Quickly building a database client app for the web with DBKit
In this tutorial, you will recreate the single page example in the DBKit-Web example project. The tutorial takes about 20 minutes to complete. There is a desktop tutorial as well.
Creating the project
Download the
DBKitResourcesfile. This contains the database and icons you'll need to complete the tutorial.Uncompress the file which will create the DBKit Resources folder.
Create a new web project.
Save the project.
From the DBKit Resources folder you downloaded, drag the Icons folder into the Navigator in your project.
Open the DBKit-Web example project (New Project > Examples > Databases > DBKit-Web) then copy the DBKit module from the example into your project.
Important
Always copy DBKit from the DBKit-Web example project when using it with web projects.
Note
The Icons folder includes icons you can use for toolbar buttons that DBKit will then manage for you.
Next we need to copy the EddieElectronics.sqlite database file into your app when it is built.
In the Build Settings section of the Navigator, select the OS your are going to build for (Linux, macOS or Windows).
Add a Copy Files Build Step (Insert > Build Step > Copy Files).
In the Inspector, change the name to
CopyDB.From the DBKit Resources folder you downloaded, drag the EddieElectronics.sqlite database file into the area in the middle of the IDE below where it says "Drag files into the list below for this step".
In the Inspector, change the Destination to Resources Folder.
If you're using a Mac, drag CopyDB so that it's immediately after the Build item as the app has to be built before the database can be copied to it.
Because the database is being copied each time you run your project, you will be able to edit it all you'd like without worrying that your changes are permanent. So add, edit and delete to your heart's content.
Connecting to the database
Now let's get connected to the database.
In the Session object in the Navigator, create a property:
Item |
Value |
|---|---|
Name |
db |
Type |
DBKit.TableConnection |
Scope |
Public |
In the Session.Opening event, add the following code to connect to the SQLiteDatabase:
db = New DBKit.TableConnection
If Not db.Connected(SpecialFolder.Resources.child("EddiesElectronics.sqlite")) Then
  MessageBox("The database could not be reached due to an error.")
End If
Note
In your own apps, you should consider the Resources folder to be read-only. If you are providing the user with a database, even an empty one, your code should copy the database file from Resources to another location outside the application itself before writing to it.
Adding the ability to search for customers
Now let's add the ability to search for customers and display the results in a Listbox.
Expand DBKit in the Navigator then expand Classes and drag a TableConnection to the WebPage1.
In the Inspector, set the TableName property to
customers.From the DBKit module in the Navigator, drag out a SearchField to WebPage1. Position it at the top and make it fill the entire width.
Change the name of the SearchField to
SearchCustomers.Add a ListBox to WebPage1. Position it on the left side below the SearchField. You may need to make WebPage1 larger in the Layout Editor.
Item |
Value |
|---|---|
Name |
SearchResults |
ColumnCount |
2 |
Initial Value |
First Name TAB Last Name |
Note
TAB means to press the Tab key on the keyboard rather than literally type <tab>.
Tip
You might want to drag the bottom all the way to the bottom of the webpage and lock it so that it expands to fill the height of the browser window.
To tell DBKit that this ListBox will show search results, you'll need to make it a DBKit.QueryRowsListBox control. Since you didn't drag this from the DBKit Module in the Navigator, click on the pencil icon next to the Super property in the Inspector.
When the dialog appears, select DBKit.QueryRowsListBox then click the Select button.
In the Inspector, set the value of the Columns property for the ListBox to
FirstName, LastName. The Columns property indicates the names of the database columns from your table that you want displayed in the SearchResults Listbox.Run your project and try searching for names by typing a few characters then pressing return.
Tip
Pressing return when the SearchField is empty will display all the customers.
Displaying the selected row
Next we will add some controls that can display other database columns (address, city, etc.) when the user clicks on a customer in the SearchResults ListBox. By naming the controls to match the column names in the customers table of the database, DBKit will automatically populate them.
The finished layout should look something like the one:
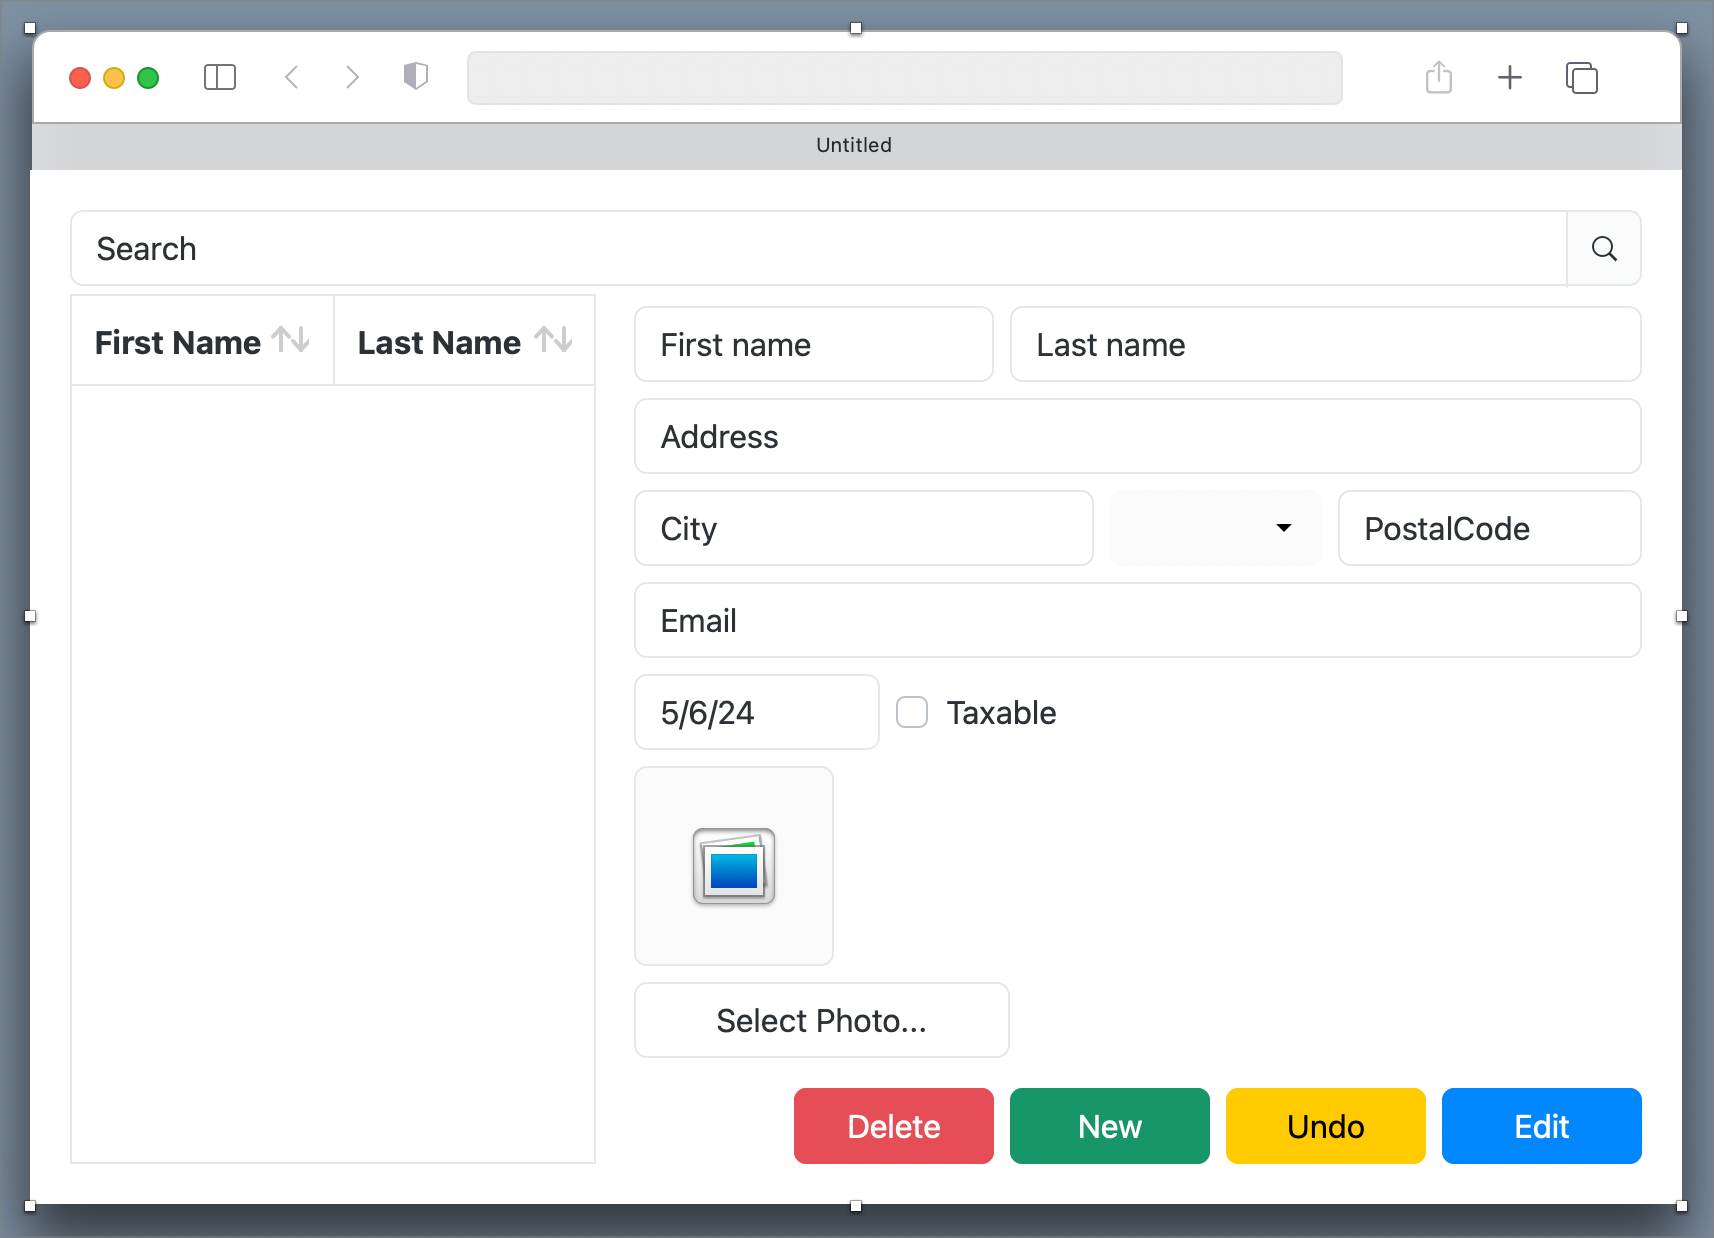
Of course you can of course arrange it any way you want.
Drag a TextField to WebPage1 and set the following properties:
Item |
Value |
|---|---|
Name |
FirstName |
Hint |
First name |
To tell DBKit that this TextField will display data from the selected row in the SearchResults ListBox, click on the pencil icon next to the Super property in the Inspector. In the dialog box that appears, select DBKit.TextField then click the Select button.
Duplicate the FirstName control to create TextFields for LastName, Address, City, PostalCode and Email. Make sure to change the Name and Hint properties for each one.
Tip
You might want to set the control locking for these controls so the user can resize the browser window and have the controls properly resize with it.
Drag out a PopupMenu to display the State/Region and set the following properties:
Item |
Value |
|---|---|
Name |
StateOrRegion |
Selected Row Index |
-1 |
Super |
DBKit.PopupMenu |
In the Inspector, click the AutoPopulate checkbox to fill in the popup menu with all the unique values from the StateOrRegion database column.
In that same section, set the Auto Populate Table property to
Statesand the Auto Populate Column property toAbbreviationto populate the popup menu from the Abbreviation column of the States table in the database.
Tip
Feel free to add a label for the PopupMenu.
Add a DatePicker control below the TextFields and set the following properties:
Item |
Value |
|---|---|
Name |
LastContact |
Super |
DBKit.DatePicker |
Add a CheckBox to the webpage and set the following properties:
Item |
Value |
|---|---|
Name |
Taxable |
Caption |
Taxable |
Super |
DBKit.CheckBox |
Add an ImageViewer to the layout and set the following properties:
Item |
Value |
|---|---|
Name |
Photo |
Super |
DBKit.ImageViewer |
To allow the user to upload images on the ImageViewer, from the DBKit module in the Navigator, drag out an ImageUploader to the page and set the following properties:.
Item |
Value |
|---|---|
Name |
ImageUploader1 |
Super |
DBKit.ImageUploader |
Has File Name Field |
False |
Caption |
Select Photo... |
In its Opening event, add the following code:
Me.TargetImageViewer = Photo
Now it's time to see your work (and DBKit) in action. Run your project. If you have any errors, you probably didn't name your controls properly so double check those. If all went well, try searching again and clicking on rows in the SearchResults ListBox. You should see the customer information appear in the various controls.
Adding more controls for other database columns in the future
Now that DBKit is set up and configured, if you needed to add more columns you'd only need to do the following 3 steps:
Drag out a control.
Name it the same as the database column.
Set the Super property in the Inspector to make it a DBKit control.
Separating the search results and entry controls
In this tutorial you created a single page web app. The SearchResults Listbox is on the same page as the various entry controls. DBKit also supports multi-page user interfaces where the SearchResults ListBox and entry controls are on separate pages. You can see this in the DBKit-Web example project. Run it and click the Separate button. What appears is a search page. After doing a search, double-click on a row to open the entry page.
If you examine the SearchPage layout, you will see a few important changes from the page you created in this tutorial:
Since the SearchResults ListBox displays more columns, the SearchForCustomers method includes the additional columns.
Since the user double-clicks on a row in the SearchResults ListBox, instead of using the SelectionChanged event, the DoublePressed event is used and the code is different:
'Make a new entry page
Var p As New EntryPage
'Bind this listbox to its DBKit TableConnection so it knows where to get the rows from
p.TableConnection1.BindListBoxControl(Me)
'Show the page
p.Show
This code:
Creates a new page.
Binds the DBKit.TableConnection on the new page to the ListBox.
Shows the new page.
You will also notice that the SearchPage has a New button on it for creating new customers. It's Pressed event code looks like this:
Try
  Var p As New EntryPage
  p.TableConnection1.CreateNewRow = True 'Set to true to create a new row
  p.Show
Catch error As DatabaseException
  MessageBox("An error occurred while attempting create a customer.")
End Try
This code:
Creates a new EntryPage instance.
Sets the CreateNewRow property to True so that the EntryPage will know to set itself up for a new row.
Shows the new EntryPage.
The EntryPage also has a DBKit.TableConnection class instance. Because it's only managing the entry controls, it's Opening event is just the code that was missing from the Opening event of the DBKit.TableConnection on the SearchPage:
'Create a new row (if this property was set before the web page opened) or load the selected row
 If Me.CreateNewRow Then
   Me.NewRow
 Else
   Me.LoadSelectedRow
 End If
 FirstName.SetFocus
The extra code at the end checks to see if CreateNewRow was set to True and if so, calls the NewRow method to create a new customer. If it's False, then the EntryPage loads the selected row.
You will also notice that the EntryPage uses a toolbar rather than individual buttons. This is just to show that DBKit can use Toolbar buttons as easily as regular buttons. If you want to use a toolbar in your web app, check out the toolbar on this page to see how to set it up and what methods to call to perform the delete, undo and save actions.
Next Steps
Explore the Separate page and No Rows examples in the DBKit-Web example project.
Explore the DBKit-Desktop example project.
Review the DBKit Details.
Start using DBKit in your own projects.