Android Tutorial
This Android Tutorial is an introduction to the Xojo development environment and will lead you through the development of a real Android app. It should take you 30 to 45 minutes to complete this tutorial. We'll walk you through building a Task Manager app from start to finish. If you are new to programming and to Xojo, we recommend you first complete the Android QuickStart.
We have a video walk-through available as well.
Android development requirements
To run, test and debug an Android project, Xojo needs access to the Android emulator that is part of Android Studio. If you have not yet downloaded and installed Android Studio yet, do that now before continuing with the tutorial.
Getting started
Launch Xojo. After it finishes loading, the Project Chooser window appears. If Xojo is already running, choose File > New Project.
Xojo lets you build several different types of apps (Desktop, Web, Console, iOS and Android).
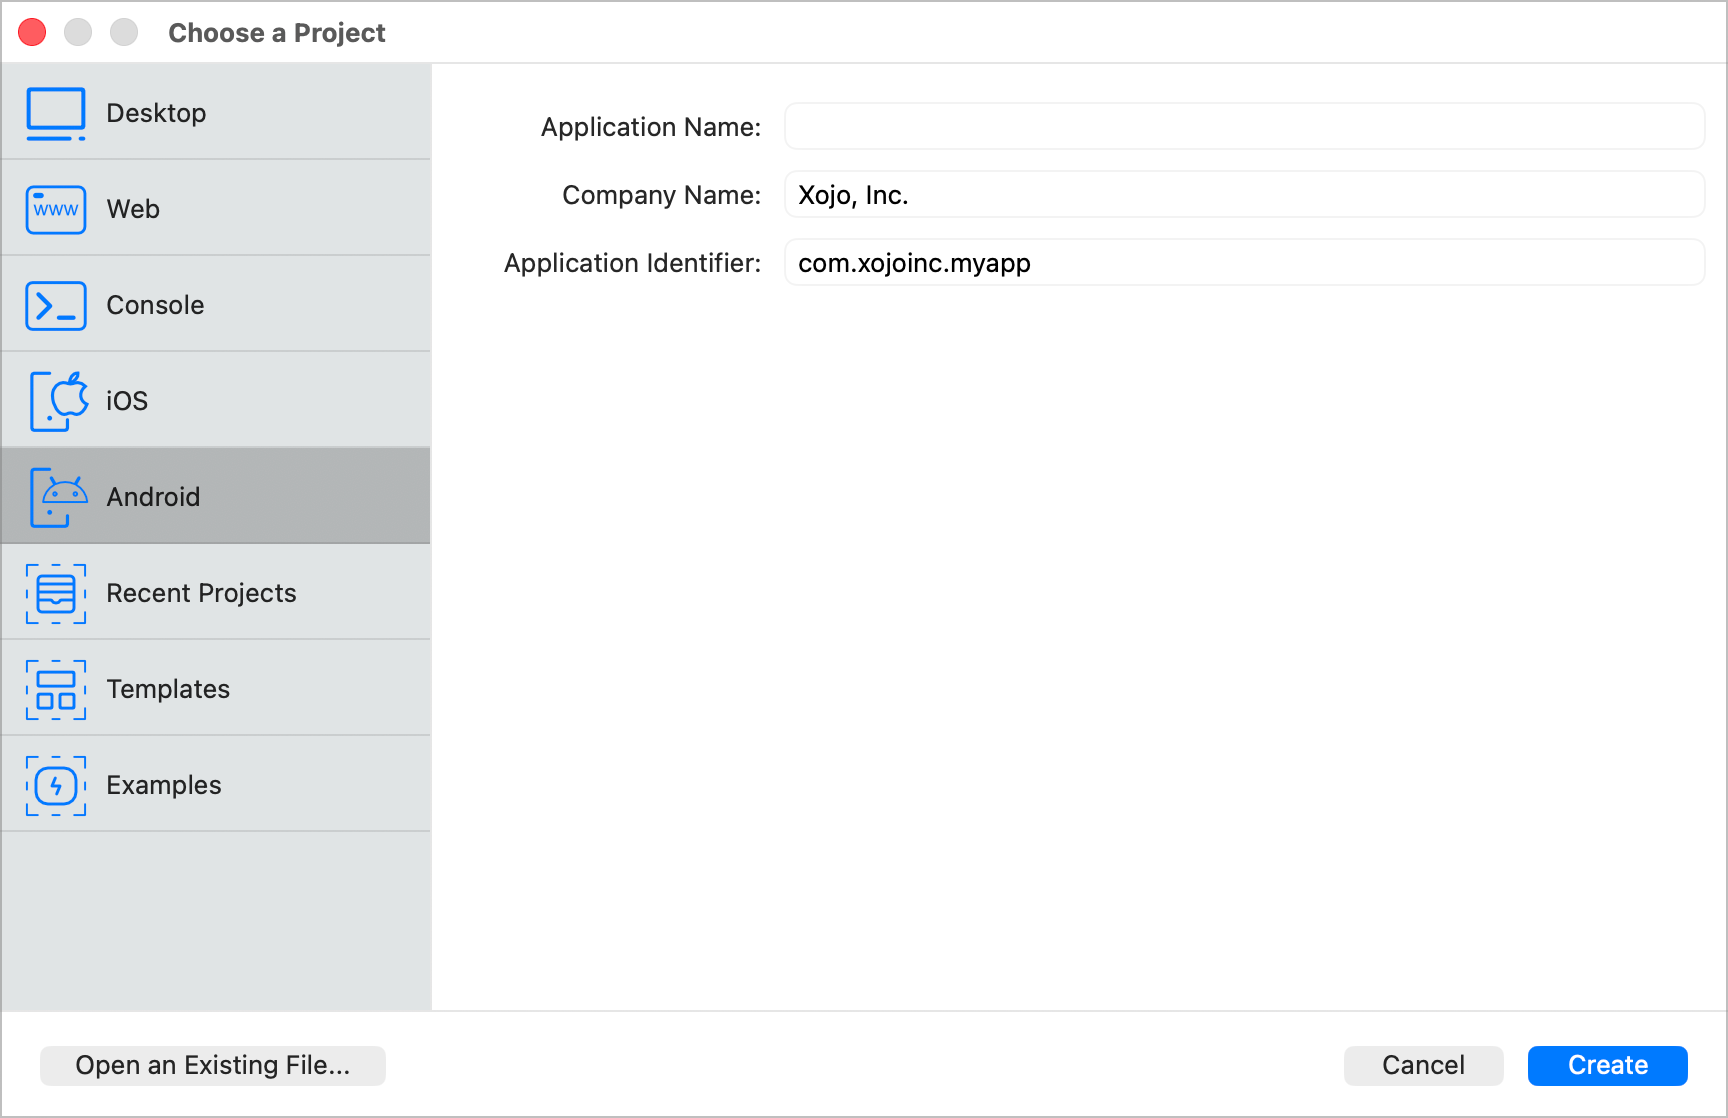
For this Tutorial, you are building an Android app, so click on Android.
You should now see three fields that need values: Application Name, Company Name and Application Identifier.
Application Name: the name of your app. This will be the filename of the actual app file that gets created.
Company Name: the name of your company.
Application Identifier: a unique identifier for this app. It will automatically populate using what you enter for the Application and Company Names, but you can also change it to whatever you want.
Enter
TaskManageras the Application Name.Click Create to open the main Xojo window (called the Workspace) where you will begin designing your app.
The Workspace
Xojo opens the Workspace with the default View for your app selected in the Navigator and displayed in the Layout Editor.
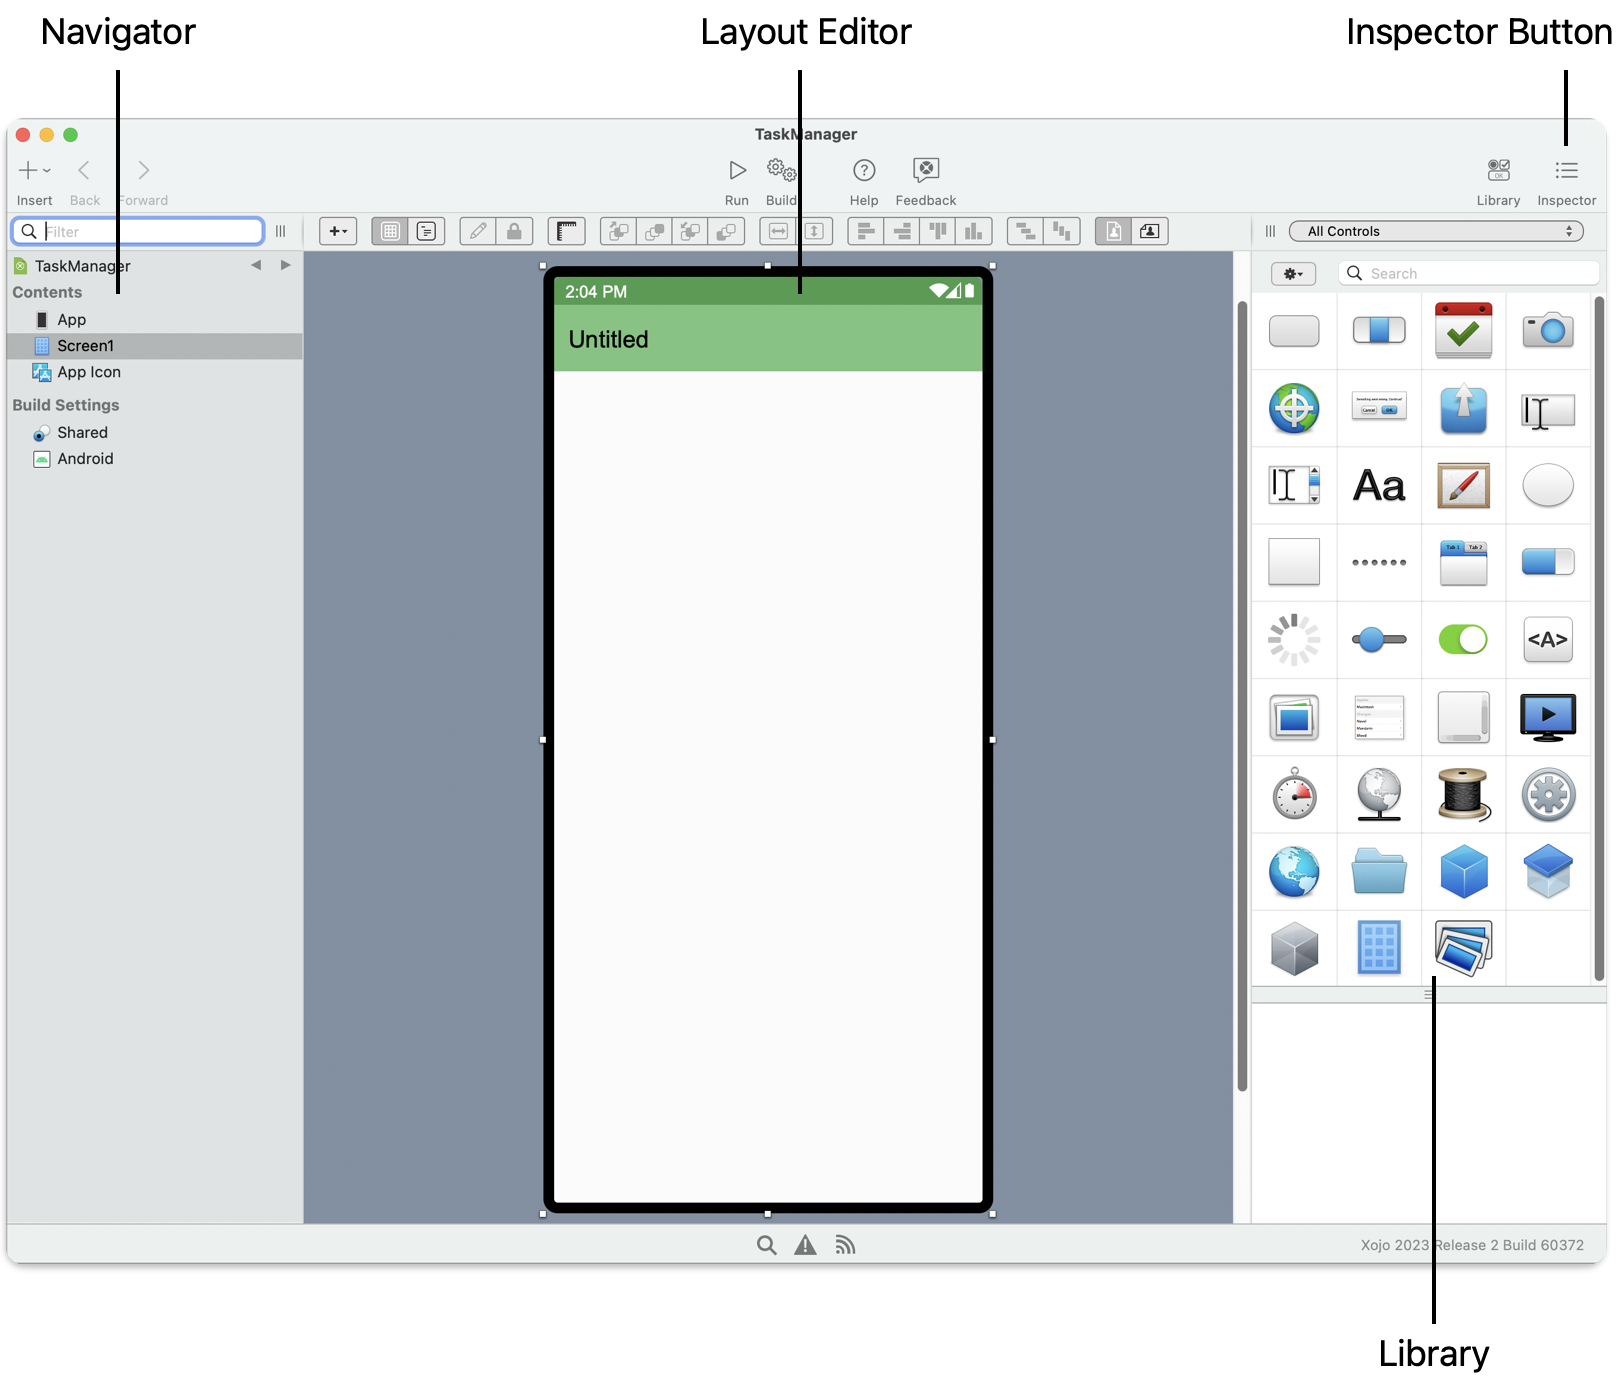
Navigator: The area on the top left shows you all the items in your project. By default you can see Screen1 (which is selected), the App object, and the App Icon. You use the Navigator to navigate within your project.
Layout Editor: The center area is the Layout Editor. You use the Layout Editor to design the user interface for the Screens in your app. It shows the Screen and previews how it looks when the app runs on an Android device. In this image, the Screen is blank because you haven't yet added any user interface controls from the Library.
Library: The area on the right is the Library and shows the controls and interface elements that you can add to a Screen or to the project. You design the Screen by dragging controls from the Library to the Screen layout. You can also add a control to the Screen by double-clicking it. You can change how the controls display in the Library by clicking the small gear icon and choosing a different setting.
If the Library is not visible, click the Library button on the toolbar to show it.
Inspector: Not shown in the above image is the Inspector, which allows you to see and change the properties for the selected control. This area of the Workspace window is shared with the Library. You can show the Inspector by clicking the Inspector button on the toolbar. The Inspector shows information about the selected item in the Navigator or Editor. The contents of the Inspector change as you click on different items. You change an Inspector value by entering a new value in the field to the right of the field label.
About the app
In this tutorial you will create an app to manage tasks. Not surprisingly it is called Task Manager. When finished, the app will let you add tasks, edit them, mark them as completed (and unmark them if it turns out they are not) and delete them.
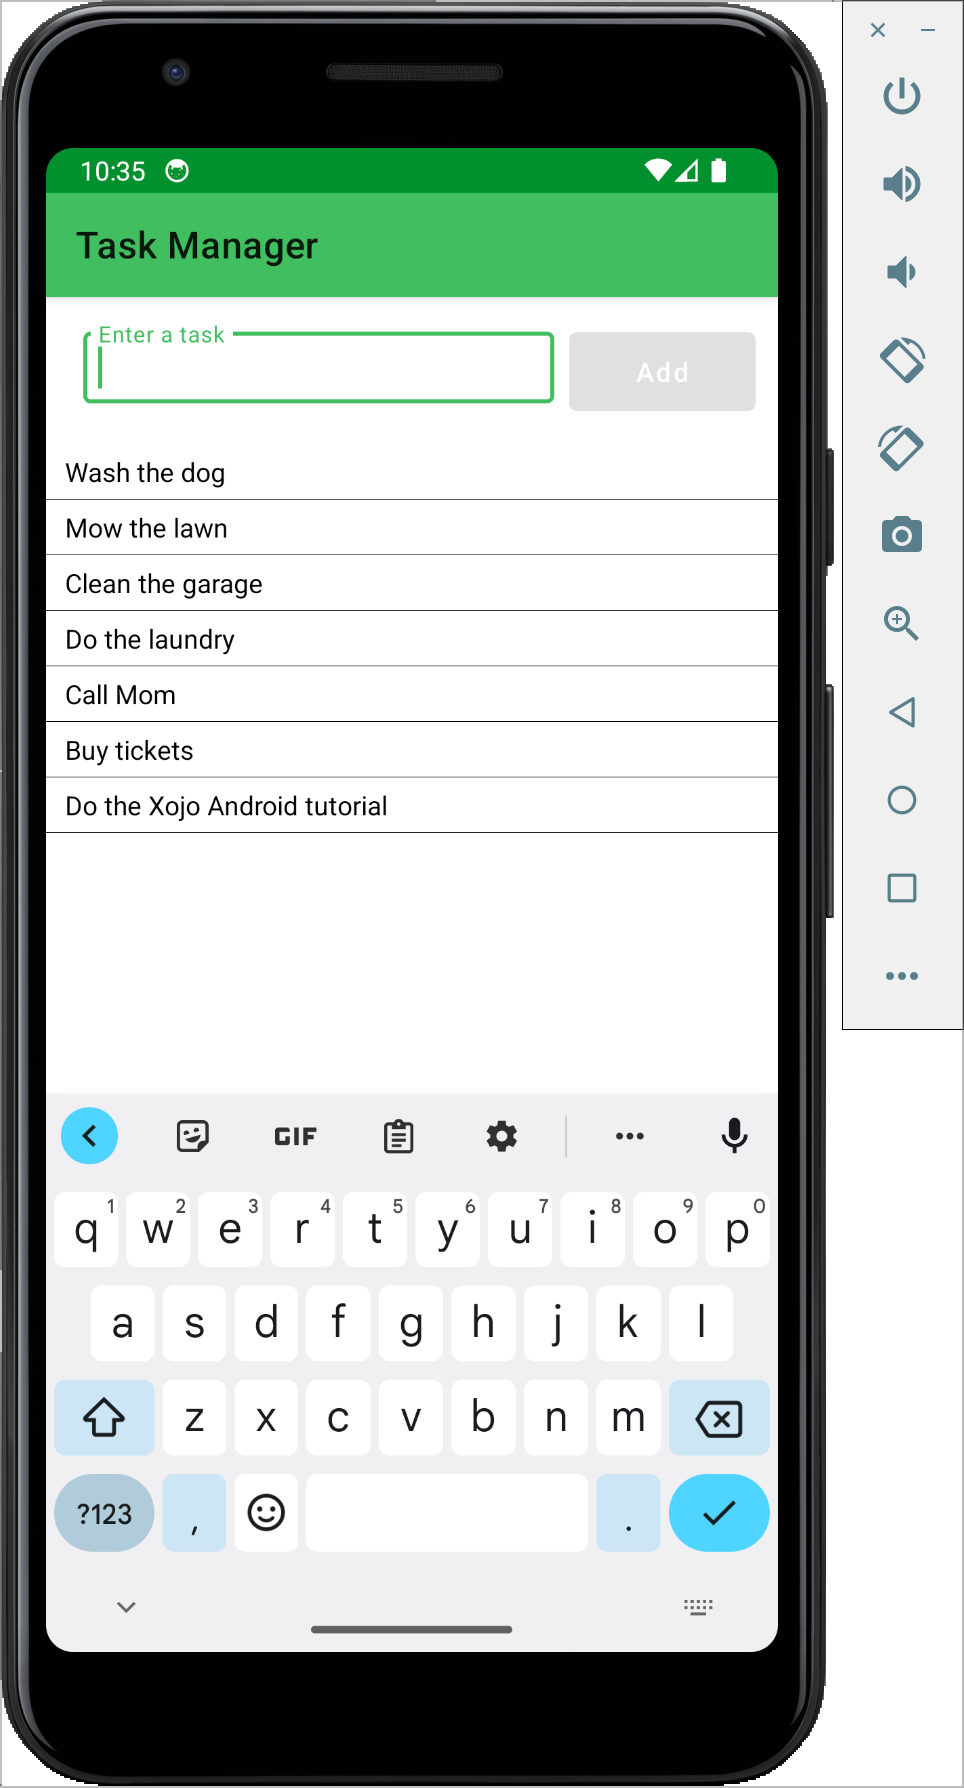
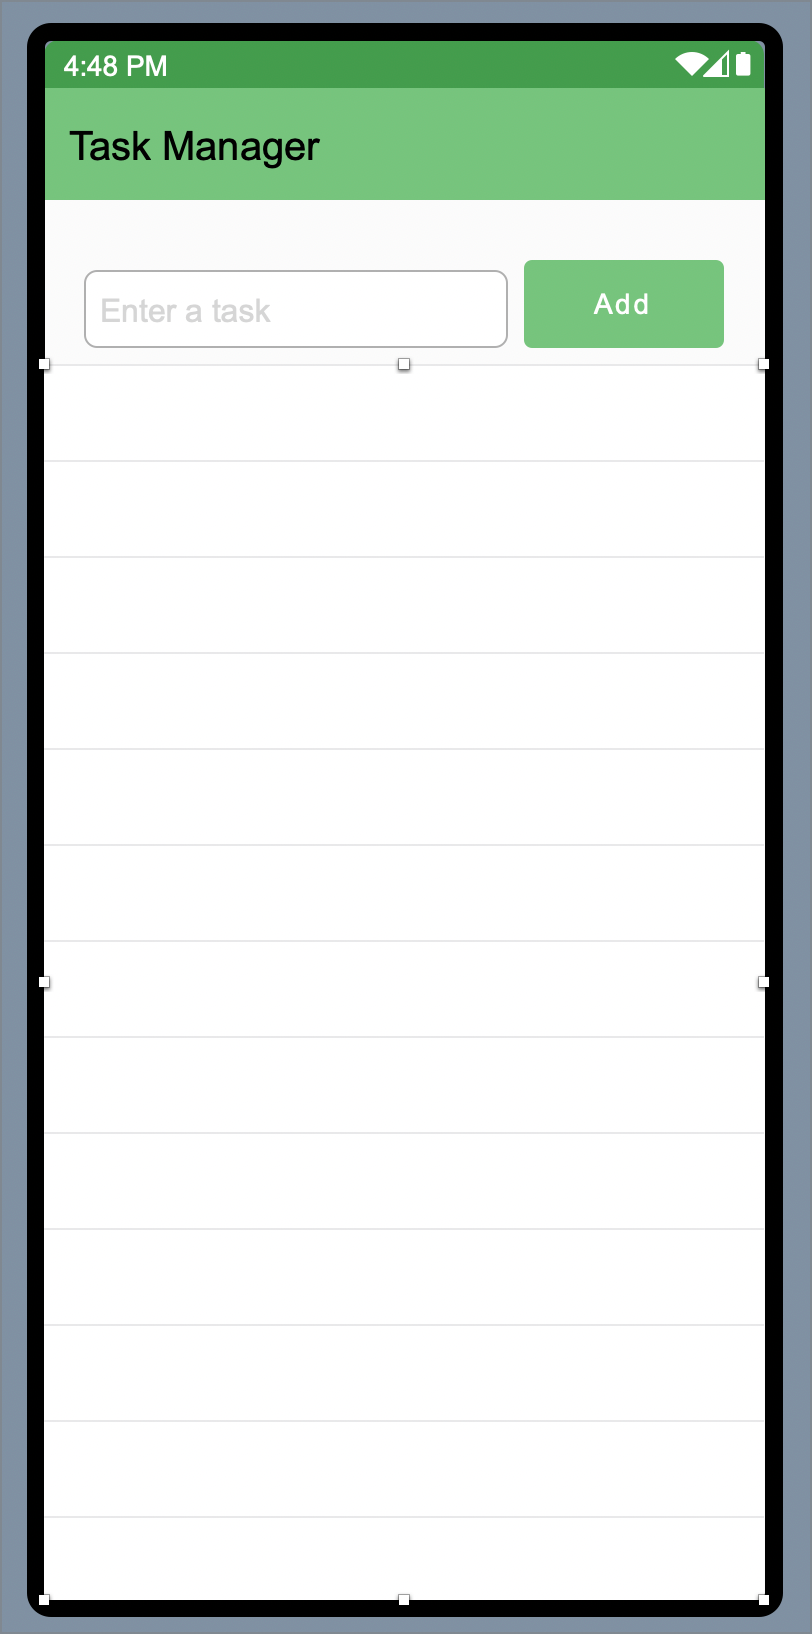
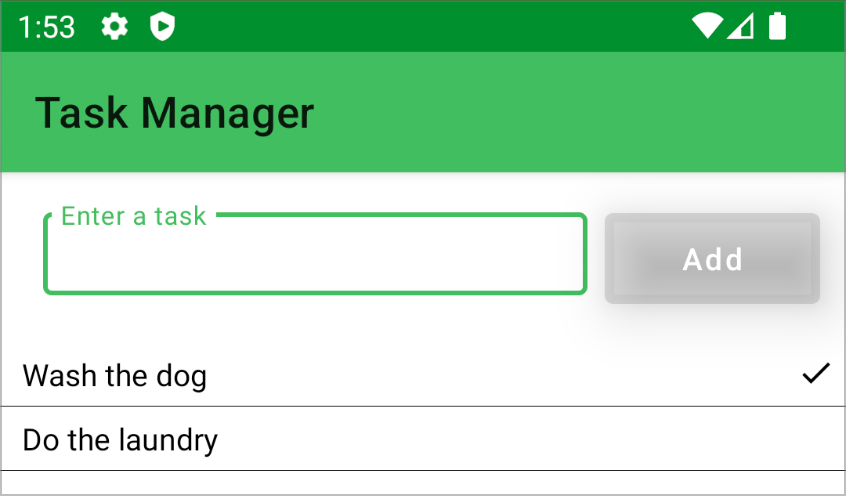
Task manager
For the Task manager app, you enter tasks in the text field and tap Add to add them to the table. You can tap on individual tasks in the table to delete them or mark them as complete.
Task Manager uses these controls:
Icon |
Name |
Description |
|---|---|---|
TextField |
A TextField control is used to enter text. In this project, the task to add is entered into a TextField at the top of the Screen. |
|
Button |
A Button is used to trigger an action. This project uses a Button to add a task to the table. |
|
Table |
A Table is used to display a list of data. In this project, it is what displays the tasks entered in the TextField. |
|
Label |
A Label is used to identify a user interface element or provide more information. In this project, it will identify the control you use to mark a task as completed. |
|
Switch |
A Switch is used to indicate a value in one of two states such as on and off. In this project, it will indicate if the task is completed or not. |
Designing the user interface
Xojo is displaying Screen1 open in the Layout Editor. You are now going to add the controls to the Screen and position them.
Adding a button
First add the Button that is used to add a task to the table.
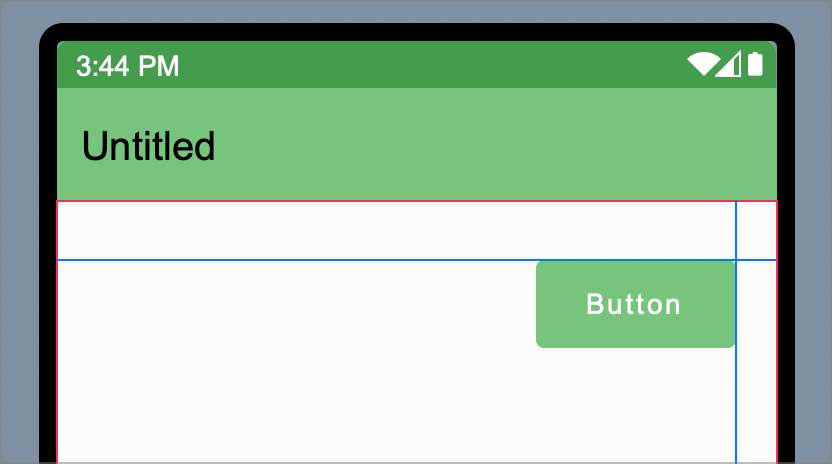
In the Library, click on Button and drag it to the Screen so that it is at the top right just below the Navigation Bar.
Use the alignment guides to position it with the appropriate amount of space between the two blue guide lines.
Adding a text field
The TextField is where the user types the Task to add to the list.
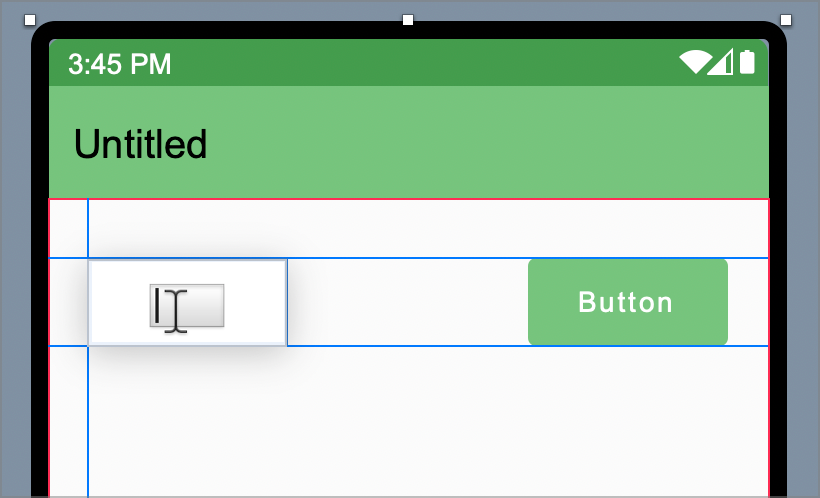
In the Library, click on TextField and drag it to the Screen so that it is at the top left just below the Navigation Bar. As you drag you will notice alignment guides that will help you align the TextField with the Button as pictured below.
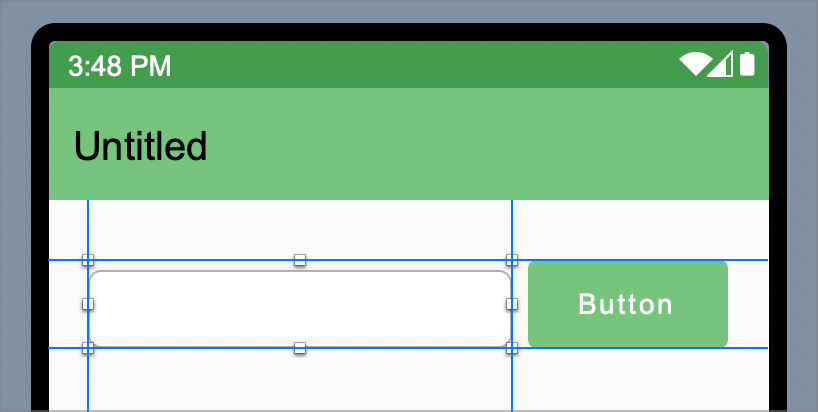
Grab the right handle of the TextField and drag it to make the control wider until you reach the button's left alignment guide.
Adding a table
The Table displays the tasks.
In the Library, click on the Table and drag it to the center of the Layout Editor below the Button and TextField. As you drag the Table onto the Screen, you will see alignment indicators that help you position the control. Drop the Table when you are happy with its position on the Screen.
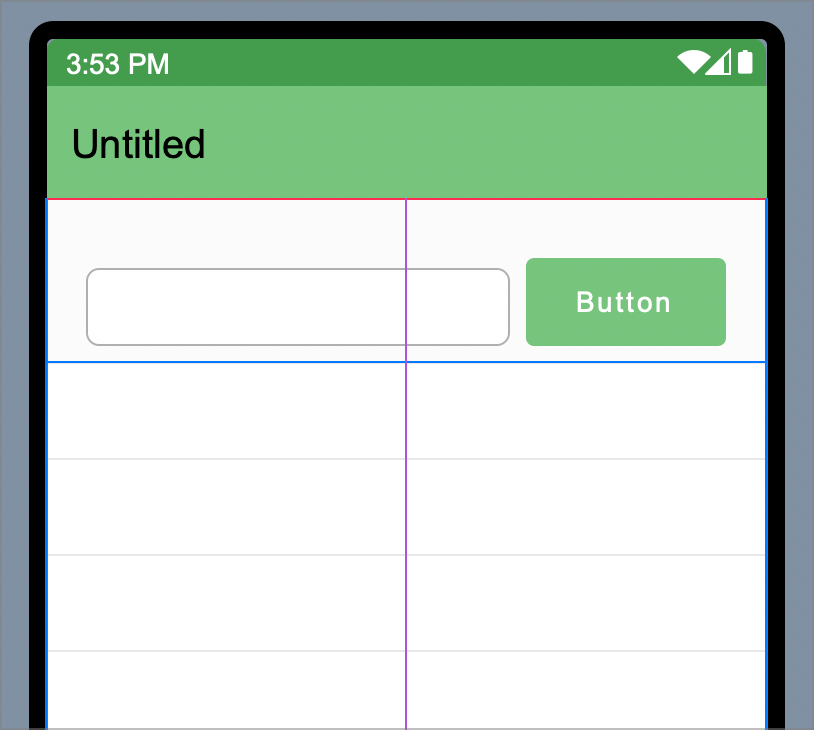
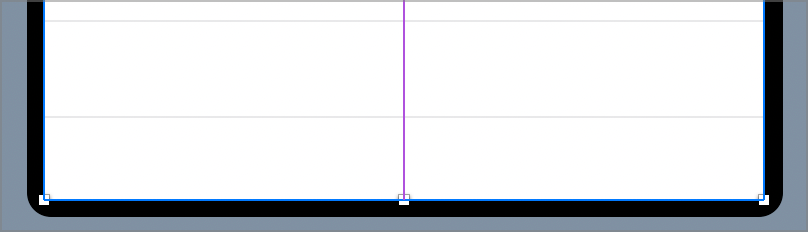
Grab the bottom handle of the Table and drag it downward to make it taller. Stop dragging when the bottom edge is right up against the bottom of the Screen:
The screen layout at this point
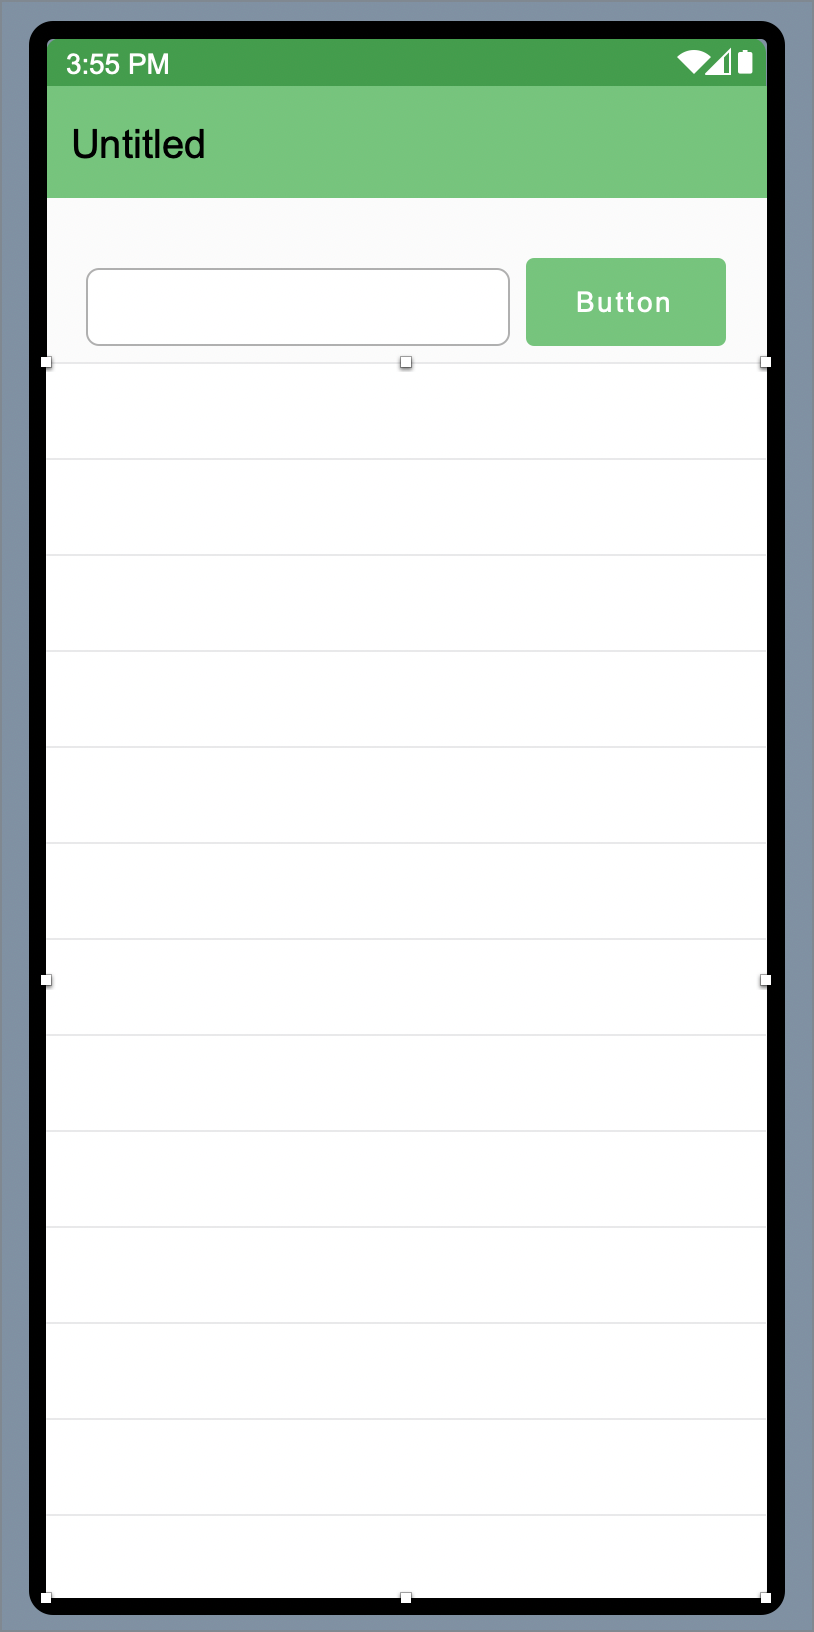
After adding all the controls, your Screen should now look like this:
Handling different screen sizes
Android devices come in a variety of different sizes. You will want your user interface to look good on all of them. Additionally, the user may rotate their device from portrait to landscape orientation. When they do, you will want your user interface to resize itself properly.
You can see this by switching the layout from portrait to landscape mode using the Landscape/Portrait buttons in the Layout Editor's toolbar:
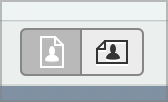
If you don't see the Portrait/Landscape buttons in the Layout Editor's toolbar, it's likely that your window is too small to show them. You can either make your window wider or click on the More Items  button on the right side of the Layout Editor's toolbar.
Click the Landscape button. Notice that the controls do not resize to fit the landscape orientation.
Click the Portrait button to switch the Layout Editor back to portrait mode.
Fortunately, this is easy to do by locking controls to edges of the layout. For this, you will need to change some control properties.
Understanding properties
What is a property?
A property is a specific attribute of an object. For example, a button has a width and thus has a Width property. Changing property values allows you to change the behavior of the object. In this case, you will need to change various locking properties of the controls.
Using the inspector
The Inspector is used to change screen and control properties. It shares the same area on the right of the Workspace as the Library.
Click the Inspector button in the upper-right corner of the window (or press ⌘ I on macOS or Ctrl I on Windows and Linux) to display the Inspector.
On your layout, click on the button to select it.
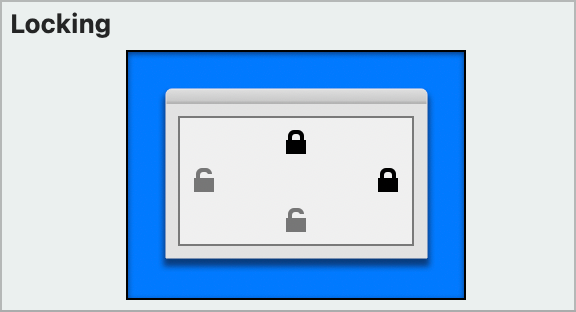
In the Locking section of the Inspector, click on the lock on the right side to lock the right side of the button to the right side of the screen.
In that same section, click on the Lock on the left side to unlock the button from the left side of the screen. This will keep it locked only to the right side. Your locking properties should now look like this:
On your layout, click on the TextField to select it.
In Inspector, click on the lock on the right side to lock the right side of the Textfield to the right side of the screen.
On your layout, click on the Table control to select it.
This time, we want to lock the control to all sides of the screen. In the Inspector, click the lock on the bottom side.
Try clicking the Landscape and Portrait buttons again to see that your controls now automatically resize and reposition themselves properly when the screen dimensions change.
Changing more properties
There are some additional properties that you need to change. You need to:
Rename all controls (and the Screen) so that they describe their behavior and are easy to refer to in code.
Add a Caption to the Button.
Add a hint to the TextField to help the user know what to enter.
You need to change the Name and Title properties of Screen1:
In the Layout Editor click anywhere on the background to select the Screen (rather than a control). The Inspector now shows the properties of the Screen.
Change the Name property from
Screen1toTaskManagerScreen. Press Return to see the name change in the Navigator.Change the Title property from
UntitledtoTask Manager. Press Return to see the name change in the Navigation Bar of the screen.
Changing textfield properties
The TextField is where the user types the task to add to the Table. You'll be changing the Name, Text and Hint properties.
Click on the TextField to select it so that its properties are displayed in the Inspector.
Change the Name property from
TextField1toTaskField. Press Return to see the name change in the Navigator.Change the Hint property to
Enter a task.
Changing table properties
The table displays the tasks and will also show a check mark next to ones marked as completed. Let's change the Name property to something that is more descriptive.
Click on the table to select it and display its properties in the Inspector.
Change the Name property from
Table1toTaskTable. Press Return to see the name change in the Navigator.
The final TaskManager layout
This is what your layout should now look like after adjusting all the properties:
Adding an editing screen
Eventually we want the user to be able to change the text of a task, mark it as complete or even delete it. To do these things, you will need to create another screen that appears when the user taps on a task in the TaskTable. To do this, you will use the Layout Editor, Library and Inspector just as you did when you created the TaskManagerScreen:
Choose Insert > Screen.
Click on the Library button in the toolbar to switch to the Library pane.
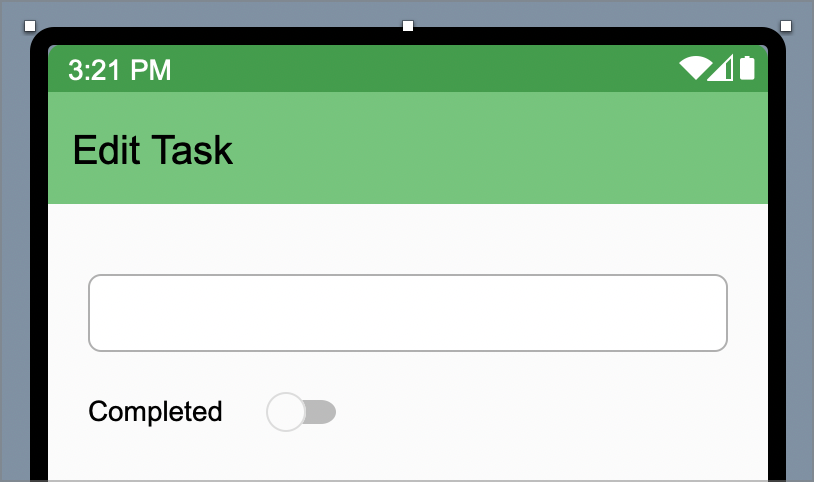
From the Library, drag a TextField to the top of the screen. Resize it to fill the width and lock it to the right side of the screen.
Drag a Label control below the TextField.
Click the Pencil icon on your label to edit the text of the Label.
Enter
Completedas the text for the Label.Drag a Switch control to the right of the Completed Label.
Drag a Button to the bottom of the layout and resize it to fill the width. This will be the Delete button.
Click on the Inspector button in the toolbar to display the Inspector.
In the Inspector, in the Locking section, turn off the top lock and turn on the bottom lock to lock the button to the bottom of the screen and the right lock to lock the button to the right side of the screen.
Change the Name of the Button to
DeleteButton.Change the Caption to
Delete.In the Navigator, click on Screen1 to select it.
In the Inspector, change the Name of the screen to
TaskEditorScreen.Change the Title of the Screen to
Edit Task.Click on the TextField to select it.
In the Inspector, change the Name for the TextField to TaskField.
Click on the Switch control you added to select it.
Change the name of the Switch control to ``Completed`.
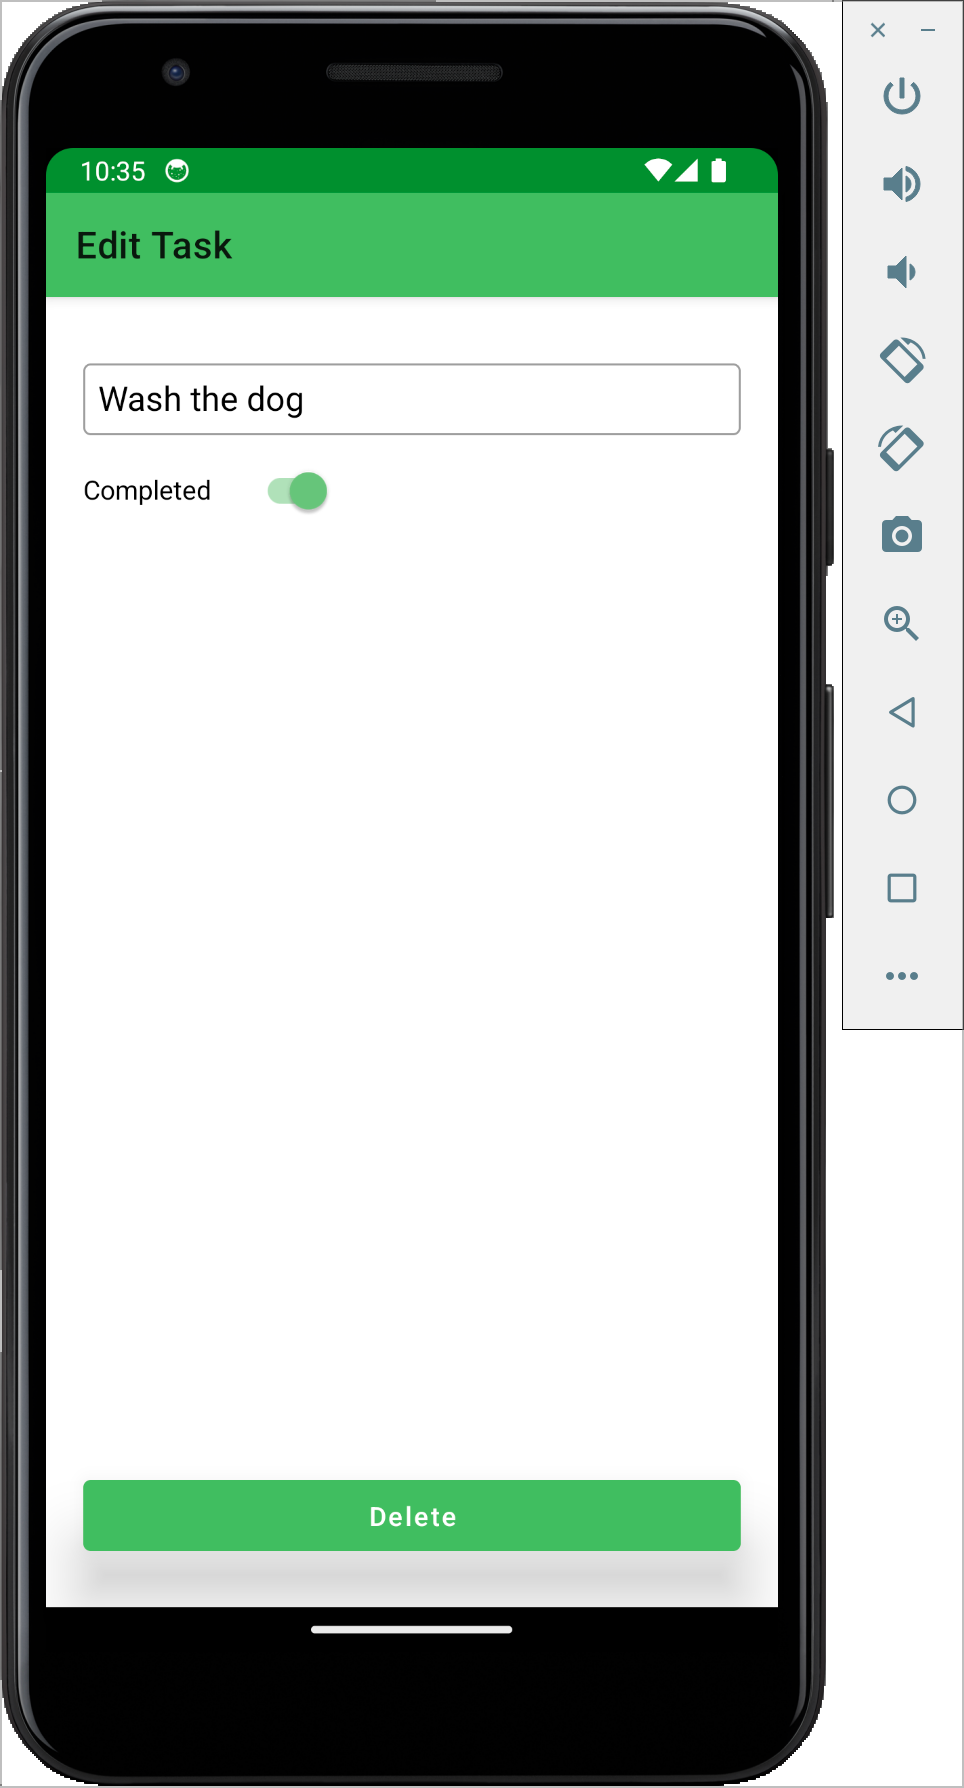
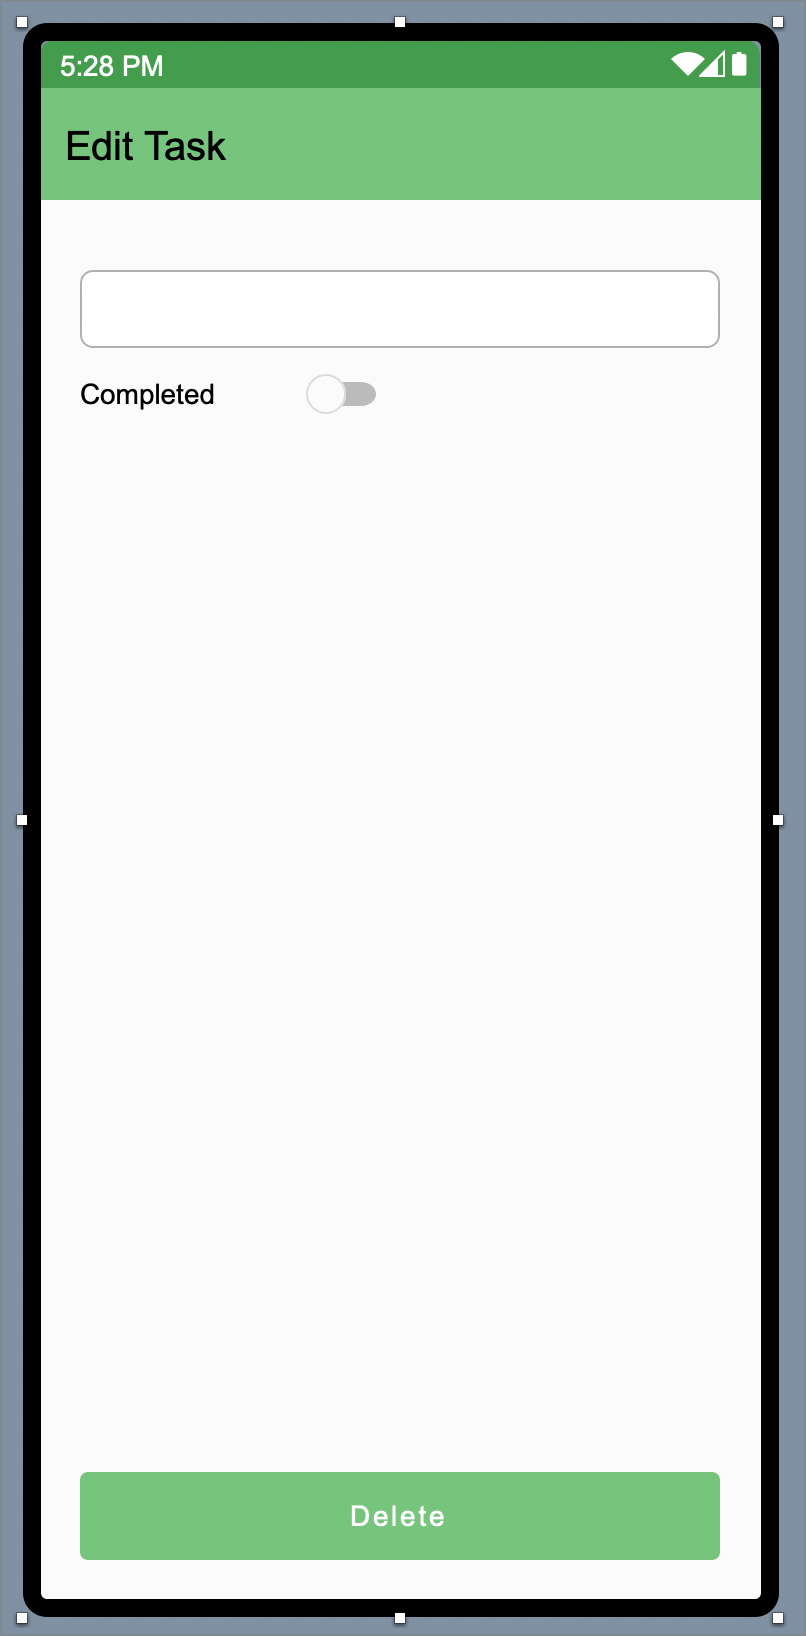
This is what your TaskEditor screen should look like when you are done:
Running the app
Your user interface layout is now complete, so it's time to try it out. But before you go further, you should first save your work.
Save the project by selecting File > Save.
Note
This means select Save from the File menu and is the standard way choosing menu items as notated in the Xojo documentation.
Name the project
AndroidTaskManagerand click Save.
Now you can test your app:
Click the Run button in the toolbar to run the project. This builds your app and runs it in the Android Emulator. If this the first time you are running the Android Emulator, it will take a minute or so to start up.
When your app appears in the Android Emulator, you can interact with the buttons by clicking on them or you can type in the TextField.
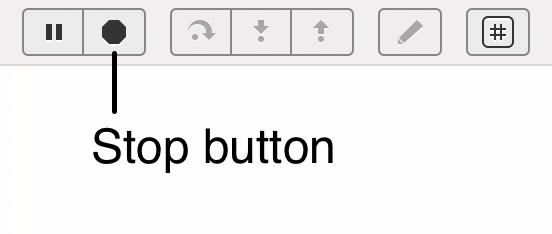
When you are finished, switch back to Xojo and click the Stop button.
Of course, Task Manager doesn't do anything yet! You can't even get to the TaskEditor screen you created. For that you need to add some code, which is what you'll do next.
Adding code
To complete the Task Manager, you will need to:
Make the Add Button add a task.
Make the Add Button only be enabled after the user has entered text into the TaskField.
Allow the user to tap on a row to edit, mark completed and delete a task using the TaskEditor screen you created.
Coding the Add button
The Add button should create a new row in the TaskTable from the text the user enters in the TaskField:
In the Navigator, click on the TaskManagerScreen to select it.
Double-click on the AddButton. The Add Event Handler dialog box appears.
The Pressed event occurs when the user presses the button. It's already selected so just click the OK button. The Code Editor is displayed.
You need to write a line of code that adds a new row to the TaskTable and assigns it the text from the TaskField. Enter the following code:
TaskTable.AddRow(TaskField.Text)
AddRow is a built-in method of the AndroidMobileTable control you added (and named "TaskTable"). It creates a new row from the text passed. The text passed in this case is the Text property of the TaskField.
To avoid the user accidentally creating duplicate tasks, the TaskField should be cleared after the user presses the Add button. Let's add another line of code to do that:
TaskField.Text = ""
This line sets the Text property to an empty string of text.
Great. Let's give it a try.
Click the Run button in the main toolbar.
Note
If you mistyped something, instead of the Android Emulator running, an errors pane will appear in the lower half of the Xojo Workspace window. Should this happen, look at the lines the error messages are indicating and compare them to the code in the instructions above. You probably just mistyped something. If you can't figure it out, go to the Xojo forum or contact us via email.
Your app should now be running again in the Android Emulator.
Type a task in the TaskField and press the Add button to add it to the table. Enter a few tasks if you'd like.
When you're done, return to Xojo and press the Stop button you used last time.
Allowing task editing
Now that you have created a screen that can be used to edit tasks, let's create a method that will be passed task information and display the TaskEditorScreen. When we are finished, the TaskManagerScreen will display a checkmark on the right side of the TaskTable for any tasks that have been completed.
The checkmark is able to appear because the AndroidMobileTable allows for a picture to appear either on the left or right sides of a row. The code you will write will display a picture of a checkmark when the task is marked as completed and display no picture when it's not. Fortunately, Xojo provides a way to display any of the images that are built-in to Android itself, one of which is a checkmark. Let's add a new method to do this:
In the Navigator, click on the TaskEditorScreen to select it.
Choose Insert > Method.
In the Inspector, change the name of the method to
UpdateControls.For the parameters, enter
theTask As String, complete As Boolean.Make sure the Scope is set to Public.
In the Code Editor, add the following two lines:
TaskField.Text = theTask
Completed.Value = complete
When you call this method, you will pass it the task and the completion status so that it can then set the TaskField and Completed controls.
TaskEditorScreen.UpdateControls should be called when the user taps on a task in the TasksTable. Once you've passed the data to the TaskEditorScreen, the next step will be to show it.
In the Navigator, click on the TaskManagerScreen to select.
In the layout, double-click on the TaskTable. The Add Event Handler dialog box appears.
Click on the SelectionChanged event and then click OK.
First, the code needs to determine if this task has been completed or not. Since the checkmark picture will appear in any row that is completed, its presence or absence tells us if the task is completed or not. Enter the following code to determine if the task is completed or not:
If Me.SelectedRowIndex > -1 Then
  Var complete As Boolean
  If Me.RowPictureAt(Me.SelectedRowIndex, True) <> Nil Then
    complete = True
  End If
This code first makes sure a row is selected by checking that SelectedRowIndex is > -1. It then creates a variable called complete of type Boolean which is False by default. It then calls the TaskTable's RowPictureAt method, passing it the row number of the selected row (Me.SelectedRowIndex) and True as the second parameter to indicate if the picture is on the left or right (True meaning right). If there is a picture on the right side in that row, then the picture is not Nil and the complete variable will be set to True. We can then pass this value, along with the task itself, to the UpdateControls method you wrote. Let's do it:
Press Return to create a new line and add the following code to call your UpdateControls method and then show the TaskEditorScreen:
  TaskEditorScreen.UpdateControls(Me.SelectedRowText, complete)
  TaskEditorScreen.Show
End If
This code calls the UpdateControls method, passing it the text in the row the user tapped on (Me.SelectedRowText) and the complete variable that indicates the status of the task. The second line shows the TaskEditorScreen.
Last but not least, we need to make sure a row is selected before trying to access the SelectedRowIndex or SelectedRowText. This is easy to do by wrapping all of this code in an If statement that checks to see that SelectedRowIndex is > -1. Add Let's try it out.
Click the Run button.
Add a task and then click on it. It appears in the TaskEditorScreen. You can even click on the Android's Back button
 (or the swipe gesture if you don't have a Back button) to go back to the TaskManagerScreen and click on the row again. What you can't do (yet) is save changes you make on this screen so let's add that ability:
In Xojo, click the Stop button.
In the Navigator, click on the TaskManagerScreen to select it.
Choose Insert > Method to create a new method.
Set the Name of the new method
UpdateControls. Like TaskEditorScreen.UpdateControls, this method will send the changes back from the TaskEditorScreen to the TaskManagerScreen.Set the parameters to the same ones you used last time,
theTask As String, complete As Boolean.Make sure the Scope is Public.
Add the following code:
TaskTable.SelectedRowText = theTask
If complete Then
  TaskTable.RowPictureAt(TaskTable.SelectedRowIndex, True) = Picture.SystemImage("check", 18)
Else
  TaskTable.RowPictureAt(TaskTable.SelectedRowIndex, True) = Nil
End If
This code first makes sure there is a selected row. If the user deleted the row, there won't be. Next, it sets the text of the row the user tapped on to the text passed to it (in the theTask parameter). It then looks at the complete parameter passed. If it's True, it calls RowPictureAt again for the selected row (the one the user tapped on) to set the row picture to a checkmark. It then called Picture.SystemImage to get the checkmark picture from a large set of pictures provided by Xojo. One of them is called "check". The last part (18) indicates the desired size of the picture. If complete is False, then the row picture is set to Nil.
Now we just need to call the new method to update the TaskTable.
In the Navigator, click on the TaskEditorScreen to select it.
Choose Insert > Event Handler.
Select the Closing event then click OK.
Enter the following code to call the new UpdateControls method:
TaskManagerScreen.UpdateControls(TaskField.Text, Completed.Value)
When the user taps the Back button to return to the list of tasks, the Closing event will be called because the TaskEditorScreen is closing. The code is calling UpdateControls and passing it the text from the TaskField and the Value of the Completed Switch control.
Now you can edit the task and its completed status in the TaskEditorScreen. Let's try it out.
Click the Run button.
Enter a task then click on it. Make some changes and click the Back button.
When you're done testing, go back to Xojo and click the Stop button.
Deleting Tasks
The last step is to make that Delete button you added work.
In the Navigator, click on TaskManagerScreen to select it.
Add a new method called
DeleteTask.Enter the following code:
TaskTable.RemoveRowAt(TaskTable.SelectedRowIndex)
TaskTable.SelectedRowIndex = -1
This method, when called, will remove the row the user tapped on by calling the table's RemoveRowAt method and passing it the table's SelectedRowIndex (the number of the row that the user tapped on). It then sets the SelectedRowIndex to -1 since there can be no row selected since the selected row was just removed. Last but not least, you need to call this method.
In the Navigator, click on the TaskEditorScreen to select it.
Double-click on the Delete button and add the Pressed event.
Add the following code:
TaskManagerScreen.DeleteTask
Close
When the user presses the Delete button, the DeleteTask method will delete the row in the TaskTable. The Close method will then close the TaskEditorScreen.
Run your project and try deleting a task. You're going to see there's a bug you need to fix.
Note
Xojo also supports test running and debugging your Android apps directly on your phone or tablet.
Finding and Fixing Bugs
Sometimes code doesn't work the way you planned. Bugs are a normal part of creating apps. So what happened here?
Xojo's Debugger is indicating that there's a problem with the TaskManager.UpdateControls method. Remember that in the Closing event of the TaskEditorScreen, your code calls that method. The problem is on the first line. It's trying to set the row text of the row the user tapped on to the text from the TaskField on the TaskEditorScreen. The problem is that you just deleted that row. So there is no row to update. In the Variables pane of the Debugger, you can see that an Exception has occurred. Specifically, an OutOfBoundsException. An exception occurs when something unanticipated happened. In this case, it occurred because the code is trying to assign a value to a row that no longer exists. The row is out of bounds. Fortunately, there's an easy solution to this problem. You just need to have your code make sure there's a valid row before trying to change it:
In the Xojo Debugger, click the Stop button.
In the Navigator, click on the TaskManagerScreen.UpdateControls method to select it.
In the code, add an If statement around the code. When you're done, your UpdateControls method should look like this:
If TaskTable.SelectedRowIndex > -1 Then
  TaskTable.SelectedRowText = theTask
  If complete Then
    TaskTable.RowPictureAt(TaskTable.SelectedRowIndex, True) = Picture.SystemImage("check", 18)
  Else
    TaskTable.RowPictureAt(TaskTable.SelectedRowIndex, True) = Nil
  End If
End If
The If statement first checks to see if the TaskTable's SelectedRowIndex (the number of the row the user tapped on), is greater than -1. The first row is 0. It will only be -1 if there are no rows. So as long as there is a selected row, your code will now attempt to update the TaskTable.
Run your project again, create a task and then delete it. No more error. Congratulations!
Deploying your app
Android apps are deployed by publishing them via the Google Play Store. You can provide your app to the general public or to just those in your organization.
Next steps
Congratulations, you have successfully completed the Android Tutorial and now have a fully functional app. You learned a lot in this tutorial. You may be wondering how you'll remember it all. The good news is that you don't have to remember it. Xojo comes with documentation that will help you every step of the way. The Topics section will give you a general overview of the different parts of Xojo and of all the various controls and things you can use in your projects. The API section will give you the all the details for specific controls. After you feel you've reviewed enough of the documentation, choose a small project to build that will benefit you or others. The best way to learn is to have a reason to learn. A small project will provide that. When you need extra help, contact us or go to our helpful community forum.
Download the completed TaskManager project.
Feedback
What did you think of this tutorial? We'd appreciate your feedback, contact us.