SQLiteDatabase for beginners
In the SQLite Basics lesson we learned that SQLite is the database engine that allows us to create really powerful and simple multiplatform apps without needing to write a bunch of code. In this next course we will see how to create and work with SQLite databases via code, both in memory database and file based SQLite databases. We will also see how to access and use the SQLite database files created using other tools and apps, and how to use the most frequently used features like the creation of new records or retrieving the data set matching a given criteria.
If you didn't go through the SQLite Basics lesson, I sincerely recommend you to complete it before advancing to this one. Read each section and watch the accompanying videos (in Spanish with English subtitles).
Classes for Using SQLite databases
Xojo offers a class you can use when working with SQLite database. This is SQLiteDatabase which you use for the following types of Xojo projects:
Console.
Desktop.
Web
iOS
Android
For both 32 and 64 bits deployments.
Creating an In-memory database
Probably the first thing you visualize when talking about databases is a categorized and well structured set of data stored in a physical medium, generally a disk; nevertheless —as we saw in the SQLite Basics Tutorial— SQLite also can create in-memory databases, that are only limited by the amount of available RAM in the computer and, mainly, for the selected architecture for the deployment: as 32 or 64-bit. For 32-bit deployment the total amount of available memory for the app will be around 2 or 3 GB, for 64-bit apps the upper limit will not be a problem at all.
In fact, the use of in-memory databases provides a great advantage when implementing some features because they are faster both in retrieving records and in creating, editing or deleting existing data, when compared to those based on files.
Regardless of the targeted platform, we need to follow these simple steps in order to create an in-memory database:
Create a new instance from the SQLiteDatabase class, making sure that the instance will be in scope when we want to use and access the database. Some good candidates are a global property with public Scope under a Module or the App object due to the fact that these are global and their scope lasts until we decide to quit the app.
The second step is using the method to Connect with the database…and that's all!
For example, this is what we do in the following snippet of code, where the dbsource variable is a property with public scope that has been added to the App object:
dbsource = New SQLiteDatabase

Try
  dbSource.Connect
Catch e As DatabaseException
  MessageBox(e.Message)
End Try
Note that the Connect method returns a boolean value indicating the success or failure of the operation: True if it succeeded, and False if there has been an error during the operation. Thus, it's always a good practice to check the returned value by the Connect method both for in-memory and file based SQLite databases; as it is wrapping the code in a Try…Catch block.
How to create a table
After connecting to the SQLite database we will be all set to work with it. Because this is an in-memory database created from scratch, the first thing we need to do is to define the table or tables in charge to store our records (data). For this, the SQLiteDatabase Class provide the ExecuteSQL method that get as parameter the string with the SQL statement we want the database to execute.
Remember that ExecuteSQL is the method that we have to use when we don't need to retrieve data as result of the operation, as when creating tables and also when inserting new records (rows).
Thus, we can use the following SQL statement in order to create a basic table composed of a unique and autoincremented ID field, and two additional text fields to store the name and surname of every database record:
dbsource.ExecuteSQL("CREATE TABLE test(id INTEGER PRIMARY KEY AUTOINCREMENT, name TEXT, surname TEXT)")
Good Practice: It is considered a good practice to make sure that there is not an error when executing any operation against the database. This is something we can do simply wrapping any SQLiteDatabase operation in a Try…Catch block.
Of course, we can create as many tables as we need for our databases, and even modify them once they had been created both for adding new columns, and for modifying the name of existing table columns. For example, we can execute the following SQL statement to modify the just created table, adding a new column with the name age:
dbsource.ExecuteSQL("ALTER TABLE test ADD age INTEGER")
Creating new records (rows)
Xojo provides several ways we can use to add new records to any of the available database tables. Next, we will see how we can do it using the DatabaseRow Class and also directly using the SQL language.
The simplest way of adding new rows to a database table is using an instance of the DatabaseRow class. Once we have a valid instance, we just need to assign the desired value to the column we are interested in. The class also provides the methods for assigning and retrieving several kind of value types for the column: boolean, currency, real, integer and 64-bits integer, picture and BLOB (RAW data, generally a big volume of data). As you probably know, SQLite is agnostic about the type defined for a column, so we generally use the generic Column method both for getting and setting the value of a column.
For example, this fragment of code will add a total of ten records to the 'test' table created for our in-memory database:
Var nr As DatabaseRow

For n As Integer = 0 To 10
  nr = New DatabaseRow
  nr.Column("Name").StringValue = "Name: " + n.ToString
  nr.Column("Surname").StringValue = "Surname: " + n.ToString
  dbsource.AddRow("test", nr)
Next
Note
SQLite is case-insensitive, meaning it treats the use of uppercase and lowercase letters the same when referring the table fields.
We also can insert new records in the database executing an SQL statement. For example, these lines of code will produce the same result:
Try

  For n As Integer = 0 To 10
    dbsource.ExecuteSQL("insert into test(name,surname) values('Name: " + n.ToString + "', 'Surname: " + n.ToString + "')")
  Next

Catch e As DatabaseException
  MessageBox(e.Message)
End Try
As you can see, the main advantage of this approach is that you write less code. The counterpart is that it can be less clear when you read the code! In addition, note the use of the single quotes to enclose the values passed as strings as part of the SQL statement. If we forget any of these details, the SQL operation will fail and we will get an error as response, instead of creating new records in the database.
But there is still a better approach! As you can see, we are providing the data to insert in the record "as-is". That is not a bad thing if the data is generated in code (because you're probably in control about what is going to be inserted). But, what happened if the data to insert in a new record comes from the user? In that cases we can be faced to scenarios where the user introduces some specific characters as part of the input itself that can result in what is know as SQL injection attacks. And that is not a good think at all.
In order to prevent these scenarios we can use other syntax for the ExecuteSQL method, known as a Prepared Statement. When using this syntax, we provide the '?' character as a placeholder of the value to be inserted in the SQL statement itself, followed by the real values in the expected order.
So, for example, the previous snippet would be like this:
Try

  For n As Integer = 0 To 10
    dbsource.ExecuteSQL("INSERT INTO TEST(name, surname) values(?,?)", "Name: " + n.ToString, "Surname: " + n.ToString)
  Next

Catch e As DatabaseException
  MessageBox(e.Message)
End Try
Knowing the last added row
It is very common for most of SQLite database tables to include a column that uniquely identifies every record. This way it is easier to use that value to retrieve a given record or to execute any operation affecting only those records we are interested in.
The SQLiteDatabase class allows us to know which is the last record added to the database simply calling the LastRowID method. Note that, as for the nature of SQLite, all the tables have by default a column named RowID. If your tables doesn't have a column defined as primary key, something that's advisable, then the LastRowID method will return the value from the by default column; otherwise it will return the value for the column you've defined for the table and that will work, in fact, as an alias for the RowID column.
Thus, we just need to employ the following line of code in order to know the value of the RowID corresponding to the last added row:
MessageBox(dbsource.LastRowID.ToString)
Retrieving rows
Sooner or later we will need to retrieve a set of rows (records) matching a specified criteria. We can get just one record or a group of records. For that kind of operation, we use the RowSet class to work with the retrieved records from a SQL query. As you probably remember, that's the one we have been working with briefly in the previous SQLite Basics course.
RowSet provides the methods we need to move from one record to another in the row set: moving to the next, returning to the previous one, setting the record pointer cursor again to the first record of the group or jumping to the last one. The available class methods also allows us to know the total amount of records in the set using the RowCount method, delete the current record with the RemoveRow method or updating any of the record columns using the SaveRow method, always we have invoked the EditRow method previously, in first place, to instruct the DatabaseRow instance to block the record while we are modifying it, so it can't be modified also by other users. the row will be unlocked when we use the methods MoveToNextRow, to advance to the next record, MoveToPreviousRow to go back to the previous record, or if we close the RowSet executing the Close method or because the RowSet has become out of scope.
Take care of this when you start to work with RowSet instances:
Make sure that the RowSet instance is in scope as long as you need to access the records it contains. If you get the RowSet into a method's variable, then you should know that such row set will be deleted from memory once you exit the method.
Once the last record from the RowSet has been reached, you should invoke the MoveToFirstRow method before iterating the records again from the beginning.
Sometimes you will get a non Nil RowSet object, but without records on it; so it is important to check not only if the RowSet returned from the database query is not Nil but also that the value returned with the RowCount method is not equal to zero or if the RowSet is not AfterLastRow.
For example, we can use this fragment of code to retrieve a RowSet with all the records added to our in-memory database:
Var rs As RowSet
rs = dbsource.SelectSQL("SELECT * FROM test")
If rs <> Nil And rs.RowCount <> 0 Then ' we can also check against rs.AfterLastRow = False
  ' We can access to the records returned by the database query
End If
Or if we want to retrieve a RowSet with a single record matching, in this case, the unique value stored by the id field:
rs = dbsource.SelectSQL("SELECT * FROM test WHERE id = 8")
Iterating the rows from a RowSet
Generally speaking, the most frequent operation once we get a RowSet is adding, in full or part, the information of the records to an UI control, so the user of the app can interact with these items, editing them, adding new records or deleting them (among other operations). The code you will use for that will iterate all the records, something we can do in this way (observe that RowCount is 1 based, while the RowSet index is 0 base, so we need to subtract 1 to the value returned by RowCount):
Var x As Integer = rs.RowCount - 1
For n As Integer = 0 To x
  MessageBox("ID: " + rs.Column("id").StringValue + EndOfLine + "Name: " + rs.Column("name").StringValue + EndOfLine + "Surname: " + rs.Column("surname").StringValue)
  rs.MoveToNextRow
Next
The recommended practice is iterating the RowSet using a For…Each loop:
For Each row As DatabaseRow In rs
  MessageBox("ID: " + row.Column("id").StringValue + EndOfLine + "Name: " + row.Column("name").StringValue + EndOfLine + "Surname: "+ row.Column("surname").StringValue)
Next
As we can see, we get in both cases the value for the column (field) of the table calling the Column method on the RowSet, and passing along the name of the column we are interested in as the parameter. In fact, the value returned by this method is a DatabaseRow instance that provides all the properties we can use to retrieve (and assign) the values for the column using all the supported data types.
In our example, we use StringValue in order to get the field value as a String, hiding the use of the underlaying DatabaseRow instance thanks to the use of the dot notation that chains the result from the Column call with the access to the StringValue property on the instance returned from the first method.
Editing and updating rows
Once we have a RowSet, we can update its contents, using the EditRow method in combination with the SaveRow method. For example, the following snippet of code will modify the name and surname of the record whose id value is equal to 8:
If rs.Column("id").IntegerValue = 8 Then
  rs.EditRow
  rs.Column("name").StringValue = "John"
  rs.Column("surname").StringValue = "Doe"
  rs.SaveRow
End If
In addition, we can get the same result without getting a RowSet in first place. For that, we just need to execute the appropriate SQL statement on the database instance, using the ExecuteSQL method for that. This example gives the same result as the previous one:
dbsource.ExecuteSQL("UPDATE test SET name = ?, surname = ? WHERE id = ?", "John", "Doe", 8)
Once again, note the use of placeholders in the SQL statement and the real values in the expected order after it.
Deleting records
Another operation we do frequently when using databases is deleting existing rows. As we did see, when we work with a RowSet we can use the RemoveRow method. This method will delete the current record pointed by the RowSet cursor. In addition, you can always execute the SQL statement to delete any record matching the provided criteria. In that case we don't need to get a RowSet in advance. As you can see, this options are more flexible, but the first one is the most simple as long the record to delete is part of a valid RowSet.
For example, if we would like to delete the current record from a RowSet instance assigned to the rs variable, we just need to execute this:
rs.RemoveRow
But if we prefer to use the most flexible formula via a SQL statement, then we have to use the following line of code to delete the record whose id value is equal to 8:
dbsource.ExecuteSQL("DELETE FROM test WHERE id = ?",8)
Or delete any record that matches the provided criteria, as for example all the records whose name field is equal to Javier and the age is greater than 40:
dbsource.ExecuteSQL("DELETE FROM test WHERE name = ? AND age > ?","Javier",40)
And if we would like to delete all the records from a database table, then we only need to provide the table name:
dbsource.ExecuteSQL("DELETE FROM test") ' deletes all the records from the table
Creating file-based SQLite databases
By now, we have been working with an in-memory database, the fastest option from the performance point of view. But in general we will want to access a file based SQL database, probably created using other tools or that has been created from scratch by our code.
In both cases, the way to do it is very similar to the one we did see already to create an in-memory based database. The main difference is that we need to provide a FolderItem object to the database instance. This one will point to the database file itself.
For example, the following snippet of code will create an SQLite database on a file on disk with the name "test.sqlite" under the Documents folder for any of the supported operating systems:
DBSourceDisk = New SQLiteDatabase
Var file As FolderItem = SpecialFolder.Documents.Child("test.sqlite")

If file <> Nil Then
  Try
    DBSourceDisk.DatabaseFile = file
    DBSourceDisk.CreateDatabase
  Catch e As DatabaseException
    MessageBox("Error while creating and connecting to the database file.")
  End Try
Else
  MessageBox("Error creating the file on disk.")
End If

' From this point on, you can use the file based database
In this example, the DBSourceDisk property is created in a Module with the scope set to Global. As you can see, it doesn't matter that the variable pointing to the FolderItem gets out of scope once the Method execution ends; that's because it has been assigned previously to the DatabaseFile property on our database instance.
Please, put special attention to the CreateDatabase method; it does a double task:
Creates the database file.
Connects to the database, so we don't need to call the Connect method.
In addition, if you want to Connect to an existing SQLite database file, then this method will work as if you had called the Connect method.
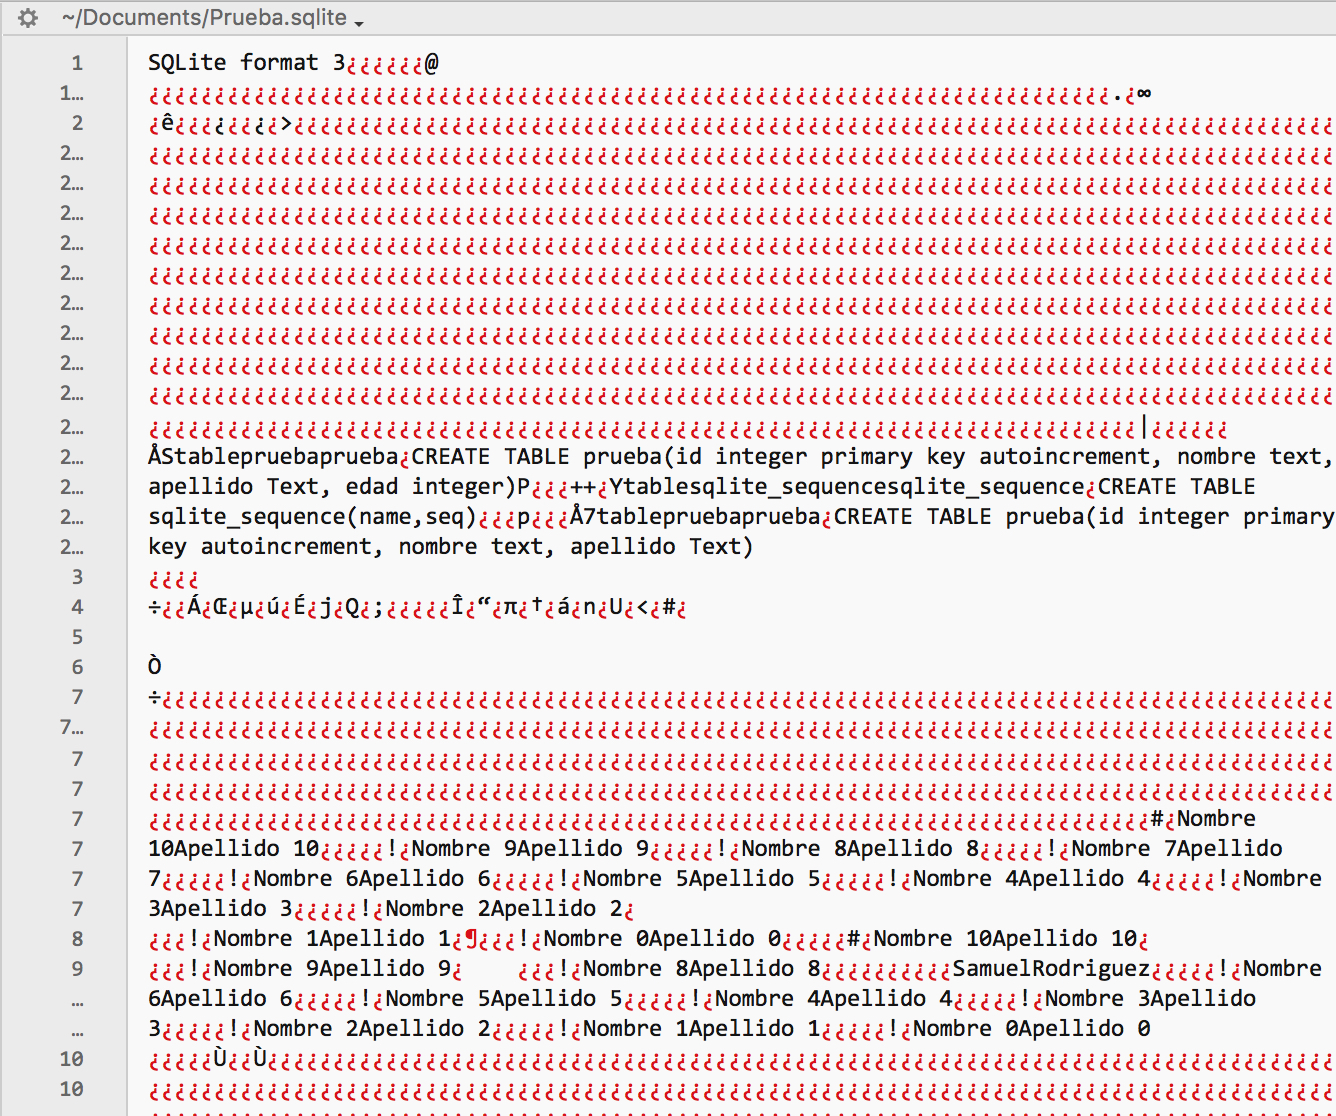
Try to execute all the operations we have seen until now: creation of a table, adding new records, executing queries, getting RowSets, editing and deleting records on the file based database, etc. By the way, try to open the file using a Text Editor and you will discover that the records data and even the database schema is clear and in a human readable format. We will see how we can solve this ciphering the stored data on the database file.
Database backup
There is an important concern especially when dealing with in-memory databases: we will lose all the stored data once we quit the application, or if the computer that runs the app suddenly shutdowns or freezes. However, for these and other issues we can find and use the Backup method found in the SQLiteDatabse. This method will copy both the database structure and the available records on the provided SQLite database based on file.
It is important to notice that if the database instance provided as the target for the backup contains data, it will be overwritten with the data found in the database we are going to backup.
In addition, the Backup method can work in synchronous or asynchronous modes. With the first mode, the app execution will not resume until the backup task is finished. In asynchronous mode, the backup process will not interrupt the responsiveness of the application, but the counterpart is that its implementation requires a bit more of work from our side.
For example, we can use the following code to start a synchronous backup from the in-memory database, pointed by the dbsource instance, to the file based database, pointed by the DBSourceDisk instance:
dbsource.Backup(DBSourceDisk, Nil, -1)
MessageBox("Backup Finished")
As we can see, the Backup method gets a total of three parameters:
A valid target SQLite database instance.
A handler pointing to an object (that implements the SQLiteBackupInterface interface) and that will be called to inform about the backup process when executed in asynchronous mode. Pass Nil for this parameter when executed in synchronous mode.
Operation frequency, set in milliseconds. This is the amount of time between chunks of data saved to the target SQLite database. Higher values means a more responsive application. Use -1 to set the synchronous mode, as shown in the example.
Of course, you can use the Backup method not only to copy in-memory SQLite databases to a file, but also for creating backups from file-based SQLite databases.
It is important to notice that the synchronous mode will pause the app execution until the backup has finished. Thus, our example will not display the "Backup Finished" message until the backup has finished. This pause can represent an inconvenience in some cases, because the app will not be responsive to the user interactions in UI.
Asynchronous backup
The second backup mode implies passing along an instance of a class implementing the SQLiteBackupInterface class interface, that has to be in scope at least until the backup process has finished. In fact, this will be the object that will receive the information about the Backup progress via the three methods defined by the Class Interface:
Complete. This is the method called when the backup process is complete.
Error. If there is an error during the backup process, then our instance will get it through the errorCode parameter.
Progress. This is the method called at regular intervals, providing the percentage of progress via the Progress parameter. The second provided parameter, Cancel, that is passed by reference, will let us to cancel the backup process assigning the boolean value True to it.
For example, we can add a new class to our example project named MySQLiteProgress; clicking the Interfaces button on the associated Inspector Panel in order to select and implement the methods from the SQLiteBackupInterface class interface. Once confirmed, we will see how Xojo adds the three methods to the just created class. Please, write the following line of code for the Complete method:
MessageBox ("Backup Finished")
And add the following line of code for the Error method:
MessageBox ("Error: ") + errorCode.ToString
Next, we can add a property named SQLiteBackupProgress, using MySQLiteProgress as the data type, and Public as the Scope value), to a Global Module or to the App object so it will be in scope during all the app life.
Now, we can change the backup code so it works in asynchronous mode:
SQLiteBackupProgress = New MySQLiteProgress
dbsource.BackUp(DBSourceDisk, SQLiteBackupProgress)
As you can see from the previous code, we create in first place a new instance from our class, in charge of receiving the messages related with the backup progress. Then, we use that instance as the parameter for the Backup method, using the by default value for the frequency parameter (10).
Ciphering SQLite databases
Try to use a Text Editor to open the file of the SQLite database created in the previous example (as result of the backup). You will see that both the database scheme and the records data are in a human-readable form (plain text).
Maybe this is not a problem in some cases, depending on how we expect to use the database; but I'm pretty sure that in most of the cases you will want your data protected and ciphered so no one can read or change it.
The good news is that it's really simple to create ciphered databases using Xojo. In addition, since Xojo 2018r1 we can do it using a stronger ciphering length of 256 bits in comparison with the 128 bits used in previous releases. This is really important to keep the information secure in the database.
However, Xojo will use by default the ciphering length of 128 bits; so, in order to use the 256 bits length, we need to use the string 'aes256:' as a prefix when providing the password.
When ciphering a SQLite database in Xojo we have to deal with three possible scenarios:
Ciphering a new database created from scratch via code.
Connecting to an already ciphered database.
Ciphering an already created SQLite database.
For the first case, we need to assign the password to use in the ciphering process in the EncryptionKey property of the SQLite database instance, before calling the CreateDatabase method. For example, we can modify the code we used previously for the file based SQLite database creation, so it is ciphered:
If file <> Nil Then
  DBSourceDisk.DatabaseFile = file
  DBSourceDisk.EncryptionKey = "aes256:5uper_2ecurePa55m0r9!"

  Try
    dbsourcedisk.CreateDatabase
  Catch error As IOException
    MessageBox("Error connecting to the database")
  End Try
Else
  MessageBox("Error found while creating the file")
End If
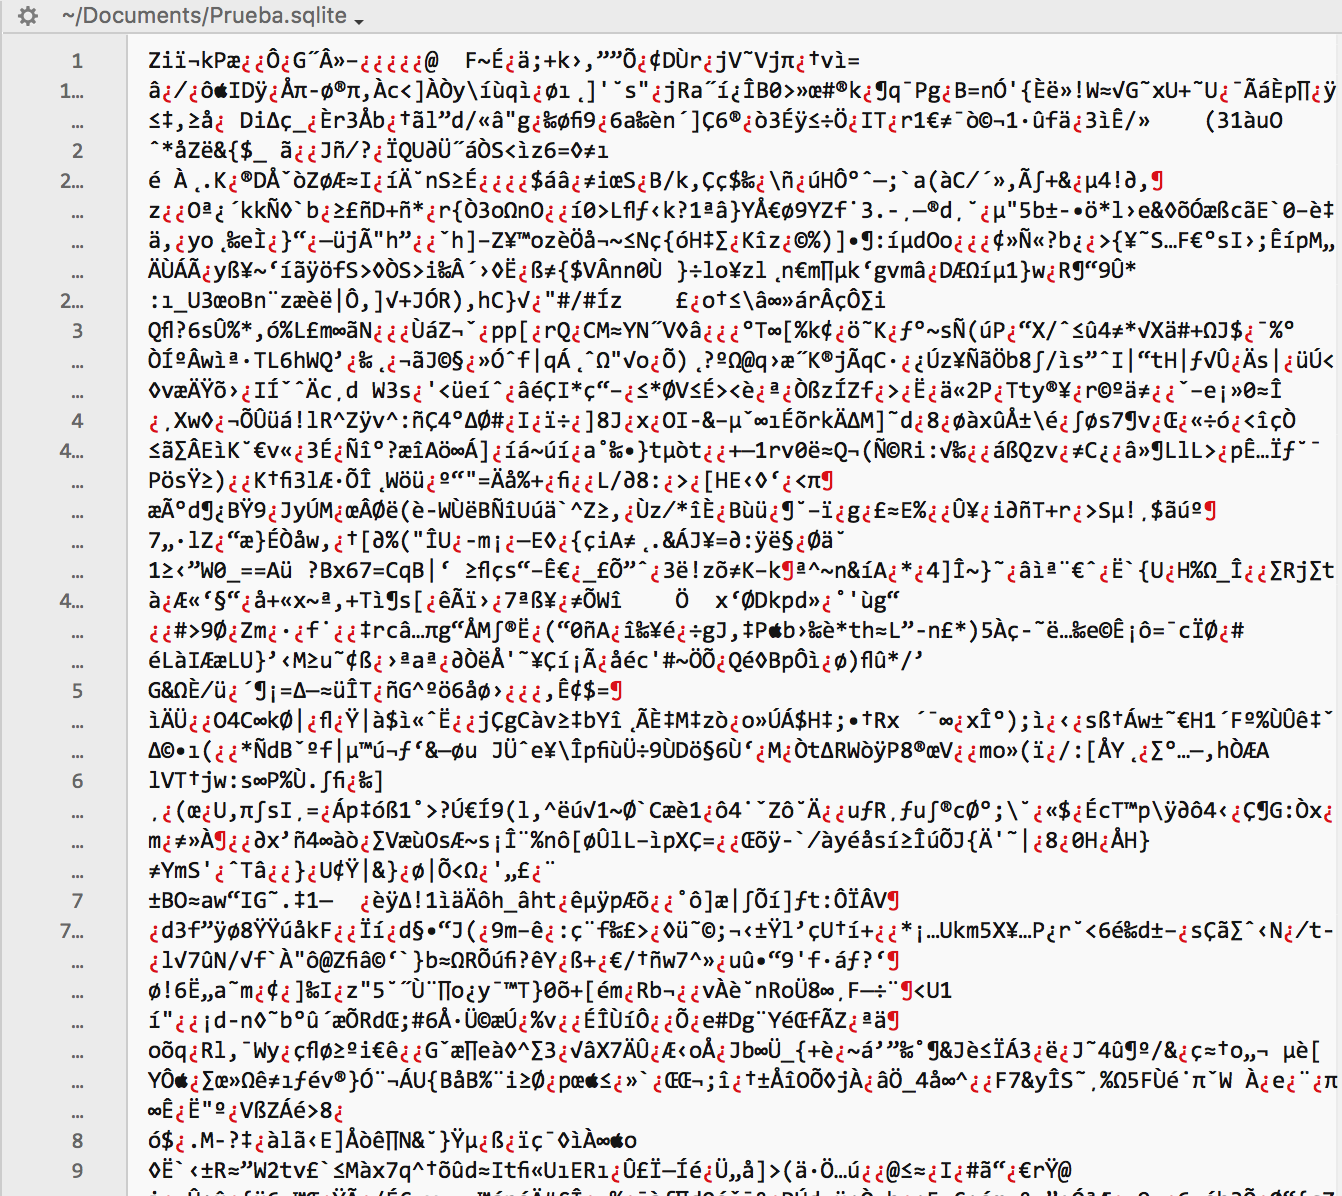
Run the example project. It will create again the backup from the in-memory database to the file based SQLite database. If you try to open now the database file using a Text Editor, both the database scheme and the database data itself are not in a human-readable form anymore!
In order to connect to an already ciphered database, we need to use the same password used during the ciphering process before calling the Connect method. For example:
DBSourceDisk.DatabaseFile = file
DBSourceDisk.EncryptionKey = "aes256:5uper_2ecurePa55m0r9!"

If Not dbsourcedisk.Connect Then
  MessageBox("Error connecting to the database")
End If
Finally, we use the Encrypt method to ciphering an already available SQLite database after connecting to it using the Connect method. For example:
DBSourceDisk.DatabaseFile = file

If Not dbsourcedisk.Connect Then

  DBSourceDisk.Encrypt("aes256:5uper_2ecurePa55m0r9!")

  MessageBox("Error connecting to the database")

End If
The Encrypt method also provides two additional functions, always called after Connect:
To modify the password of an already ciphered database. For this we provide the string used as the new password as the parameter.
Decrypt a previously ciphered database. For this we pass an empty string as the parameter.
For example, try this:
If file <> Nil Then
  DBSourceDisk.DatabaseFile = file
  DBSourceDisk.EncryptionKey = "aes256:5uper_2ecurePa55m0r9!"

  Try
    dbsourcedisk.CreateDatabase
  Catch error As IOException
    MessageBox("Error connecting to the database")
  End Try
Else
  MessageBox("Error found while creating the file")
End If

DBSourceDisk.Encrypt("")
What happens when executing this code? Open the resulting database file with a Text Editor and you will see that the contents are legible again, because we have unencrypted the data using Encrypt("") just right after we ciphered it a couple of lines before.
Of course, we can find the Decrypt method in Xojo to decrypt a database that has been previously ciphered. In that case, the Decrypt method needs to be executed once we have connected to the ciphered database. For example:
If file <> Nil Then
  DBSourceDisk.DatabaseFile = file
  DBSourceDisk.EncryptionKey = "aes256:5uper_2ecurePa55m0r9!"

  If Not dbsourcedisk.Connect Then
    MessageBox("Error connecting to the database")
  End If
Else
  MessageBox("Error found while creating the file")
End If

BBSourceDisk.Decrypt
Of course, we don't need to decrypt the database contents in order to use it! That is, once we have connected to a ciphered SQLite database we will be able to execute any SQL statement with the SQLExecute and SQLSelect methods, and use the available RowSet and DatabaseRow classes (among others) as we did see. Thus, we only need to decrypt a previously ciphered database when we really want to make all the content available in a clear or human readable form, but not for a regular use.
However, note that there is still a weak point in the code itself, because we are providing the password as a human readable String that can be retrieved using a Text Editor or a specific development tool over our compiled project. Thus, is a common practice to encrypt the password used both for ciphering a database and/or accessing an already ciphered database, and assign it to a constant; deciphering such password constant when it's time to be used in combination with the Encrypt method or the EncryptionKey property. This way, the password would not be readable even when we use a Text Editor or development tool in order to extract the strings from our compiled app.
Multiuser SQLite databases
Although SQLite does not support multiple users accessing from different apps, you can enable Multiuser support from a single app (usually a web app allowing multiple users to connect to it) by setting the WriteAheadLogging property from the database instance to True after connecting to it with Connect method. This enables a feature called Write-Ahead Logging (WAL). In addition, and even if the database is not expected to be accessed by multiple users at once, the activation of this feature improves the overall performance by reducing the writings on the file used by the database.
Warning
Do not use SQLite files on shared network drives. The SQLite organization does not support or recommend this as it is significantly slower and may cause data corruption.
Thus, activating the multiuser mode is as simple as this:
DBSourceDisk.DatabaseFile = file

If Not dbsourcedisk.Connect Then
   MessageBox "Error connecting to the database"
End If

DBSourceDisk.WriteAheadLogging = True
The activation of the WAL mode (Write-Ahead Logging), or multiuser mode, has several implications:
The database can't be opened only in Read mode (so make sure you are creating the database file in a path with read/write permissions).
After connecting to the database, the app will create two additional files along the main database file: .sqlite-wal and .sqlite-shm.
The WAL mode doesn't work on network operating systems.
The database only can be accessed by processes hosted on the same computer where is located the database file. This can be the case of a Web Server app, where it has to process several requests from clients, retrieving data form the SQLite as response for each one of these sessions. In this case, both the web server app and the SQLite database are located on the same computer.
The WAL feature requires SQLite 3.7.0 or later.
The changes stored by the temporary files (.sqlite-wal and .sqlite-shm) will be made effective on the main database file when the database is closed by code or by exiting the app that works with it. Then, these temporary files will be deleted.
Quizzes
Take these quizzes to test your knowledge of SQLite with Xojo. Check your answers on the Answers page.
Quiz 1: available SQLite classes
Use this Quiz to check what you have learned. Some questions may have more than one right answer.
Question 1.1: SQLiteDatabase is available for all the supported platforms.
Yes.
No.
Question 1.2: What are the platforms supported by SQLiteDatabase?
Desktop, Web
Web, Console, Mobile (iOS & Android).
Desktop, Web, Mobile (iOS & Android)
Desktop, Console, Web
Desktop, Web, Mobile (iOS & Android), Console
Question 1.3: SQLite can be used only in single user mode.
No.
Yes.
Question 1.4: SQLite works in 32-bit mode even when the app is deployed as 64-bit.
True.
False.
Quiz 2: In-memory SQLite databases
Use this Quiz to check what you have learned. Some questions may have more than one right answer.
Question 2.1: A Xojo app only can use one in-memory database at once.
Yes.
No.
Question 2.2: Sort the following lines of code to create an in-memory database
Exit
MessageBox ("Error Creating the Database")
dbsource = New SQLiteDatabase
If Not dbsource.Connect Then
End If
Question 2.3: We only can create in-memory databases that are going to use less than 2 GB of RAM
True.
False.
Question 2.4: Once a table has been created, we can…
Delete columns.
Modify some of the current columns.
Add new columns to the table.
Question 2.5: Once we create a SQLite database instance and assign it to a variable we can start using it.
Yes.
No.
Yes, always that the variable or property is in scope during database use.
Question 2.6: We still can use an in-memory database the next time we run the app.
Yes, always it has valid data
No, the database is deleted once we exit the app.
Question 2.7: Once we create an SQLiteDatabase we just need to use the Connect method to start using it.
Yes.
No.
Yes, always the Connect method has returned True as result.
Quiz 3: tables
Use this Quiz to check what you have learned. Some questions may have more than one right answer.
Question 3.1: SQLite sets a maximum number of tables for a database.
No.
Yes.
Question 3.2: In order to create a table in Xojo we will use the SelectSQL method from the SQLiteDatabase.
True.
False.
Question 3.3: After creating a Table using ExecuteSQL we will get the result of the operation as a Boolean value.
True.
False.
Question 3.4: Once a Table has been created, it is possible to modify the name of any of the defined columns
True.
False.
Question 3.5: Once a Table has been created, it is possible to deleted any of its columns.
True.
False.
Quiz 4: DatabaseRow
Use this Quiz to check what you have learned. Notice that the questions may have more than one right answer.
Question 4.1: The name of the Class to add new records to the database is…
SQLiteRecord.
DatabaseField.
Record.
DatabaseRow.
Question 4.2: We have to observe the correct use of lowercase and uppercase letters in the name when referring the database columns.
Yes.
No, it doesn't matter when using SQLite.
Question 4.3: The method name of the SQLiteDatabase class to add new records is…
AddRow.
InsertField.
AddDatabaseRecord.
InsertRecord.
Question 4.4: We can add new records using a SQL statement executed with SelectSQL on the database instance.
True.
False.
Question 4.5: Sort the lines to add a record using the DatabaseRow Class.
dbsource.AddRow("prueba", nr)
Var nr As New DatabaseRow
nr.Column("name").StringValue = "Name: " + n.ToString
Quiz 5: retrieving records
Use this Quiz to check what you have learned. Some questions may have more than one right answer.
Question 5.1: The name of the class we use to navigate and access the records from a database query is…
DatabaseRecord.
DataGroup.
Records.
RecordList.
RowSet.
Question 5.2: We can iterate the records from a RowSet as many times as we need.
Yes.
No.
Yes, always we move the cursor pointer to the first record in first place after each iteration.
Question 5.3: Once we get a RowSet we can access to it from any point of our app.
Yes.
No.
It depends if the variable or property that references the RowSet is in scope.
Question 5.4: We just need to test the RowSet for Nil in order to start using it
True.
Not always.
We also need to make sure that AfterLastRow is False, for example.
Question 5.5: RowSet offers methods to Delete, Edit and Insert records among other operations.
Yes.
No.
Only Delete and Edit, among other actions.
Question 5.6: What are the method names we can use to navigate the RowSet?
MoveToFirstRow, MoveToNextRow, MoveToPreviousRow, MoveToLastRow.
JumpFirst, Next, Rewind, JumpLast.
MoveFirst, Next, Previous, MoveLast.
MoveNext, MovePrevious
Question 5.7: The method we use to know the number of records in a RowSet is…
RowCount.
Records.
NumberOfRecords.
TotalRecords
Question 5.8: A RowSet is closed when…
We call the Close method on the instance.
The instance gets out of Scope.
The App quits.
A RowSet never closes, it's always available.
We get an Error.
Quiz 6: editing rows
Use this Quiz to check what you have learned. Some questions may have more than one right answer
Question 6.1: What method should we use to access a column value from a record?
Value.
Record.
DataField.
Column.
Question 6.2: Can we directly access a column value using the Column method?
Yes, sure.
No, we have to query the database using SQLSelect.
No, we have to use a DataRecord instance.
No, we do it using a DatabaseRow instance.
Question 6.3: What RowSet method should we call before changing a record data?
Prepare.
Rollback.
DataEdit.
EditRow.
Question 6.4: What's the main advantage of using ExecuteSQL instead of a RowSet method when updating a record?
None, in fact it is preferable and easier to use RowSet.
SQLExecute provides greater flexibility.
SQLExecute provides greater flexibility and returns a new RowSet with the data already updated.
Quiz 7: file-based SQLite databases
Use this Quiz to check what you have learned. Some questions may have more than one right answer.
Question 7.1: Sort the lines of code to create a file based SQLite database
DBSourceDisk.DatabaseFile = file.
MessageBox "Error Creating the Database".
DBSourceDisk = New SQLiteDatabase.
If Not DBSourceDisk.CreateDatabase Then
If file <> Nil Then
End If
End If
Var file As FolderItem = SpecialFolder.Documents.Child("tet.sqlite")
Else
MessageBox "Error Found while Creating the File"
Question 7.2: What's the effect when calling the 'CreateDatabase' on a file that already has SQLite data on it?
It will delete the current contents, initializing again the file in order to be used by the SQLite database instance.
The app will raise an Exception.
The app will create a copy of the file, initializing it so it can be used by the SQLite database instance.
It will act as if the method 'Connect' was called.
Question 7.3: SQLite creates the database file encrypted by default.
True.
False.
It's true, but using a 128 bits length.
Question 7.4: What SQL statement we will use to delete all the records from a Table?
DELETE FROM table_name.
DELETE * FROM table_name.
DELETE all FROM table_name.
DELETE FROM table_name WHERE id = *.
DROP TABLE table_name.
Question 7.5: Can we change the file used by a SQLite database instance on the fly?
Yes.
No.
Quiz 8: backup
Use this Quiz to check what you have learned. Notice that the questions may have more than one right answer.
Question 8.1: We only can backup in-memory databases
Yes.
No.
Question 8.2: The backup is done over…
A valid FolderItem instance that is in scope during all the process.
Another in-memory or file based database.
Another file based and initialized SQLite database.
Question 8.3: What modes can we use to backup a SQLite database?
Synchronous and Asynchronous modes.
Synchronous, Direct and Muliuser modes.
Synchronous and Asynchronous modes.
Question 8.4: What measure of time should we use to set the period in a Synchronous backup?
Seconds.
Microseconds.
Milliseconds.
We have to pass -1 as the value for the parameter.
Question 8.5: Once the backup has finished, the SQLite database instance will use the file of the target database.
True.
False.
Quiz 9: asynchronous backup
Use this Quiz to check what you have learned. Some questions may have more than one right answer.
Question 9.1: Why is it preferable to use asynchronous backups instead of synchronous?
The app is not blocked.
It only works with big database files.
It provides more control, for example the ability to cancel the backup process.
We can receive information about the process progress and possible errors.
Question 9.2: What is the name of the Class Interface that we have to implement in the class used as backup handle?
SQLiteBackupInterface.
SQLiteBackupProgress.
SQLiteBackupInformation.
Question 9.3: Do we have to implement (add code) in all the methods added by the SQLiteBackupInterface?
Yes.
No.
Question 9.4: The object used as backup handle, has to be in scope during all the process?
Yes.
No.
Only if we had implement code on any of the Class Interface methods.
Question 9.5: It's mandatory to provide the time period parameter to the Backup method?
No.
Yes.
Quiz 10: ciphering SQLite databases
Use this Quiz to check what you have learned. Some questions may have more than one right answer.
Question 10.1: Xojo uses by default a ciphering length of 256 bits?
Yes.
No.
Question 10.2: What prefix string should we use in the password to enable the 256 bits ciphering length?
aes256:
256:
maxSecure:
Question 10.3: What method should we use in order to encrypt an already existing SQLite database file?
Encrypt.
EncryptionKey.
CipherDB.
Encrypt("").
Question 10.4: How can we decrypt an already ciphered database once we are connected to it?
Encrypt("").
Decrypt.
Wipe.
EncryptionKey = "".