Creating your own controls
In this tutorial you'll learn how to create your own controls for your desktop and web projects.
This tutorial assumes you have gone through the Desktop QuickStart and Desktop Tutorial and thus have a basic understanding of how to navigate around a simple project, get to the Inspector, the Library, the Code Editor, etc. If you haven't gone through the Desktop QuickStart and Desktop Tutorial yet, you should do so first.
Xojo has many built-in controls each with lots of functionality. Having said that it can't account for everything so sometimes you need to add your own custom logic. I 'm going to use one of the built-in controls, the TextField, as a starting point then I 'll show you how to create completely new controls using the Canvas control.
Custom version of built-in controls
Say you are creating data entry layouts with lots of TextFields and you want to make sure that the user doesn't accidentally add spaces at the beginning or end of the entries. The TextField control doesn't do that by default. The good news is that the Xojo framework has a Trim function that does this.
Add this line of code:
Me.Text = Me.Text.Trim
to the FocusLost event of a TextField and you 'll have just that. If the user leans on the spacebar, when they leave the field, your code will remove any spaces at the beginning or end of the entry.
This is great, but it what if you have a lot of TextFields over many, many layouts?
Adding this bit of code over and over to 20 or more TextFields would get tedious, not to mention the work entailed if you ever decided to update that code in the future.
The solution is to create your own TextField control that has this trimming functionality built-in to its FocusLost event. Then you would just use your custom TextField everywhere in your app that needs it. As it turns out, this is easy to do with subclassing.
With subclassing you create a new class that is based upon an existing class. The new class has all the same properties, methods and events as the original along with any new or changed functionality you add.
Here's how you create a subclass of the Textfield that has trimming code built-in to it: 1. Launch Xojo and create a new Desktop project. A web project would also work.
Add a new class to the project by choosing New Class from the Insert menu or Toolbar item.
In the Inspector, change the name from Class1 to DataEntryField.
Change the Super in the Inspector to TextField. It is this that makes our new DataEntryField class a subclass of TextField. It will have all the features of the regular TextField but we will also be able to add our own custom features. For a web project, change the Super to WebTextField.
Now add the FocusLost event to the subclass. Right-click on DataEntryField in the Navigator, choose Add to DataEntryField and from the menu that appears choose Event Handler...
In the Add Event Handler dialog box, choose FocusLost and click OK.
In the FocusLost event, add the following code:
Self.Text = Self.Text.Trim
In the Navigator, click on Window1 to select it. For a web project click on WebPage1.
Drag DataEntryField from the Navigator and drop it somewhere on Window1 (or WebPage1). This creates an instance of it.
The code runs when the control loses focus but since this control is the only control on the window, the FocusLost event won't run or at least not until you close the window or quit the app while the window is open. Thats isn't very effective for a demonstration, so drag DataEntyField from the Navigator to Window1 to create another control. Now the FocusLost event can fire when the user tabs or clicks out of the field since there's another control on screen that can receive the focus.
Run your project.
Try entering spaces at the beginning, in the middle and at the end of an entry in either TextField. You 'll notice that when you exit the field the spaces at the beginning and end are removed.
Quit your app to go back to the IDE.
Now when you want this functionality in a field, you can drag a DataEntryField to the layout or select an existing TextField and change its Super to DataEntryField. No more copying and pasting code. Also, should you ever want to make this functionality more sophisticated, you only need update the DataEntryField class in your project and all instances of it on all the different layouts you have in your project will automatically use the new version because the code only exists in one place.
There is, however, a downside. Say you had a DataEntryField control on one of your layouts and needed to add some additional logic to the FocusLost event but just for a specific instance of it and not any of the others. Naturally, you 'd just go to the Add Event Handler dialog box for that control to add the FocusLost event only to discover it's not there. It's not there because your DataEntryField class is handling it.
But, fear not. You can add back the FocusLost event. Here's how: 1. Right-click on the DataEntryField in the Navigator and choose Add to DataEntryField then choose Event Definition from the menu.
An Event Definition, as the name implies, defines an event. In this case, you will define one called FocusLost. In the Inspector, type FocusLost as the name for the new event definition.
In order for you to be able to use this event for any instance of DataEntryField, you need to call it. In the Navigator, click on the FocusLost event handler of DataEntryField. You should see your line of code there from before.
The FocusLost event you are adding back can run at any time. You might want the instance event to run before the class event or after. For this example, make the instance event run after the trim code so type FocusLost on a new line below the line that is already there. Your code should now look like this:
Self.Text = Self.Text.Trim
FocusLost
Now if you add some code to a specific instance of the DataEntryField, the DataEntryField's implementation of the FocusLost event will run first (with the trim code) followed by the local, instance-specific FocusLost code. You can add some code to an instance of the DataEntryField class to see the effect. 5. Go to Window1 and double-click on the first DataEntryField control.
Notice that the FocusLost event you just added appears in the Add Event Handler dialog. Select it and click OK.
As an example, you can add code that prevents this particular field from being left blank. Add the following code:
If Me.Text.IsEmpty Then
  System.Beep
  MessageBox("This field is mandatory. It cannot be left blank.")
  Me.SetFocus
End If
Run your project and try it out by entering spaces at the beginning and end of the field.
When you 're done testing, quit your app and return to Xojo.
The event could have been called anything you like and you could then call it anywhere in your DataEntryField's code. In this particular case it makes sense to call it FocusLost and to call it from the DataEntryField's FocusLost event because you are giving the user an option to add code to the FocusLost event of any particular instance of the DataEntryField on any particular layout. You could do the same with just about any event of any control. This gives you a lot of flexibility to create your own controls based upon the existing built-in controls.
You can also create a subclass of a control in the Library by dragging the control from the Library and dropping it into the Navigator.
Custom drawn controls
What if you need a control that doesn't exist amongst Xojo's built-in controls? Perhaps io's not even a control that the OS provides, but something entirely custom directly from your own imagination.
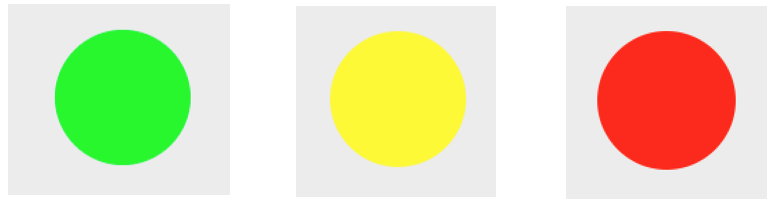
Consider a simple control called TrafficLight. It's a circle that when clicked, changes from green to yellow to red. Xojo doesn't have this built-in nor does any OS provide it. The good news is that this is not a problem because you can create custom controls with the Canvas control. The Canvas control is nothing more than a blank area where you do all the drawing and respond to all of the events. You control everything.
Here's how to create the TrafficLight control. Like the DataEntryField control, you could recreate or copy and paste this each time you needed one but that would be tedious to maintain so instead you will start off with a new class that is a subclass of the Canvas control. 1. Choose New Class from the Insert menu or from the Insert toolbar button.
In the Inspector, change the name of the class to TrafficLight.
Change the Super to Canvas.
You will need to store the color that was last used when drawing the control so you know which color to use next. Add a property to store that. 4. Right-click on the TrafficLight class in the Navigator, choose “Add to TrafficLight” and then choose Property from the menu.
In the Inspector, change the name of the new property to LightColor.
Change the property type to Color.
Set the Default value to Color.Green.
Xojo has some basic colors built-in so you don't have to figure the proper red, green and blue (or RGB) values to create them but you can create any color you want.
Next you need to add the Paint event. This event is called each time the canvas needs to be redrawn. This can happen for a number of reasons. For example, your code might redraw the canvas in response to a user's click (or tap on a mobile device). If the layout has just been opened, the canvas will need to be drawn or redrawn if ir's exposed when a user drags away a window that was obscuring it.
The Paint event is passed a Graphics object. This represents the graphics that will be drawn into the canvas when the Paint event completes. Your code call methods of this graphics object in order to draw whatever it is you want to appear in the canvas.
To add the Paint event: 1. Right-click on the TrafficLight class in the Navigator, choose “Add to TrafficLight” and then choose Event Handler from the menu.
Select the Paint event handler and click OK.
Add a line of code that sets the color used for drawing to the new property. Add the following line of code:
g.DrawingColor = LightColor
Now draw the circle using the FillOval function. This function takes the X and Y coordinates where you want to draw the upper-left position (within the canvas) as well as the width and height of the oval you want to draw. You will start drawing at 0, 0 and pass the canvas control's width and height so the circle fills the canvas. 4. Add the following line of code to draw the circle:
g.FillOval(0, 0, width, height)
Click on Window1 to select it.
Drag the TrafficLight class from the Navigator to Window1.
Run your project to see the result.
You now have a control that draws a green circle. Granted, it doesn't do a whole lot just yet but keep going. Next you need to add some code that sets the LightColor property to the next color in the series (green, yellow, red) when the user clicks on the control. For that, you need to add the MouseDown even to detect a mouse click: 1. Right-click on TrafficLight in the Navigator, choose “Add to TrafficLight” and then choose Event Handler.
Choose the MouseDown event and click OK. This event is called when the user clicks the control. At that point you want to change the color and then redraw the circle in the canvas with the new color.
Add the follow code to the MouseDown event:
Select Case LightColor
Case Color.Green
  LightColor = Color.Yellow
Case Color.Yellow
  LightColor = Color.Red
Case Color.Red
  LightColor = Color.Green
End Select
Refresh
Just as you 'd expect, this Select Case statement looks at the color then changes it to the next color in the series. If it's green, it changes it to yellow. If it's yellow, it changes it to red and if it's red, it changes it back to green. The Refresh method at the end causes the control to be redrawn and thus fire the Paint event which will draw the circle using the color that was set in the MouseDown event. 4. Run your project to see the results.
Now you have a custom control you can use as many times as you want across many different layouts. If you need to change the logic of the control, you can change it one place (the TrafficLight class).
The last thing you 'll want to decide is whether or not you want to be able to add code to the MouseDown and Paint events on an instance of the TrafficLight control on any particular layout. If you do, you 'll need to add these events back just as you did with the FocusLost event of the DataEntryField control.
Adding event definitions for these two events is a little trickier than adding the FocusLost event was because both the MouseDown and Paint events have parameters passed to them. That means you will need to define the same parameters as part of the event definition and pass those parameters through when you call the event definitions from the original events. 1. Add a new Event Definition to the TrafficLight class in your project.
Name this new Event Definition MouseDown.
Enter as the Parameters:
x As Integer, y As Integer
Now set the Return Type to Boolean.
Lastly, click on the MouseDown event handler and add the following line of code to the end:
Return MouseDown(x, y)
Now if you want to add code to the MouseDown event of a specific instance of your TrafficLight control, you can. Your code will be called after the TrafficLight control sets the color and tells the control to refresh.
Do the same thing for the Paint event. 1. Add a new Event Definition to the TrafficLight class in your project.
Name this new Event Definition: Paint.
Enter as the Parameters:
g As Graphics, areas() As Rect
Lastly, click on the Paint event handler and add the following line of code to the end:
Paint(g, areas)
Run your project to see that it still works properly. You shouldn't see any change (unless of course you typed something wrong).
Now you should feel comfortable being able to subclass existing controls to make your own custom versions of them as well as using the Canvas control to create completely new controls.