Android apps
Android apps run on Android devices including phones and tablets.
Android project overview
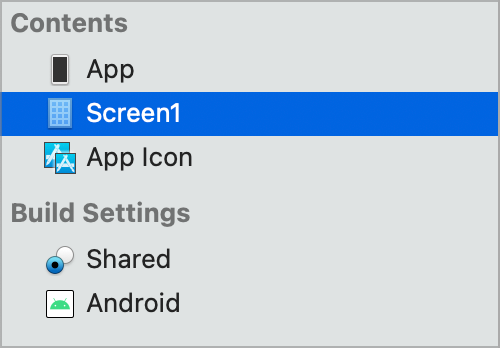
When you create your first Android project, the following project items are added automatically:
App: The App object works similarly to how it works for desktop and web projects. In the App Inspector, you can set the Default Screen to use for phones and tablet devices.
Default Phone Screen: Specifies the initial screen displayed when the app is started on phone-sized devices.
Default Tablet Screen: Specifies the initial screen displayed when the app is started on tablet-sized devices.
Screen1: This the main layout where controls are placed. It is roughly equivalent to a Window or WebPage in desktop and web projects.
App Icon: This item is where the various size app icons for the app are placed.
To prevent an app from working on a phone, select "None" for the Default Phone Screen App property. If you do not want the app to run natively on a tablet, select "None" for the Default Tablet Screen App property. If Default Tablet Screen is "None", then the "Not supported on tablets" message is displayed. To have the app run on both phone and tablets, it should have a both default screens specified, although they can refer to the same screen.
App Object
The App object works similarly to how it works for desktop and web projects. For an Android project, the App object is a subclass of MobileApplication. You use it to specify the default screen layouts for the devices. You can add events, properties and methods to the App object. Use the App prefix to refer to public properties and methods elsewhere in your code. For example, to refer to the property UserName added to the App object in a class of the project, you would write:
App.UserName = "Billy"
Event Handlers
The Application class has several event handlers. Opening and Closing are supported as they are in desktop and web projects. Mobile applications also have some unique event handlers.
Properties
Default Phone Screen: The Screen to display when a phone-sized device is used. Set this to "None" to prevent the app from working on a phone.
Default Tablet Screen: The Screen to display when an tablet-sized device is used. Set this to "None" when you do not want a native tablet app. The app will still run on a tablet, but will do so by running the phone screen in "scaled" mode.
Screens
In the Inspector for App, you can specify the default screens to use when the app is run on a phone or a tablet. A Screen is a project item that specifies the type of layout and supported orientations. Only one screen is added by default with new projects: Screen1. When you click on a Screen you are shown a preview of how it might look on the device.
Build Settings
The Build Settings section of the Navigator contains the build-specific settings for your app.
Android-specific
This section of the Build Settings contains Android-specific settings, including:
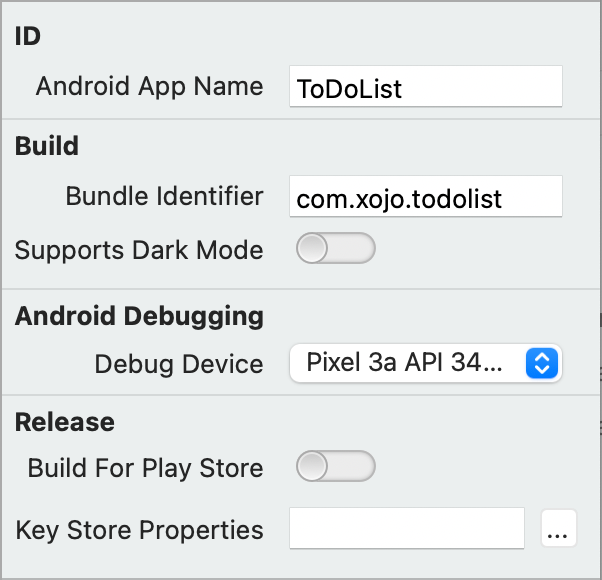
Android App Name: The actual name for your Android app. This is the name that appears on the home screen in Android and is the name of the actual app file.
Bundle Identifier: The bundle identifier is used by Android as a unique descriptor for your app. It is usually specified as a reverse domain name, such as com.xojo.myapp. A bundle identifier is required for Android apps.
Supports Dark Mode: Indicates whether Android should switch your app to Dark Mode when the OS switches to Dark Mode. If you are doing any drawing and have made sure your app will respond properly when in Dark Mode, turn this option on.
Build For Play Store: This allows you to indicate how the app will be deployed so that Xojo can output the appropriate format for the Play Store.
Key Store Properties:
Tip
Choosing Build For Play Store, will cause Xojo to create a signed bundle file that can be submitted to the Play Store.
Advanced build settings
There are a several advanced settings available on the Advanced tab.
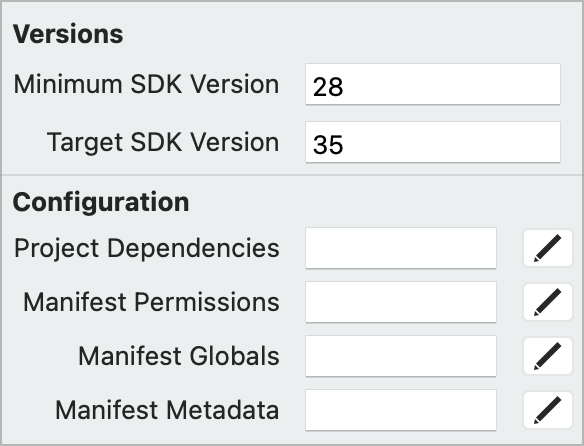
SDK Versions
When using declares to call into the OS, set the Minimum and Maximum Android SDK versions via the Advanced tab.
Dependencies
By clicking on the Advanced (Gear) tab in the Inspector you can set the Dependencies for your app. This is only needed if you are linking in libraries and/or using declares.
Note
Each dependency must be on a separate line.
Permissions
By clicking on the Advanced (Gear) tab in the Inspector you can set the Permissions for your app. This is only needed if you are linking in libraries and/or using declares.
Note
Each permission must be on a separate line.
Manifest Information
Should your app need any generic global manifest settings, these can be set via the Manifest Globals property on the Advanced tab in the Inspector.
Metadata for need for external libraries can be added via the Manifest Metadata property on the Advanced tab in the Inspector.
Android app deployment
There are two ways to deploy Android apps:
Videos about app deployment
See also
MobileApplication class