On-Device testing during development
Signing
Each time you create a new iOS app you wish to install on an iOS device for testing, you'll need to create a provisioning profile for that app. Below are the instructions to do so.
Requirements
To create a provisioning profile, you will need to have a version of XCode supported by Xojo.
Logging in to XCode
XCode needs to be made aware of your Apple ID. You will need to add it to XCode in order to login via your Apple ID. This is a one-time only operation. Once you do it the first time, you will never have to do it again for future iOS projects.
If you do not have an Apple ID you can use, you can create a new one at appleid.apple.com.
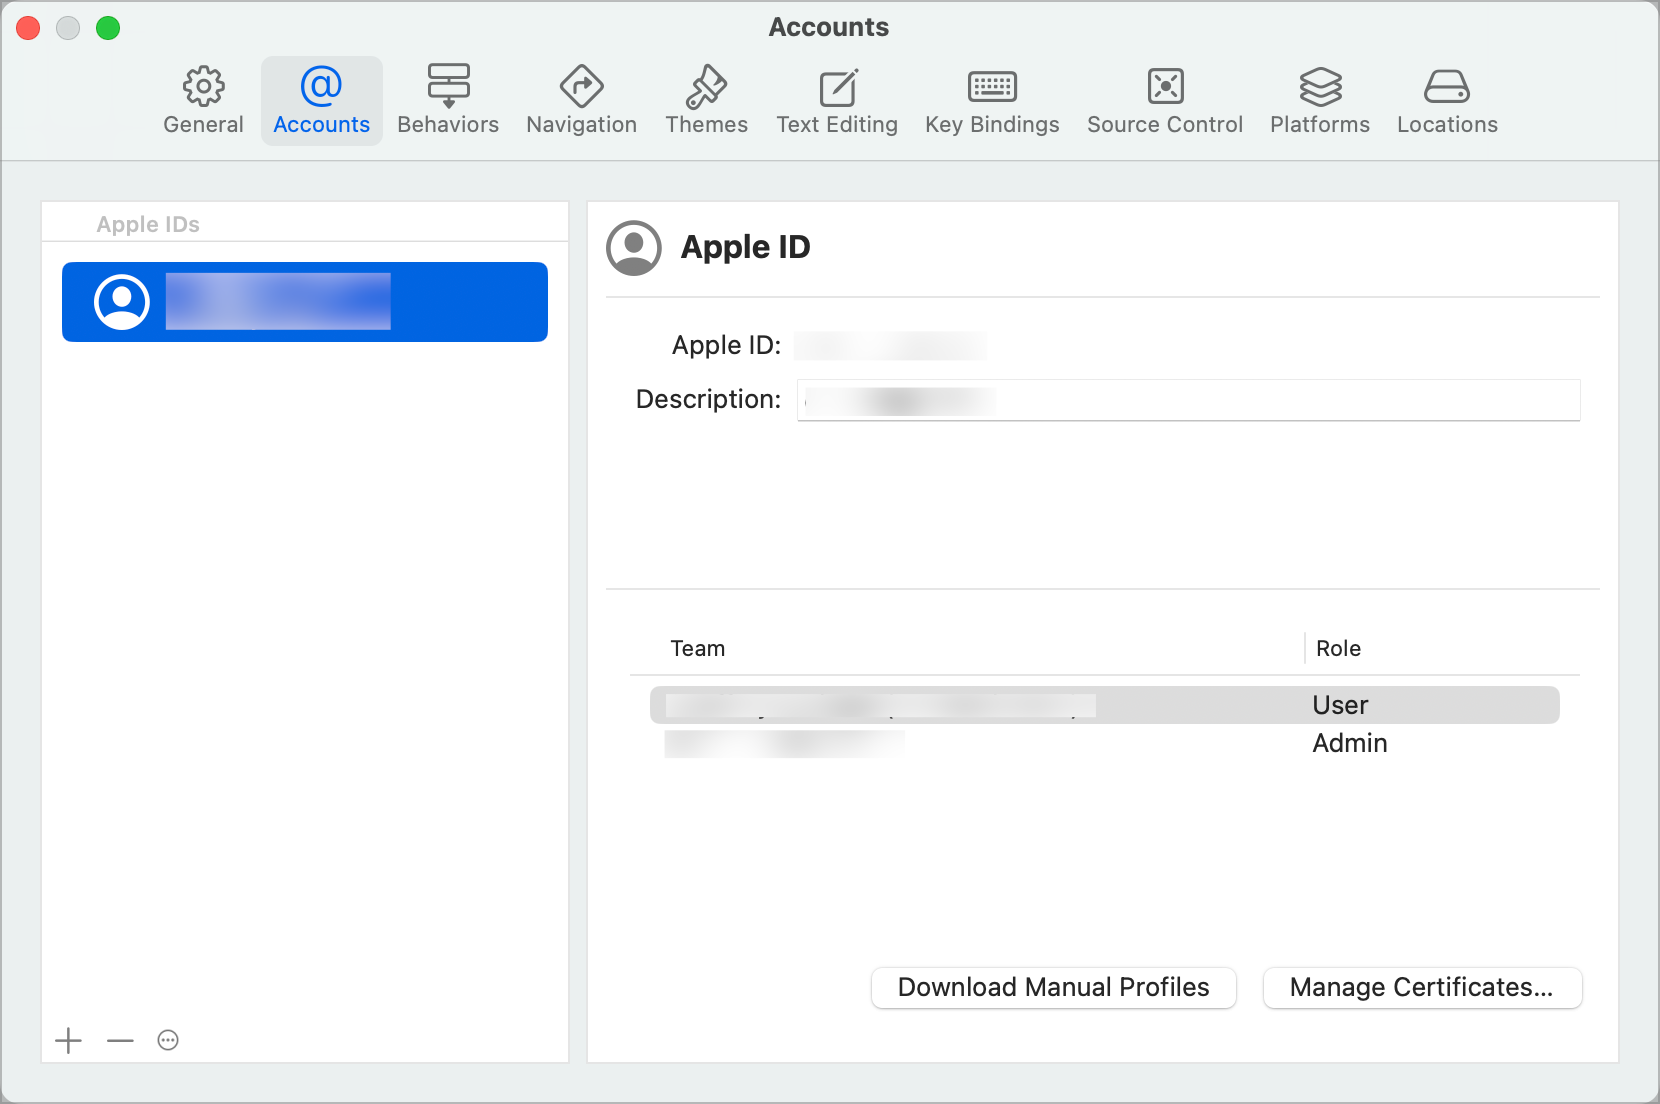
Start Xcode and open Settings (Xcode menu > Settings).
Select the Accounts tab and click the "+" button to add your Apple ID. This adds a Team Name which should be selected by default.
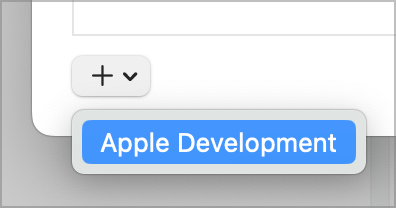
With your Team Name selected, click Manage Certificates. In the dialog that appears, click + button then choose Apple Development.
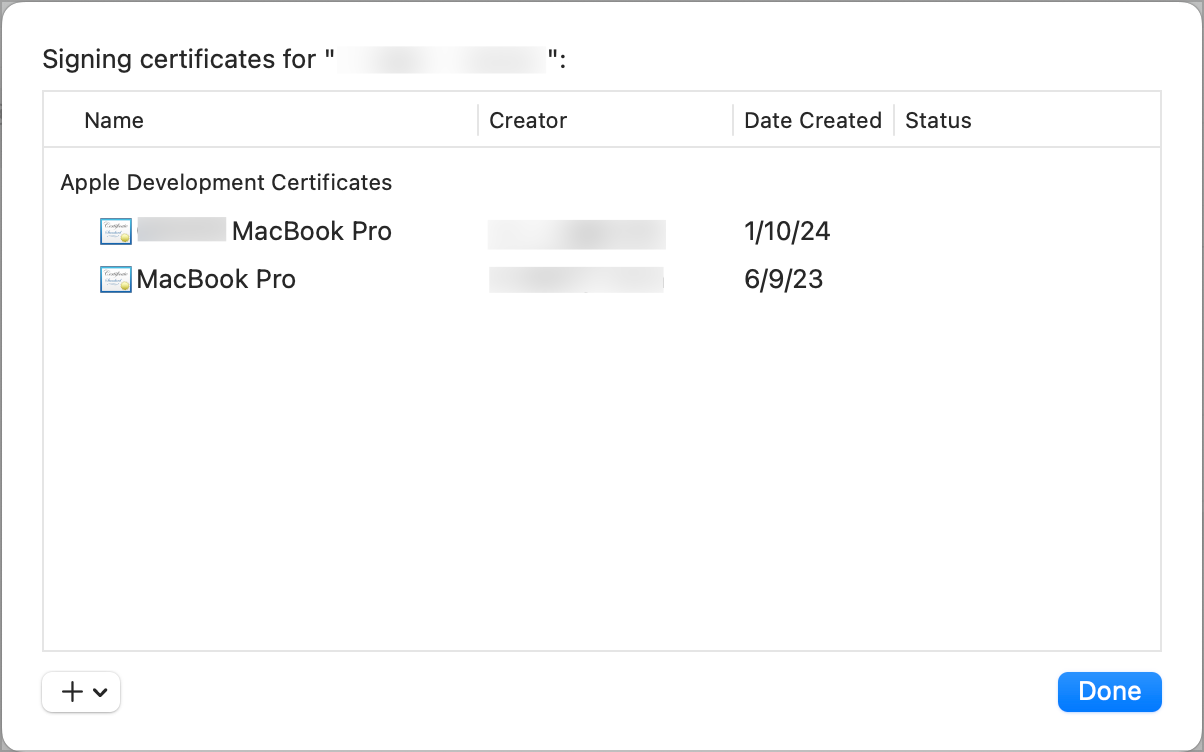
This creates the Signing Identity. You should see the name of your Mac with today's date. When finished, click the Done button.
Creating a provisioning profile for your app
For each app you create, you need to have XCode build a provisioning profile.
Plug in the iOS device (via USB) that you will use to test your app during development.
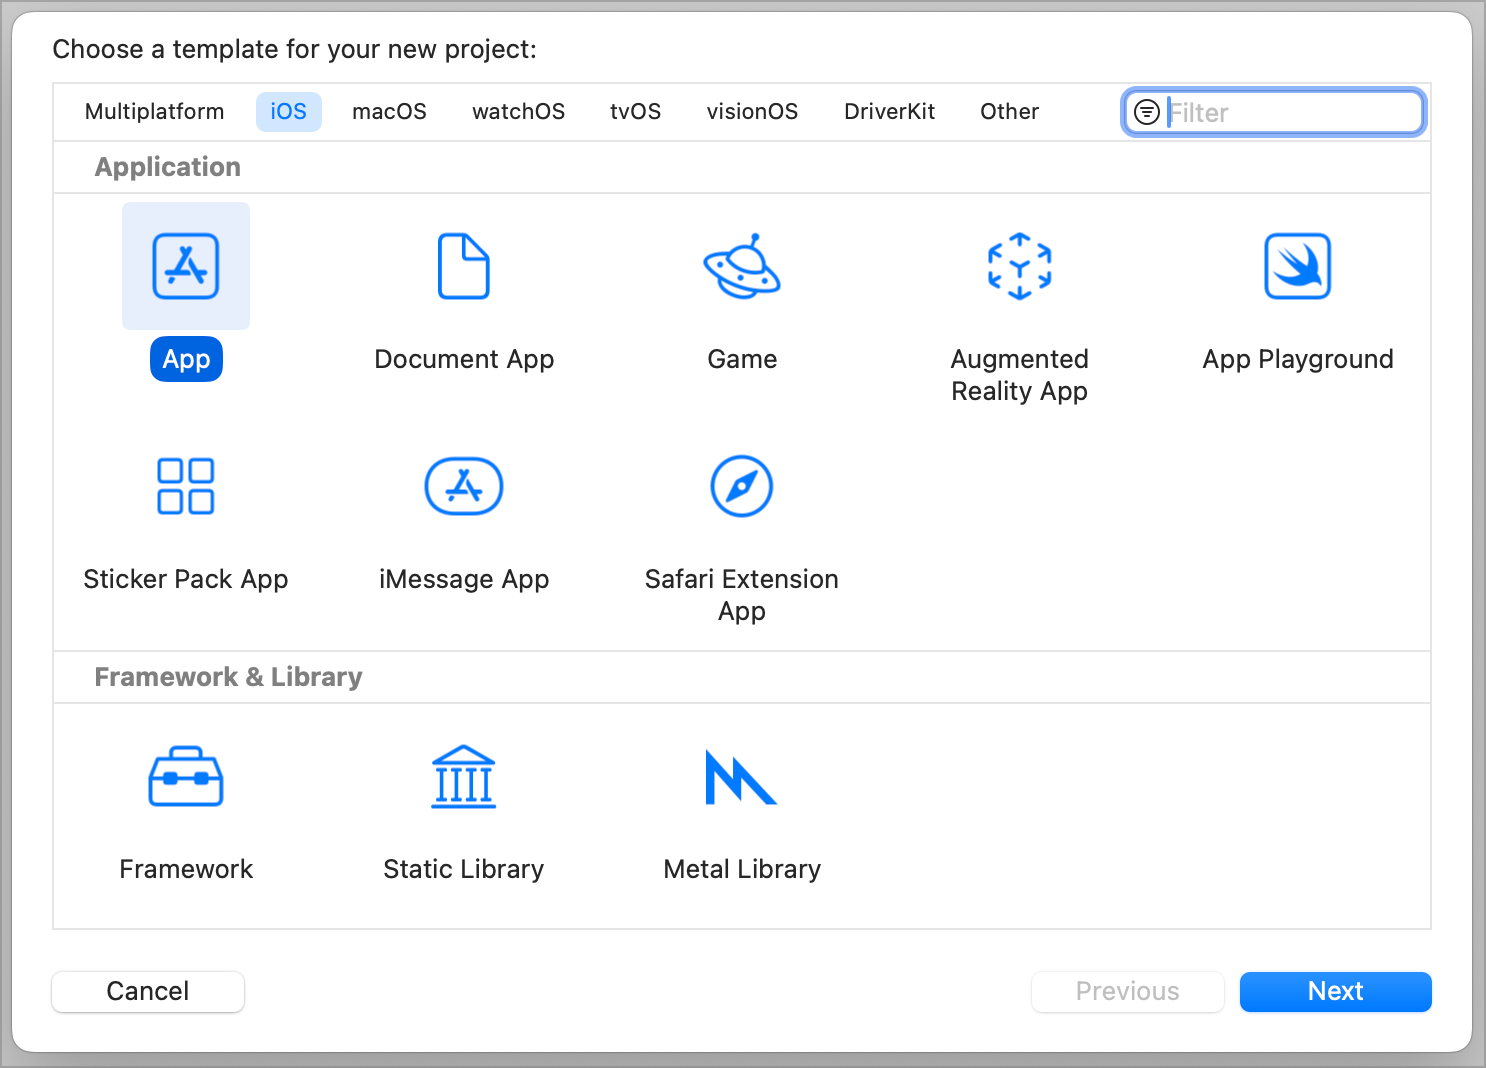
Create a new Xcode project: Choose File > New Project and select "iOS App" in the dialog and the click the Next button.
For the Product Name, enter the na me you will use (or have used) for your Xojo app.
For the Organization identifier, enter the first part of the Bundle Identifier (i.e. com.example). Click the Next button.
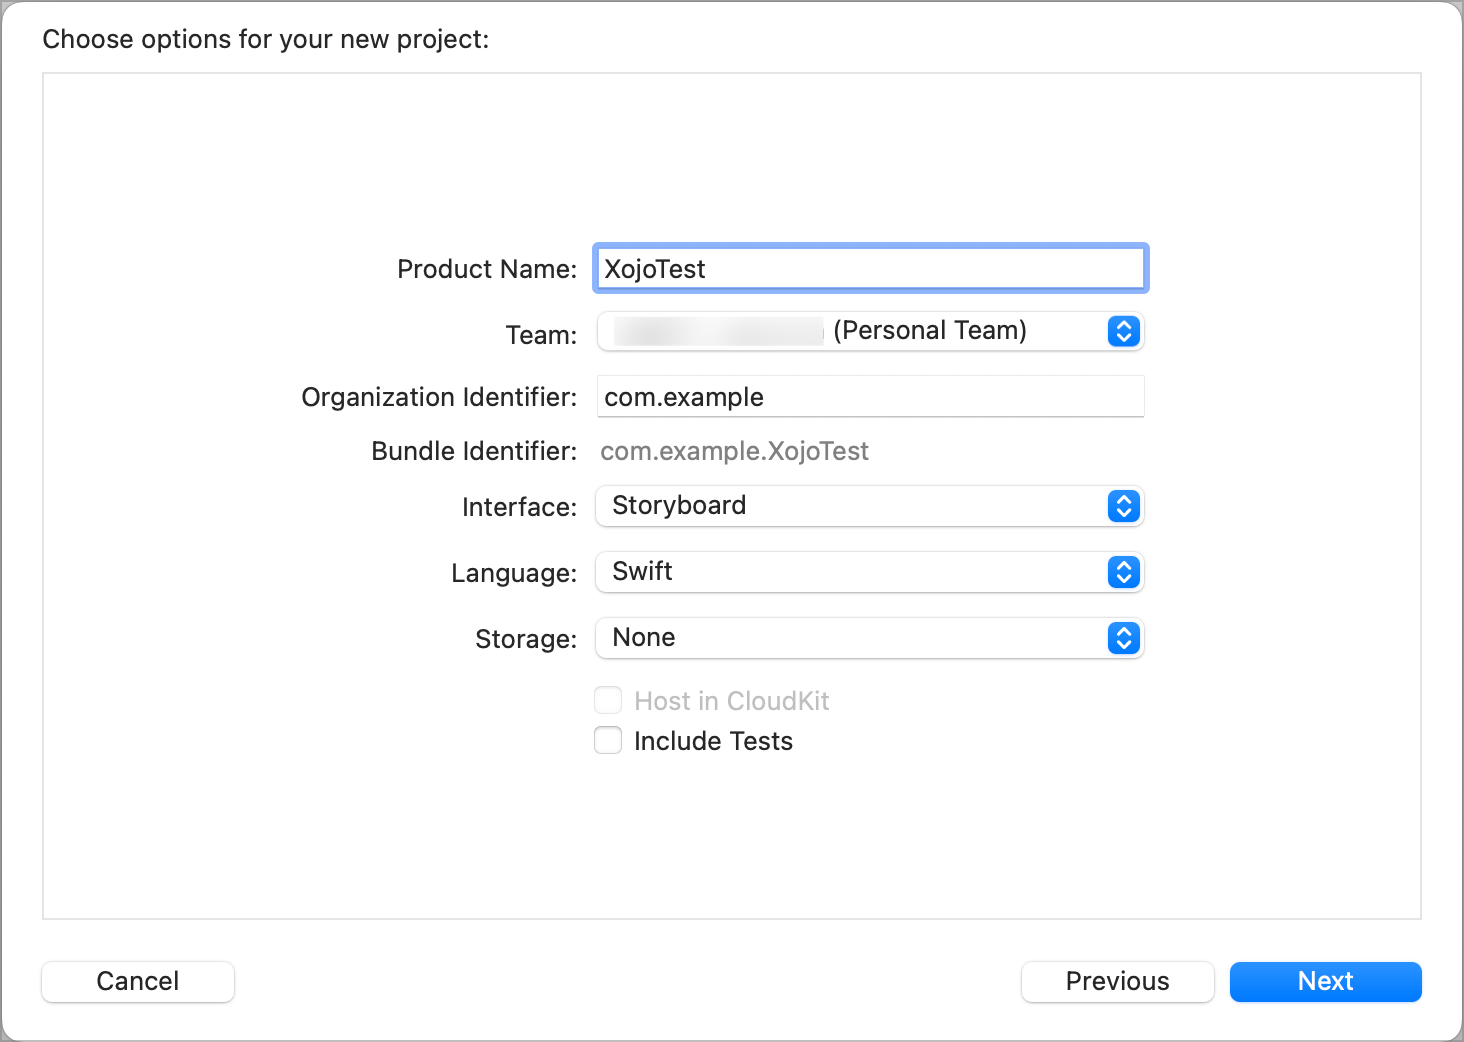
Select a folder to save the project. Make sure the Source Control checkbox is not checked since you're not going to use this project for anything. Click the Create button to create the project.
In the Signing & Capabilities section that appears, verify that the Bundle Identifier exactly matches what you will use (or have used) for your Xojo app. The next steps will only create a provisioning profile for a single app, so this Bundle Identifier is important. And you'll need to follow steps 5 and later for each new app you want to deploy.
In the Team drop-down, make sure your Apple ID is selected.

To the right of the project name near the top center of the window, make sure that the iOS device you have plugged in is selected.

If it is not, click to select your device from the list.
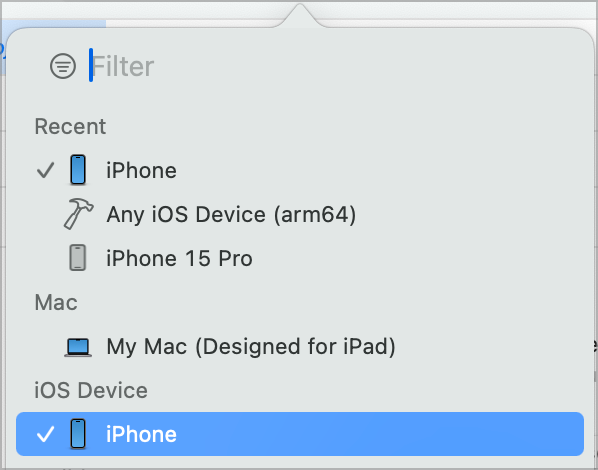
If your device does not appear in this list, you'll need to first configure the device for development.
Now click the Fix Issue button that is in the General area.
This will send the profile over to the device. You are now done with this Xcode project, so you can close it. Keep Xcode running as you'll want to use its Devices window to transfer the app you build with Xojo to the device.
Configuring your Xojo project
With Xcode configured, you can now configure you Xojo project to use the Bundle Identifier and Team.
Start Xojo and open your iOS project (or create a new one).
In the iOS Build Settings, enter the Bundle Identifier that you used in the Xcode project. It must match exactly.
In the Team drop-down, select the Apple ID you used with the Xcode project.
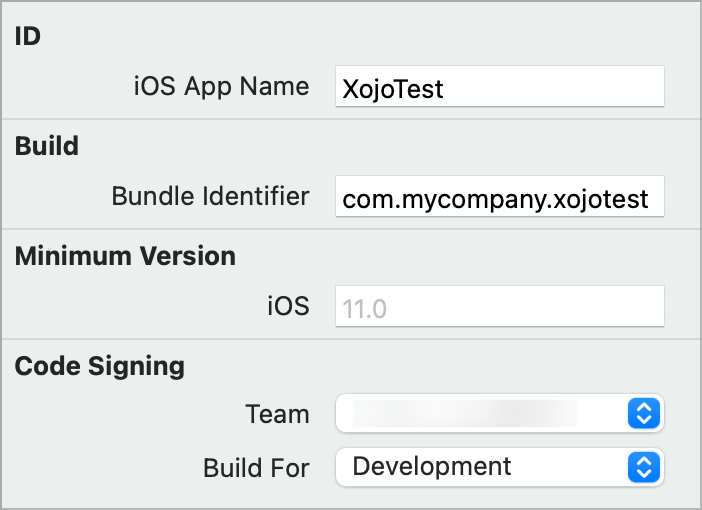
Make sure Development is chosen in the Build For popupmenu.
Building your Xojo iOS project
Now that your Mac and iOS device are configured with the provisioning profile, you can now build your iOS app using Xojo. If you had Xojo open during this process, you should close and re-launch it so it can correctly identify the newly created Provisioning Profile.
Click the Build button in Xojo to build the app. This code-signs your apps and compiles it for ARM using LLVM. This may take a little longer than running in the Simulator.
When your app is built you will get the app bundle (this is what gets installed on the device) and a .dSYM file (the debugging symbols).
It is important that you retain both of these files for builds you deploy. The dSYM file is used for analyzing crash reports that you may receive from your users and without it, it will be difficult to determine the cause of the crash. For more information, refer to the Apple document Understanding and Analyzing iOS Application Crash Reports.
If you submit device crash logs in a bug report, you will also need to include the dSYM file in order for us to interpret them.
Deploy to your device for testing
There are three ways to transfer the built app to the device you wish to use to test during development. You can debug on device from the Xojo IDE, use XCode or Apple's Configurator app.
On-Device debugging
In addition to using the iOS Simulator, Xojo allows you to run your iOS app from the IDE directly to your device.
You can learn how to do that here.
Using XCode to transfer your app to your device
Ensure your iOS device is plugged into the Mac via USB.
If the Devices window is not displayed, select it from the Window menu.
Click on the iOS device in the sidebar.
Click the "+" button (In the Installed Apps section) and select the app you previously built (or drag the app into the Installed Apps section). This immediately installs it on the iOS device.
On the device, tap on the app to launch it.
Using Apple's Configurator app to transfer your app to your device
Apple Configurator is a free download from the Mac App Store. This tool is primarily used for enterprise deployment of apps, so it can do much more than just deploy built apps to devices. Some people might prefer using it instead of the Xcode Devices window (you'll still have to set up your device using Xcode as described above, however):
Ensure your iOS device is plugged into the Mac via USB.
Run Apple Configurator.
On the "All Devices" view, double-click your iOS device.
Click on Apps in the Navigator on the left. This displays all the apps on the device.
Click the Add button in the toolbar, select "Apps" from the menu and in the dialog, click "Choose from my Mac...".
Select the app you previously built. Click OK to copy the app to the device.
On the device, tap on the app to launch it.
Getting crash logs
You can retrieve crash logs from your iOS device using the Devices and Simulators window in Xcode. Plug your device in via USB and select it in the list of devices. Then click the "View Device Logs" button. You'll see a list of crash logs (it may take a few minutes to download if you have a lot of them). Find your app in the list and click it to see the log. When submitting Feedback cases with crash logs, wait to ensure that the symbols for your log are loaded before you send the log.
iOS Console is also useful to reading iOS console logs.
Troubleshooting
If you are unable to Run/Build from Xojo, check your Xcode Command Lines Tools setting. Start Xcode, open Settings and click the Locations tab. Check the Command Lines Tools setting to make sure it has a selection that matches the version of Xcode you have installed.
If after following the steps on this page you still can't deploy to your device, it's likely due to certificate expiration or profile installation problems and is something even users of Xcode have to deal with. Try removing all profiles are located at ~/Library/Mobile Device/Provisioning Profiles/ and then remove all expired certificates using Keychain Access app.