Introduction to Xojo Cloud
Xojo Cloud is for those that want the fastest and easiest way to deploy web applications. Xojo Cloud is a fully managed, highly secure hosting environment for your Xojo web apps and has these features:
One-click deployment directly from Xojo
Excellent security, with firewall and SSL support
Automatic load balancing to support many concurrent users
Simple yet powerful control panel
Built-in SSL support
MySQL, PostgreSQL and SQLite databases
Unlimited app deployments (memory permitting)
Support for SFTP
Getting started
Xojo Cloud is a fast, easy way to deploy your Xojo web apps.
To use Xojo Cloud you will need to have a Web license and have purchased a Xojo Cloud server. Make sure you sign in to the Xojo IDE using your Xojo Account.
To start using your Xojo Cloud, you need to deploy a web app to it. Here's how you can create a simple web app to try it out. 1. Create a new Web project and drag some controls onto WebPage1.
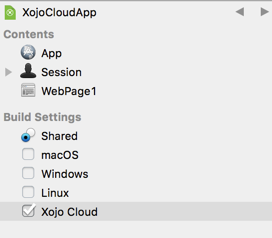
In the Build Settings section of the Navigator, select Xojo Cloud.
Choose your Xojo Cloud server from the drop-down menu using the Inspector on the right.
In the Domain Name field, enter a domain (if you have one) or enter a name to use as a subdomain of xojocloud.net. For example, if you enter "MyNiftyApp", then your app will be accessible from myniftyapp.xojocloud.net.
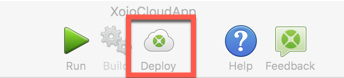
Click the Deploy button on the toolbar (or choose Deploy from the Project menu) to build your web app and deploy it to Xojo Cloud.
Xojo will open your default web browser to the URL of your deployed app when the deployment has finished.
Check out the Eddie's Electronics app to see a Xojo Web app running on Xojo Cloud.
If you require technical support for your Xojo Cloud server, contact support.

Visit the Xojo Store to purchase your own Xojo Cloud.
Deployment
As shown in Getting Started, these are the steps to deploy to Xojo Cloud: 1. In the Build Settings section of the Navigator, select Xojo Cloud.
Choose your Xojo Cloud server from the drop-down menu using the Inspector on the right.
Enter a domain or subdomain name.
Click the Deploy button on the toolbar (or choose Deploy from the Project menu) to build your web app and deploy it to Xojo Cloud.
After this initial deployment, to deploy again you only need to click the Deploy button on the toolbar.
You can upload as many apps to your Xojo Cloud server as its available memory and server capacity allows.
Accessing your Xojo Cloud server from the Xojo IDE
If your computer has a firewall enabled, these ports need to be open in for the Xojo IDE to communicate with the Xojo Cloud server: 54322 and 54320.
Using Xojo Cloud To send remote notifications
All Xojo Cloud servers are pre-configured to send remote notifications. There is no extra charge for sending remote notifications nor is there any limit.
More information
Refer to these topics to learn more about Xojo Cloud: