Remote debugging
You can use the Remote Debugger on Raspberry Pi to make it even easier to make Raspberry Pi apps with Xojo. The Remote Debugger is described in full in the Remote Debugging but this brief overview should allow you to get up and running on the Pi quickly.
Set up the Remote Debugger on the Pi
The Remote Debugger is included in your Xojo installation. Go the the installation folder and then find this file: Extras/Remote Debugger Desktop/Linux ARM.zip
Copy this file to your Raspberry Pi and unzip it. Use SFTP to copy the file as described in Getting Started.
On the Pi, find the ZIP file you copied over, right-click on it in the File Manager and select "Extract Here".
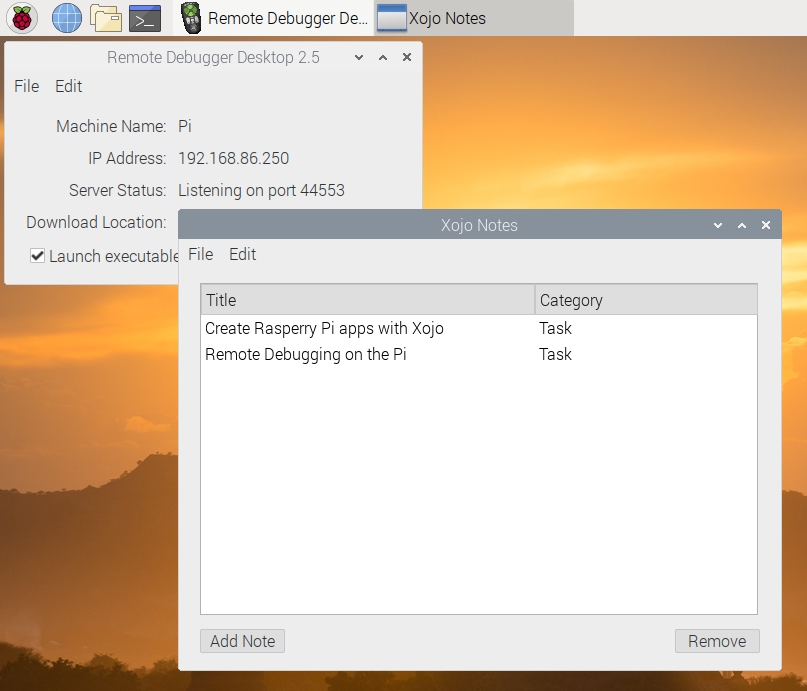
This creates a folder called "Remote Debugger Desktop". Open this folder and then double click the "Remote Debugger Desktop" file to start the Remote Debugger.
In the Remote Debugger, go to the Edit menu and select Options. Enter a name for your Pi in the "Name:" field.
In the Download Location section click Choose and choose a location for your debug apps to be copied. Using the Desktop works for most people.
Click OK to save these changes.
Tell Xojo that Raspberry Pi is a remote debugging host
Now you can start Xojo on your development machine and add the Pi as a Remote Debugging host.
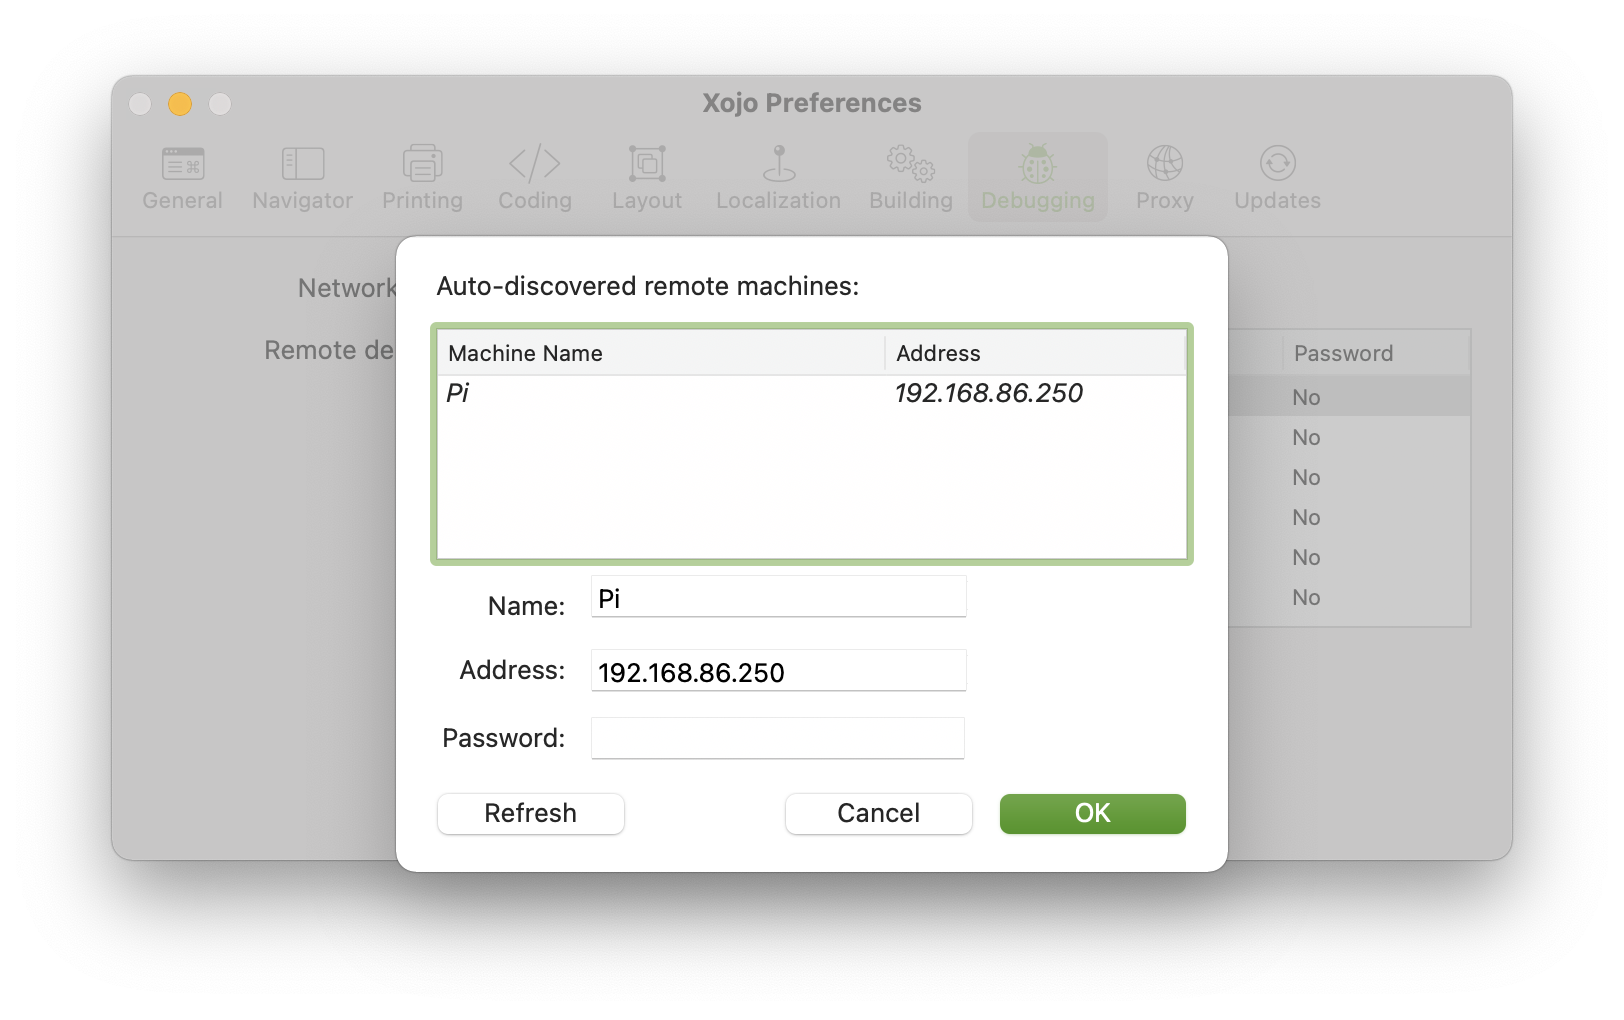
Open the Xojo Preferences and click the Debugging panel.
In the Remote Debugging Hosts section, click the Add button to add your Pi. It's likely your Pi shows up as an auto-discovered remote machine. If it does, just select it and click OK.
If it does not show up you'll need to manually add it by entering a name and the IP address of the Pi (which is displayed in the Remote Debugger running on the Pi if you need to go back to find it).
Click OK to save the changes.
Debug run an app on the Raspberry Pi
It's now time to try running a Xojo app on the Pi.
Open a Xojo example project. A good one to try is: Examples/Sample Apps/XojoNotes/XojoNotes - Desktop
In the Build Settings section of the Navigator, click on Linux.
Finally, to run the project on the Pi, click the Project menu, go to "Run Remotely" and choose your Pi that is listed there. This builds your app for Pi, transfers it to the Pi and then launches it in debug mode.
While your app is running on the Pi, you can use Xojo to debug it. You app will stop at breakpoints allowing you to view variables and other information just as you can when you are debugging normally.