Web QuickStart
Welcome to Xojo, the easiest tool for creating your own web apps. Xojo is made up of a rich set of graphical user interface objects, the modern object-oriented Xojo programming language, an integrated debugger, and a multi-platform compiler. Together they make up the Xojo Integrated Development Environment or IDE.
With the IDE, you can build your app's interface by dragging and dropping interface objects onto the app's web pages and dialogs. In this QuickStart, you will see how easy it is. Xojo provides you with the tools you need to build the apps you want.
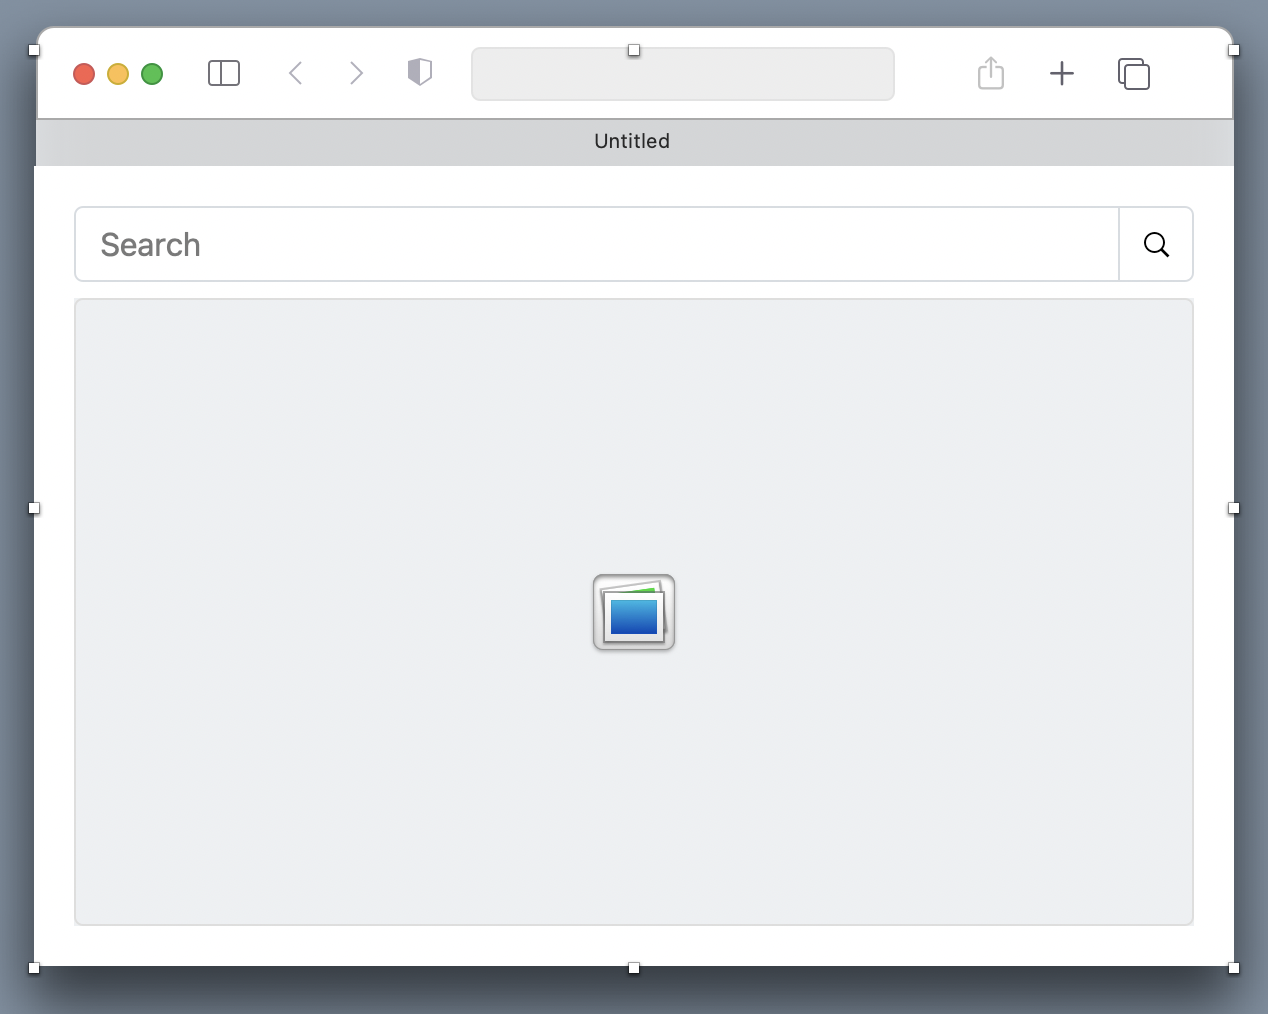
This QuickStart is for people who are new to programming or new to Xojo. It will give you a gentle introduction to the Xojo development environment and lead you through the development of a working web app (an app that uses a web service to search country flags). It may take you up to 15 minutes to complete this QuickStart. This is what the completed app will look like:
Getting started
Now is the time to start Xojo. When it finishes launching, the Project Chooser appears.
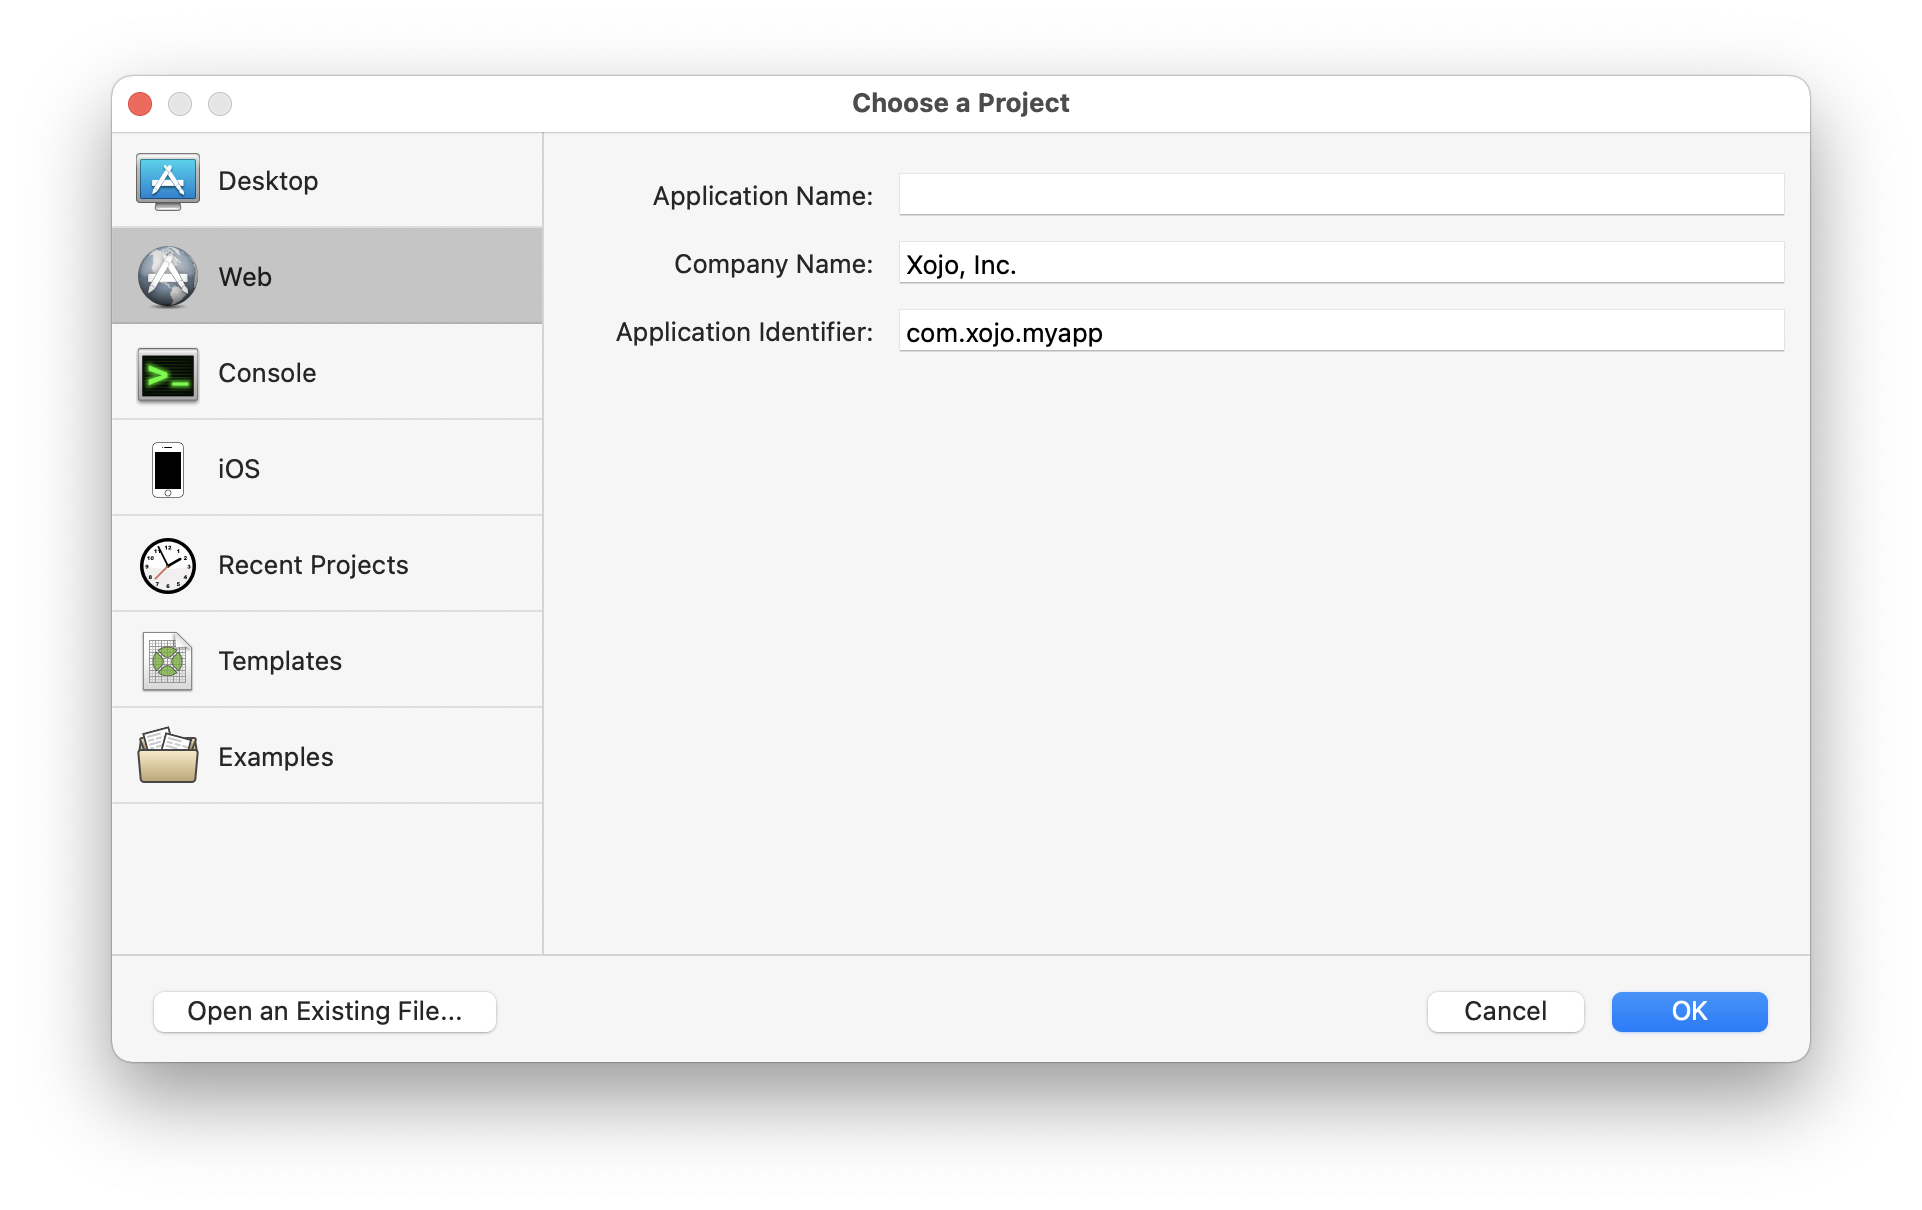
Xojo lets you build several different types of apps (Desktop, Web, Console and iOS). For this QuickStart, you are building a Web app, so click on Web.
You will now see three fields that need values:
Application Name: the name of your app. This will be the filename of the actual app file that gets created.
Company Name: the name of your company or your own name. You may choose to leave this blank.
Application Identifier: a unique identifier for this app. It will automatically populate using what you enter for the Application and Company Names, but you can also change it to whatever you want.
In this QuickStart, you will build a web application that makes use of a web service that lets you search for and display flags of various nations around the world.
Enter
FlagSearchas the Application Name. You can enter a company name or leave it blank.Click OK.
The main Xojo window (called the Workspace) opens. This is where you will begin designing your app.
Using the workspace
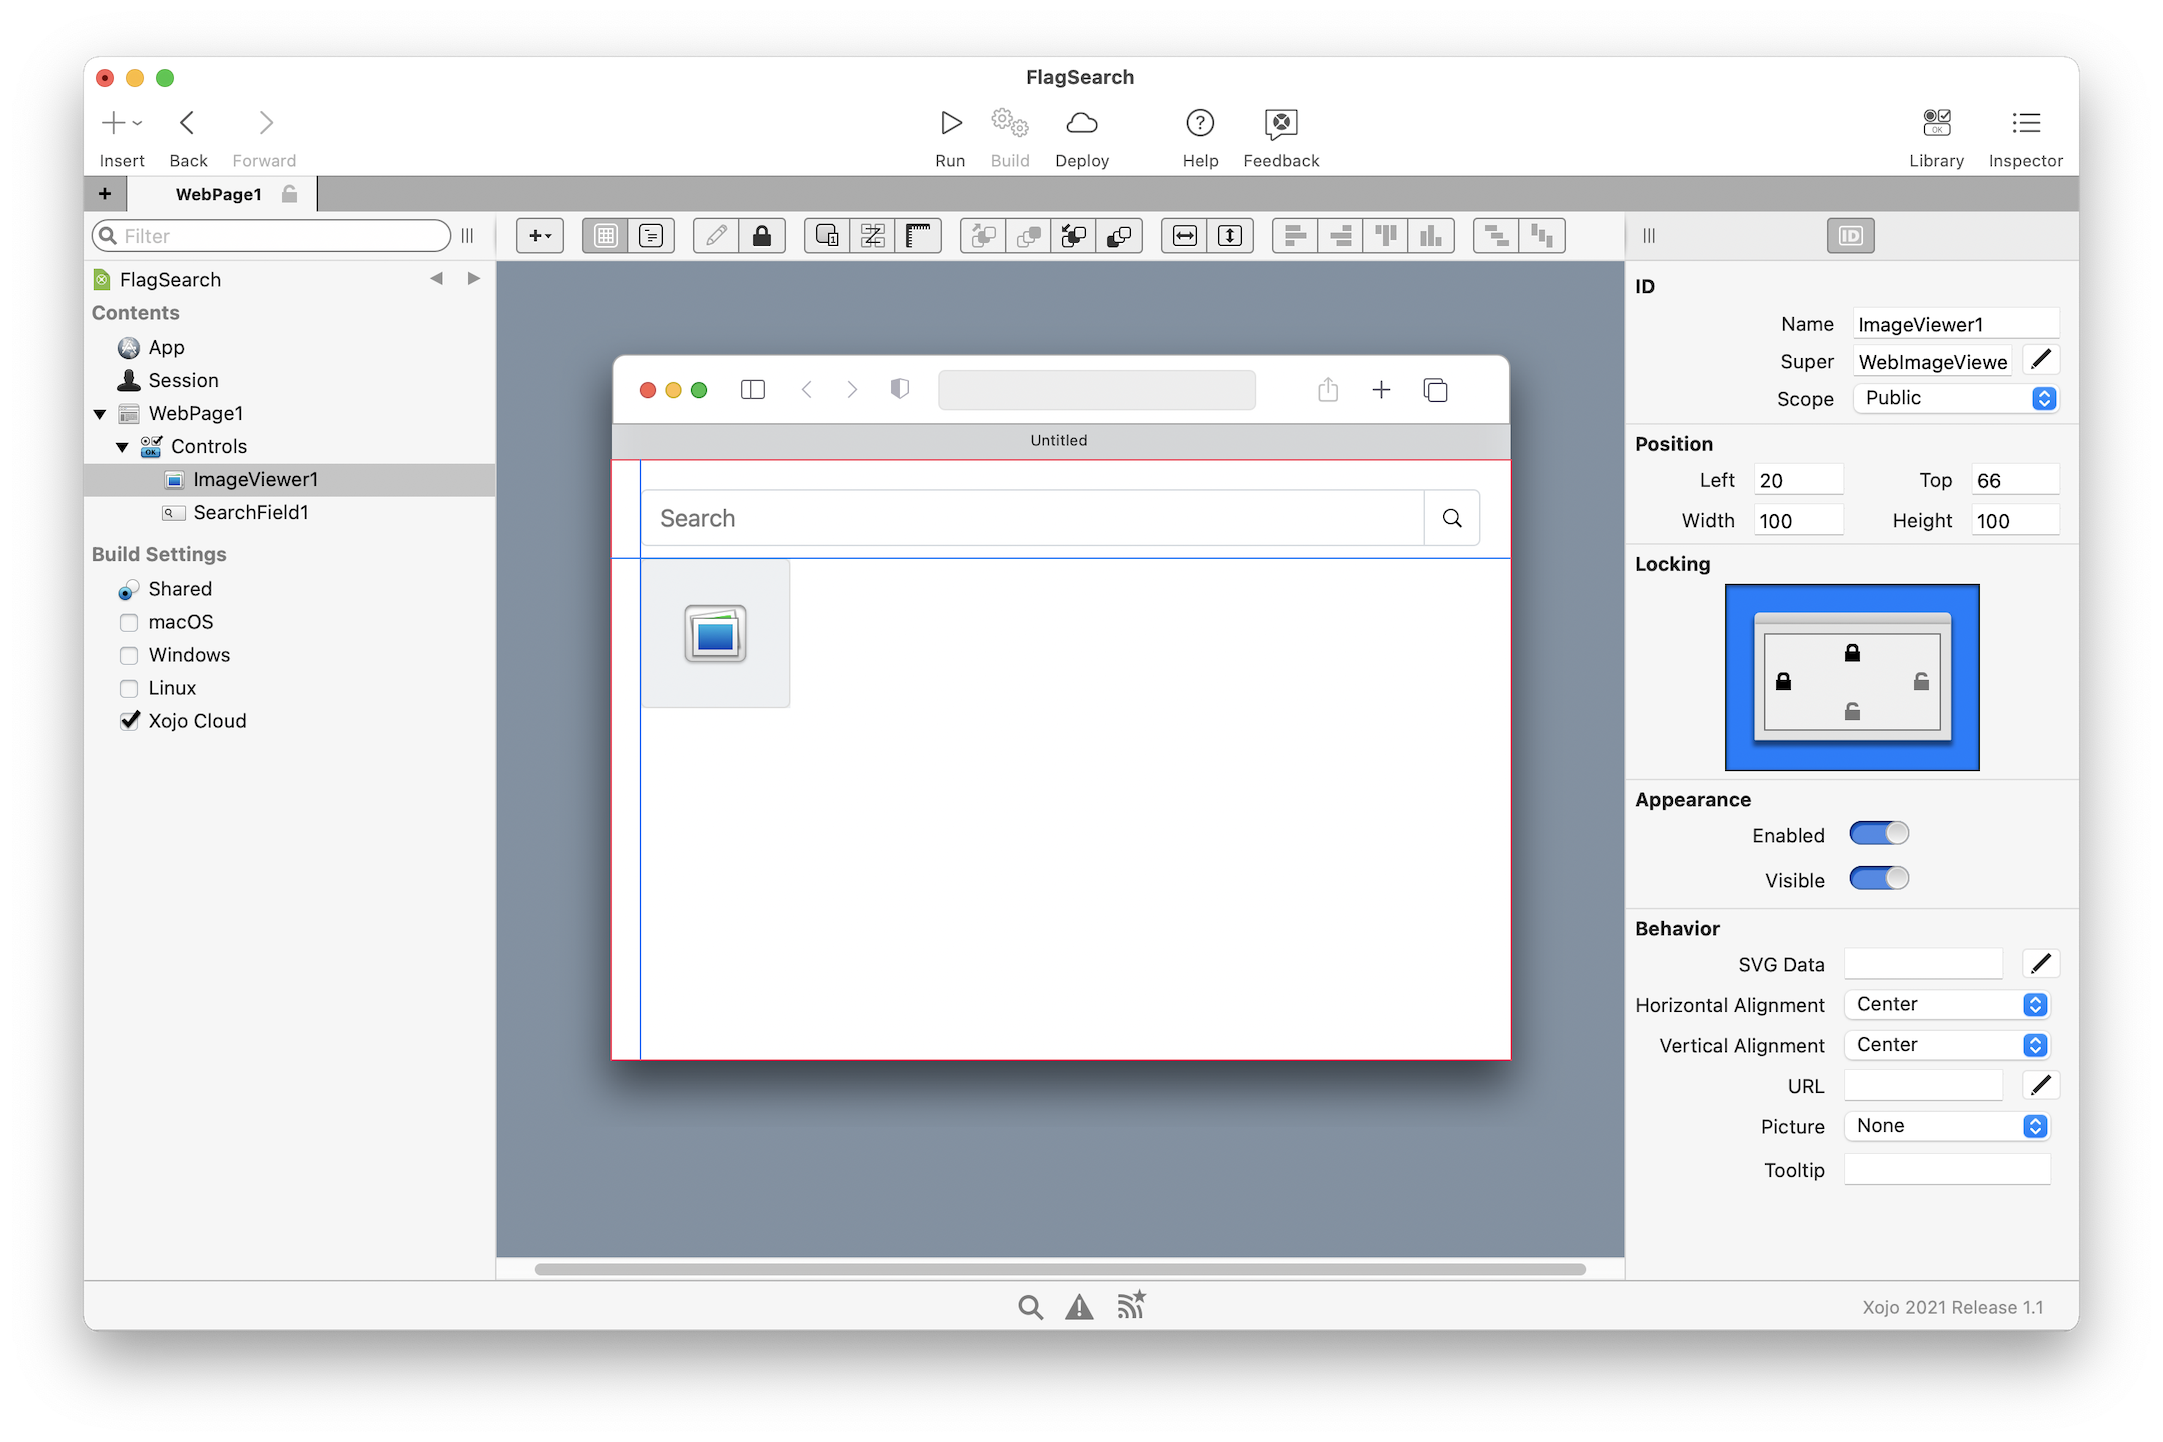
Xojo opens a Workspace window displaying your project with the default Webpage displayed in the Layout Editor.
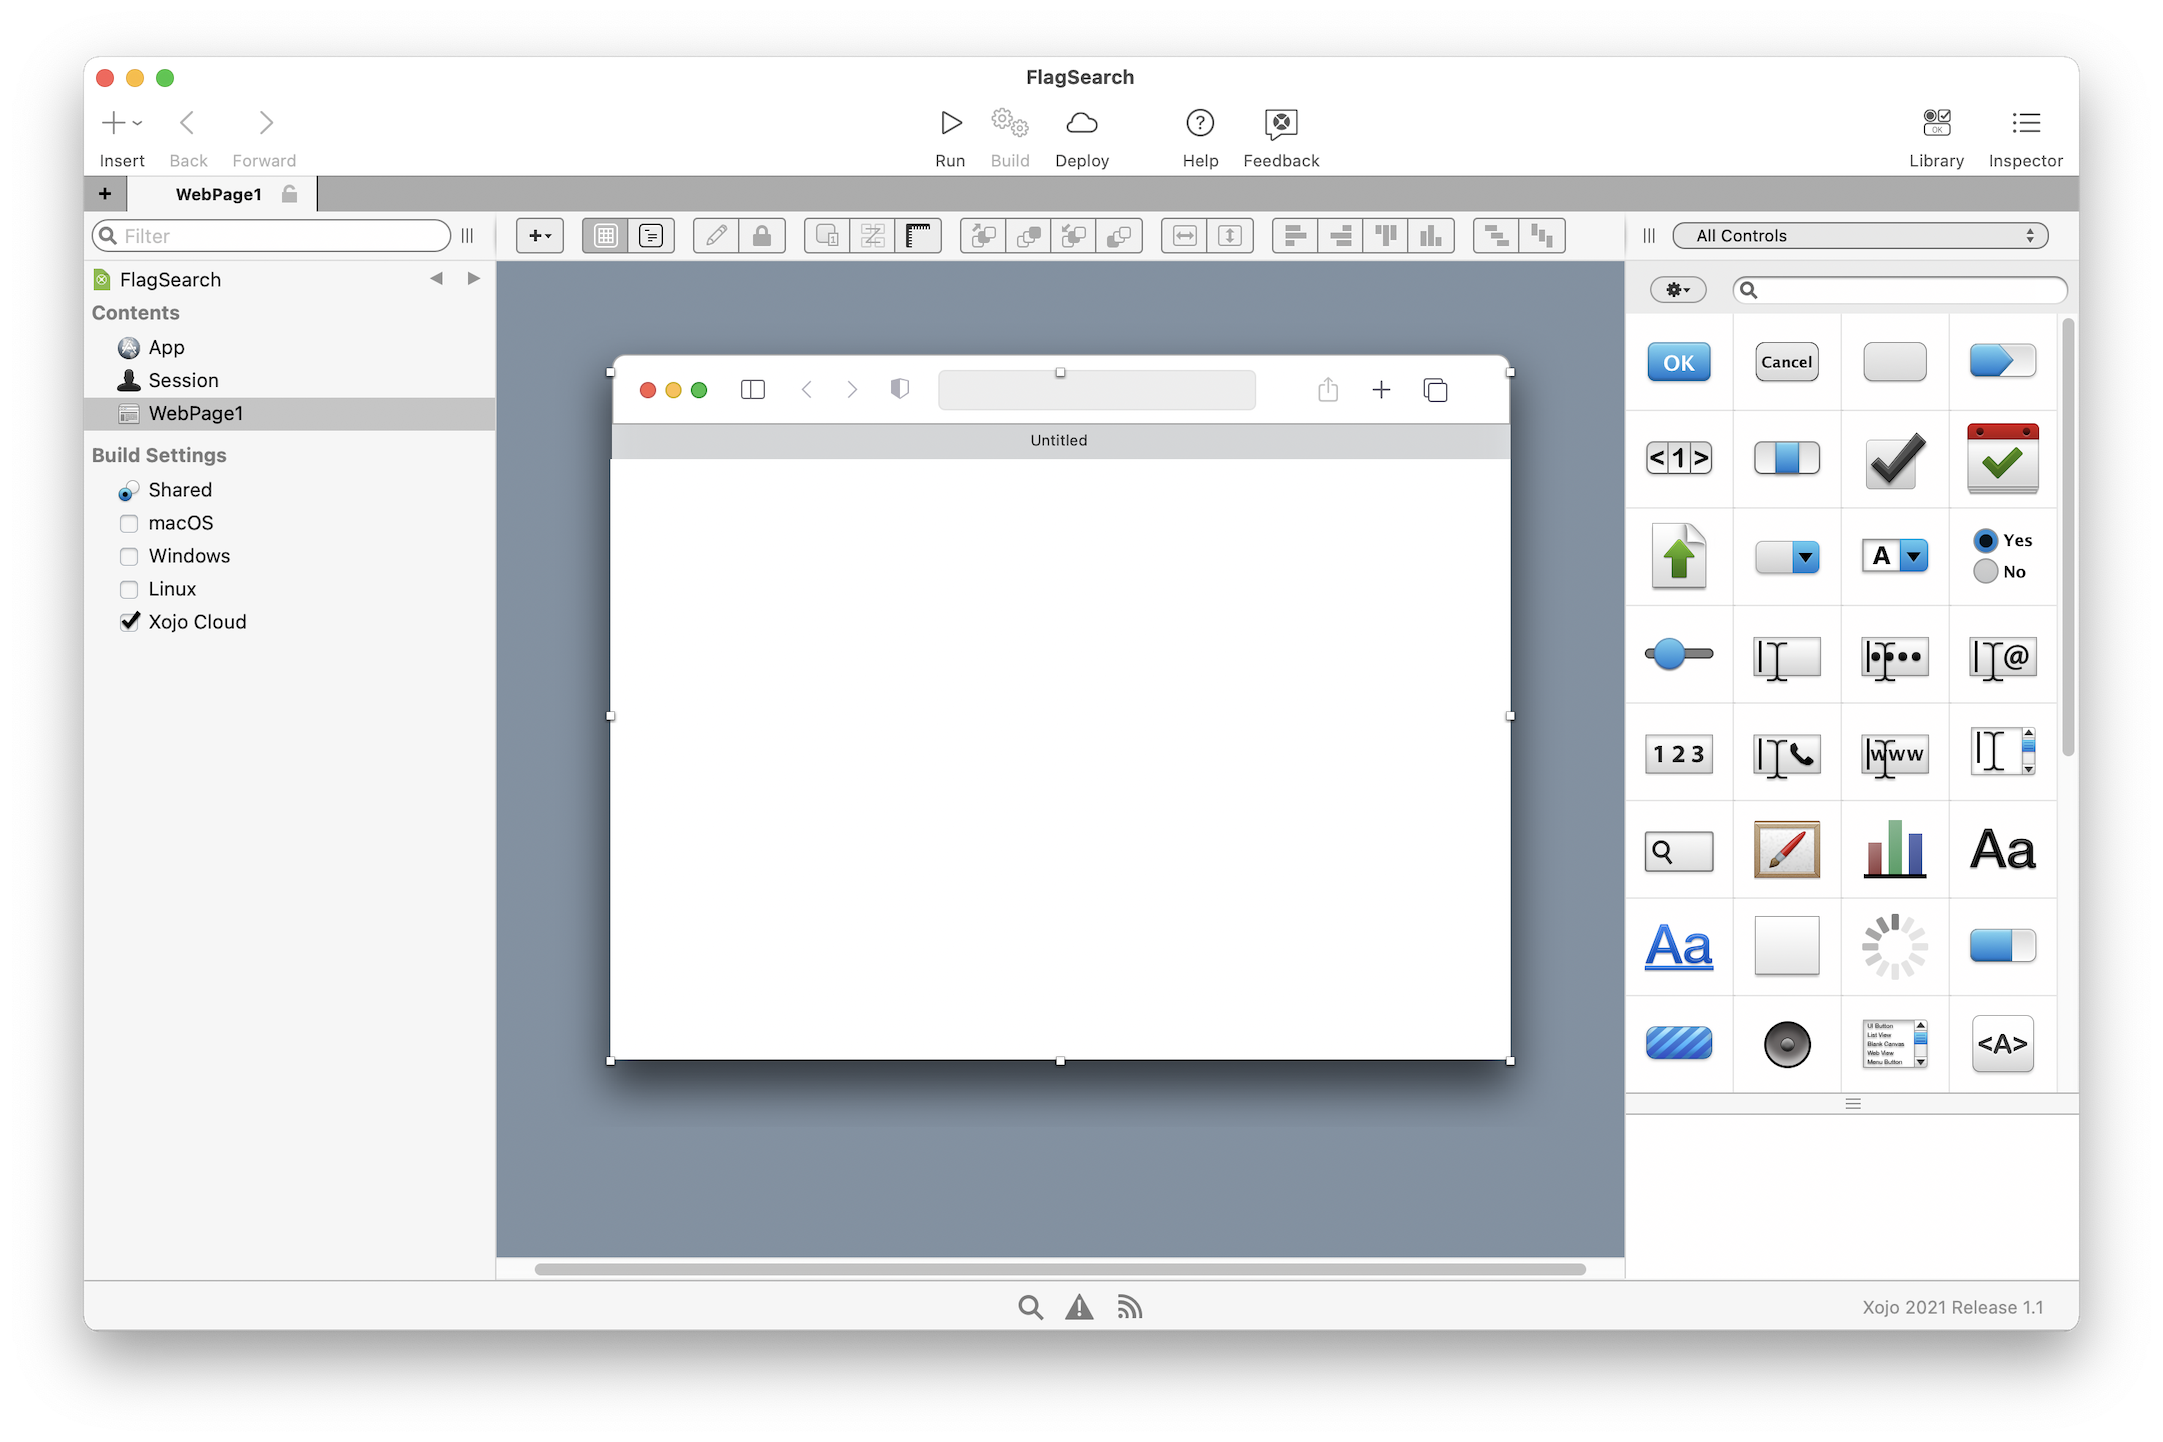
Navigator: the area on the top left shows you all the items in your project. By default you can see WebPage1 (which is selected), the App object and the Session object. You use the Navigator to navigate within your project.
Layout Editor: the center area is the Layout Editor. You use the Layout Editor to design the user interface for the windows in your app. It shows the window and previews how it looks when the app runs. In this illustration, the window is blank because you haven't yet added any user interface controls from the Library.
Library: the area on the right is the Library and shows the controls and interface elements that you can add to a window or to the project. You design the window by dragging controls from the Library to the window. You can also add a control to the window by double-clicking it. You can change how the controls display in the Library by clicking the small gear icon and choosing a different setting.
Tip
If the Library is not visible, click the Library button on the toolbar to show it.
Inspector: Not shown in the above illustration is the Inspector, which allows you to see and change the properties for the selected control. This area of the Main window is shared with the Library. You can show the Inspector by clicking the Inspector button on the toolbar. The Inspector shows information about the selected item in the Navigator or Editor. The contents of the Inspector changes as you click on different items. You change an Inspector value by entering a new value in the field to the right of the field label.
Creating the flag search app
The best way to quickly learn how to use Xojo is to create a simple app. For this QuickStart, you will create a web app that accesses a web service that returns a picture of the flag of the country whose name you provide it.
A Xojo app consists of a collection of objects, called classes. Nearly everything in Xojo is a class, including your web pages and the controls on the web page. In the Flag Search project, you will use the default WebPage class to create your web page and you will add controls (user interface classes) to the web page to create the design.
Flag Search uses these controls:
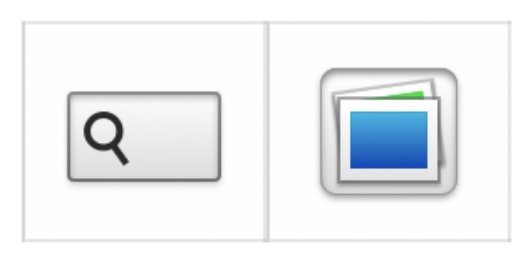
SearchField: A field where you can enter the name of a country then press Return to search for its flag.
ImageViewer: An ImageViewer control is used to view images. In this project, it will display the flag whose name is entered in the Search Field.
The next sections walk you through creating the user interface and adding the necessary code to make the app work.
Building the user interface
WebPage1 is now open in the Layout Editor. It's time to start adding controls to the web page. You will add a SearchField and an ImageViewer to your webpage by dragging it from the Library on the right side of the Workspace and dropping them on your webpage.
The finished layout will look like this:
Let's get started.
In the Library, click on the SearchField and drag it to the top-left corner of the web page in the Layout Editor. As you get close to the edges of the page, you will see alignment guides that help you position the control.
Drag the ImageViewer control so that's underneath the SearchField. Use the alignment guides to help you determine where to drop it.
Finally, let's resize the controls to best utilize the space.
Click on the SearchField to show the selection handles.
Click the center-right handle and drag it to the right until the alignment guides tell you it is close enough to the right edge of the webpage.
Click on the ImageViewer to select it.
Drag the selection handle in the control's lower-right corner and resize it to fill the remaining space. As you approach the bottom and right edges of the layout, alignment guides will appear letting you know to leave some space between the control and the edge of the page.
Editing controls
There's more to creating a nice user interface than just dragging and dropping controls. You'll need to make a few changes to finish your interface. Next make the SearchField and ImageViewer controls automatically resize themselves based upon the size of the window in which the webpage is displayed. These changes are done using the Inspector.
Let's start with the Search Field:
Click on the Search Field on the page to select it.
If the Inspector is not visible, click the Inspector button in the toolbar to display it.
Note
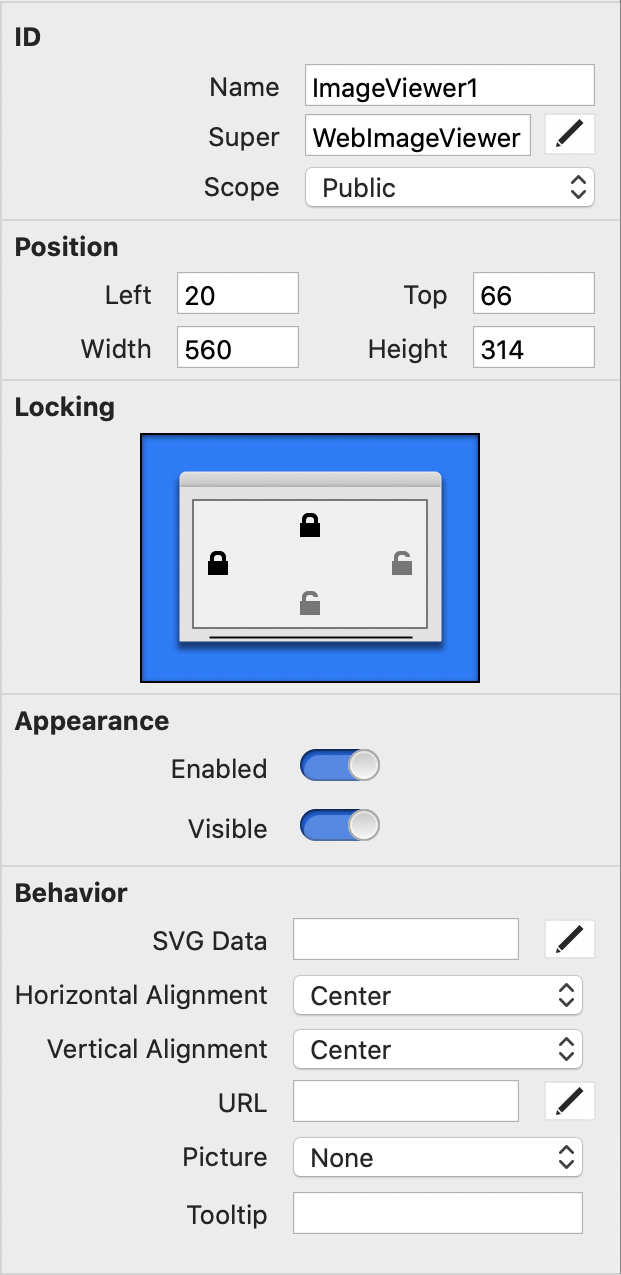
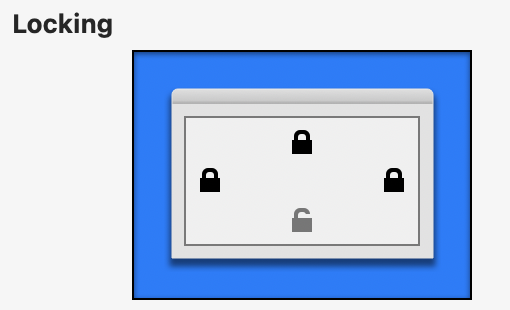
In the Inspector notice that the Locking section shows four locks. The top and left are already locked indicating that the Search Field's top and left sides are locked by default.
Click the lock on the right side to lock the right side of the button to the right side of the page.
Now let's change the ImageViewer to use all the available space on the webpage.
Click on the ImageViewer to select it.
Note
In the Inspector notice that the Locking section shows four locks. The top and left are already locked indicating that the ImageViewer's top and left sides are locked by default.
Since you'll want the ImageViewer to become wider or narrower with the window, click on the lock on the right hand side to lock the ImageViewer's right side to the right side of the page.
Since you'll want the ImageViewer to become taller and shorter with the window, click on the lock on the bottom to lock the ImageViewer's bottom side to the bottom side of the page.
Click on the webpage's title bar (where it says “Untitled”) to select the page itself.
Grab the selection handle in the lower-right corner of the page and try resizing it a bit to see how the SearchField and ImageViewer behave with their locking properties changed.
Getting ready for code
When you start writing code you will sometimes need to refer to the webpage or controls on the webpage. Xojo gives them default names such as WebPage1, SearchField1 and ImageViewer1 but those names are not particularly descriptive. Giving webpages and controls sensible names will help make your code easier to read. Let's do it.
Click on the webpage title to select WebPage1.
In the Inspector, change the Name from
WebPage1toFlagSearch.Change the Title property to
Flag Search.Click on the SearchField.
In the Inspector, change the Name to
CountryNameSearch.Change the Hint property to
Enter the name of a country.Click on the ImageViewer to select it.
Change the Name property to
FlagViewer.
Adding code
Your application is almost complete. Now it is time to add the code that will find the flag based upon the country name the user enters and display it in the FlagViewer control. Xojo uses an object-oriented programming language that is quite easy to learn. You need only one simple line of code to finish your project!
The code you will write needs to:
Execute when the user presses the Return key or clicks the search button on the right side of the Search Field.
Because it will be utilizing a web service that uses dashes instead of spaces in country names, change spaces the user enters into dashes.
Combine the updated value the user entered with the URL of the web service to create a URL that is then assigned to the FlagViewer so that it can retrieve and display the appropriate flag.
Let's get started.
Double-click on the Search Field to open the Add Event Handler dialog box.
Select the Pressed event. This event fires when the user presses the button.
Enter the following line of code:
FlagViewer.URL = "http://flagsearch.xojo.com/API?search=" + Me.Text.Replace(" ", "-")
Note
This line of code creates a URL to be used to perform the search. The first part (in quotes) is the URL that the flagsearch service expects to do a search. Added to that is Me.Text.Replace(" ", "-"). Me in this case refers to the control itself (the CountrySearch field). Text refers to its Text property and the Replace function is then replacing any spaces you entered with a dash because spaces are not allowed in URLs. This completed URL is then assigned to the URL property of the FlagViewer control which forces it to attempt to access the picture at that location.
That's it. Your first web application is complete.
Saving your project
Before we run the app to test it, it's a good idea to save your project so should something go wrong you don 't lose your work:
Choose File > Save.
When the Save As dialog box appears, enter
Flag Searchas the name of your project.Press the Save button.
Running your app
Now let's test your finished web application:
Press the Run button in the toolbar. Xojo will compile your application and as long as there are no errors, it will launch the application on your computer and then launch your browser to display the app.
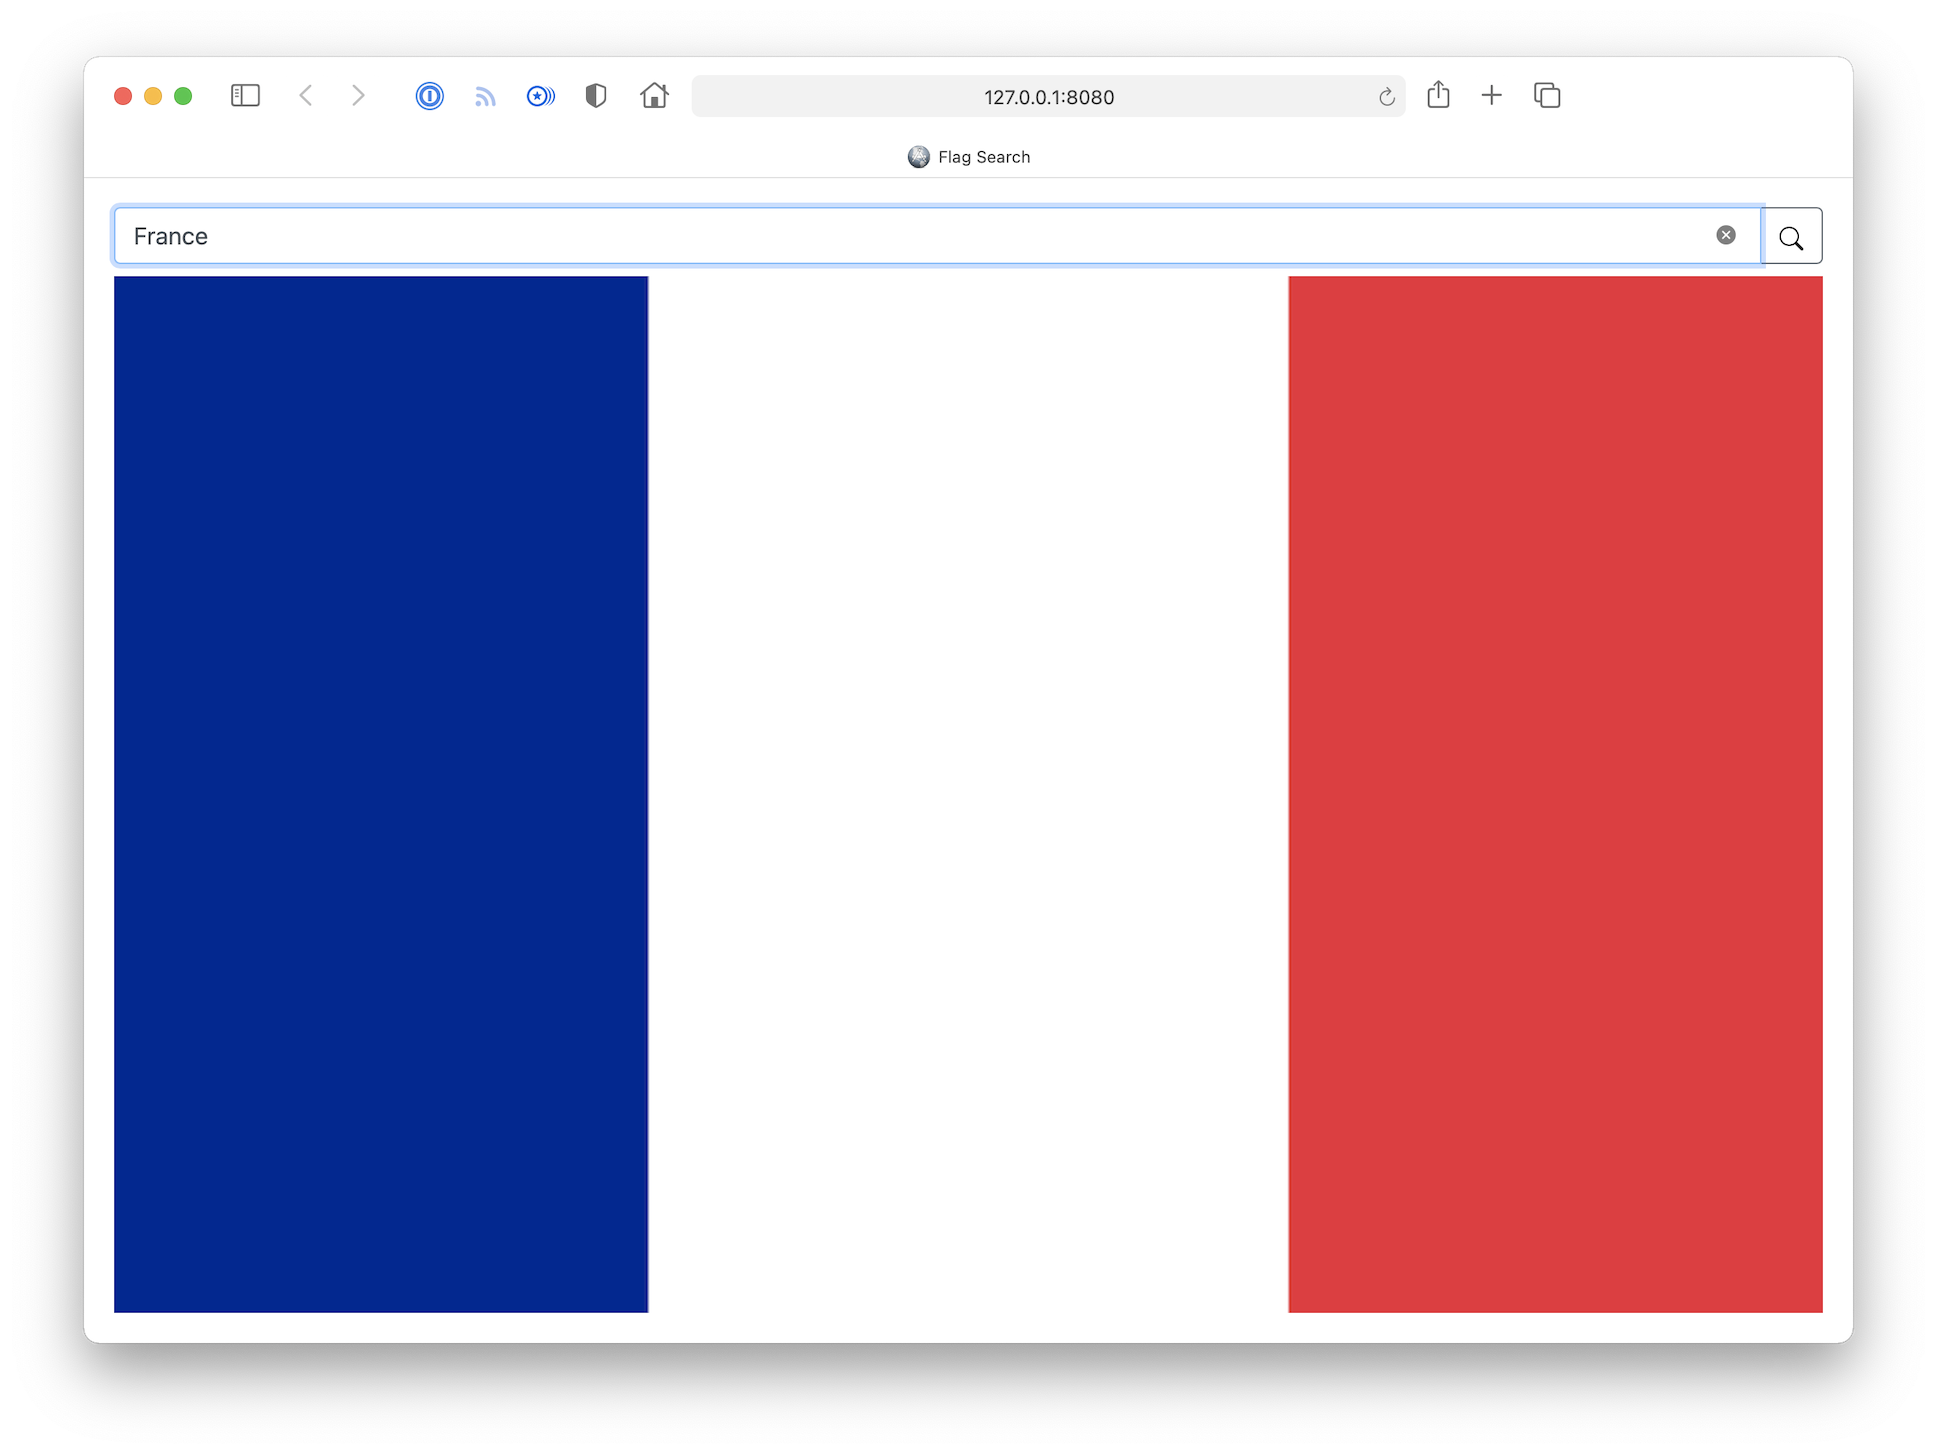
When your browser appears, click in the Search field and type
France.Press Return.
The flag of the country of France should appear. If it doesn't make sure you spelled it correctly. Try searching for the flags of other countries as well. When you're done, close the tab or browser window and then return to Xojo. It may take a few minutes for Xojo to realize you have closed the browser so click the Stop sign button in the Xojo window to stop execution of your app.
Tip
If no flags are appearing, make sure you are connected to the Internet. If you are, recheck the line of code you entered. Make sure you used http and not https for example.
Next steps
The QuickStart has introduced you to Xojo. You've learned how to make your first app by designing a web page, adding controls and writing code. You should next work through the Web Tutorial and then explore the Introduction to Xojo Programming book if you are new to programming. Be sure to also read What is Xojo? and review the API section of the documentation to continue learning how to create great web apps using Xojo.