How to apply a blur effect on iOS
Since Xojo 2019r3 we have the ability to apply a blur effect on any of the MobileRectangle instances we may be using in the design of our iOS apps. Why we would want to do that? For example, in order to make our frontmost view contents to stand over those found in the background! And the best part is that we can achieve this very easy.
The steps involved in applying this technique are really simple:
Make sure that the parent view containing your MobileRectangle instance (the one you want to use to apply the blur effect) has its background color set to transparent. How you can achieve this? just make sure that its FillColor is set to Clear.
Invoke the SetEffect method on the MobileRectangle instance that will apply the Blur effect (this control should be the frontmost layer to blur all the contents behind it).
Use any of the MobileRectangle.BlurStyles values you want to apply from the 21 available (it is an Enumeration).
Adding the base view in the hierarchy
Let's put these easy rules into practice! For that, create a new iOS project in the Xojo IDE.
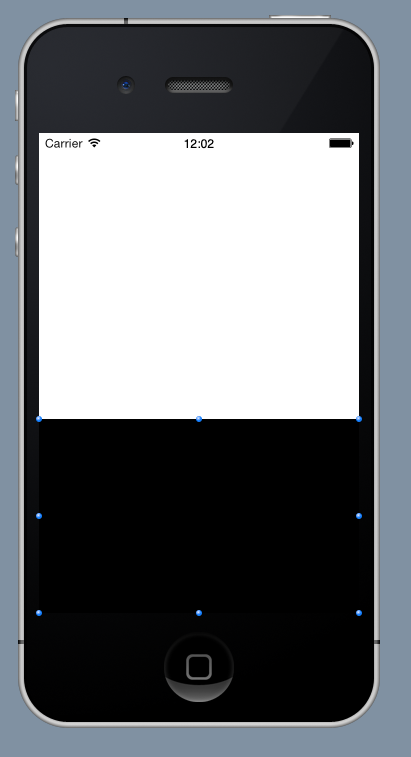
With the default Screen1 item selected in the Project Viewer, add an MobileRectangle Control from the Library into the Design Layout. This will be the one we will use as the Parent (or Super) in order to apply the Blur effect.
The added rectangle will appear in the Project Browser with the default name "RectControl". Select it and use the Inspector Panel to change its name to "BaseRectangle". Then, move it in the Layout Editor so its size and position is similar to the one displayed in the following screenshot:
Adding a middle image
Let's add now an image as the middle image, so we can see more clearly the blur effect when the app is run. For that, add a new Picture object from the Library and select it in the Project Browser. Next, change its name to "AppleImage" using the Inspector Panel.
When selected in the Project Browser, the Picture will bring the Image Editor in. Here you can see three image placeholders where you can simply drag and drop three different versions of the same image in order to be displayed at the best possible resolution in the device (1x, 2x and 3x). The image displayed will be based mostly on the ppi resolution offered by the screen on the iOS device. (Is not mandatory to fill-in all the three placeholders for the image, but in a real iOS app you'll probably want to do it).

With our image already set, let's add now the control that will be in charge of displaying it! Once again, select the Screen1 item to bring in the Layout Editor and add this time a MobileImageViewer from the Library. Drag the just added instance so it is included as a child of the "BaseRectangle" control. To make that, resize the MobileImageViewer and place it inside the limits of the "BaseRectangle". The IDE will show this being a child of the "BaseRectangle" control displaying the "BaseRectangle" outline in red color. (You also can set its Super property to "BaseRectangle" in the Inspector Panel.)
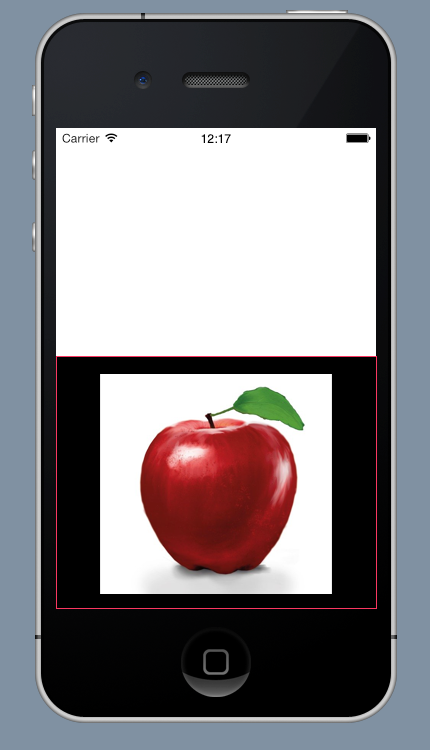
Now, with the MobileImageViewer still selected, use the Inspector Panel to change its Name property to "AppleImage", DisplayMode to the ScaleAspectToFit option, and select the AppleImage entry in the Image dropdown menu. Now, the view will display our apple image right in the Layout Editor.
Adding the rectangle in charge to apply the blur effect
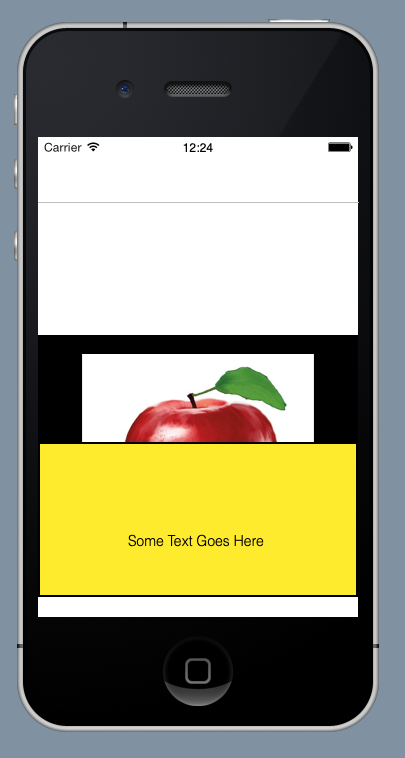
The third item we are going to add to the project is the rectangle in charge to apply the blur effect itself. Drag a new MobileRectangle from the Library and put it right over the "BaseRectangle, making sure that it becomes a child in that view. Use the Inspector Panel to change its Name to "BlurRectangle", and make sure that its Parent property is set to "BaseRectangle".
If you want, you can add a MobileLabel from the Library so it is centered inside the 'BlurRectangle' view (i.e: "BlurRectangle" is its Super class).
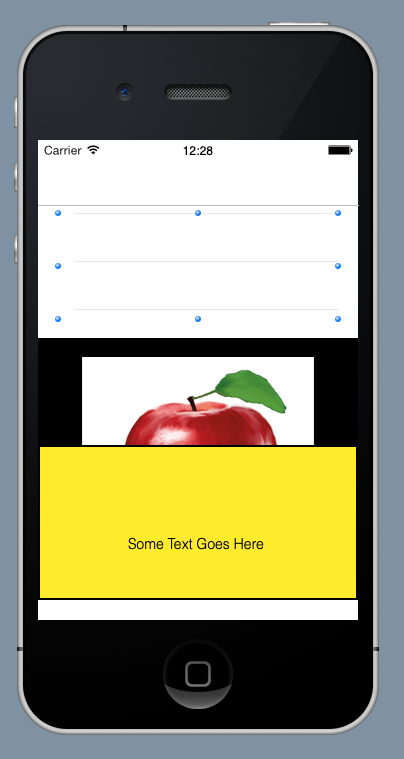
The layout at this point should be similar to the one displayed in the following screenshot:
Adding a table with blur modes to choose from
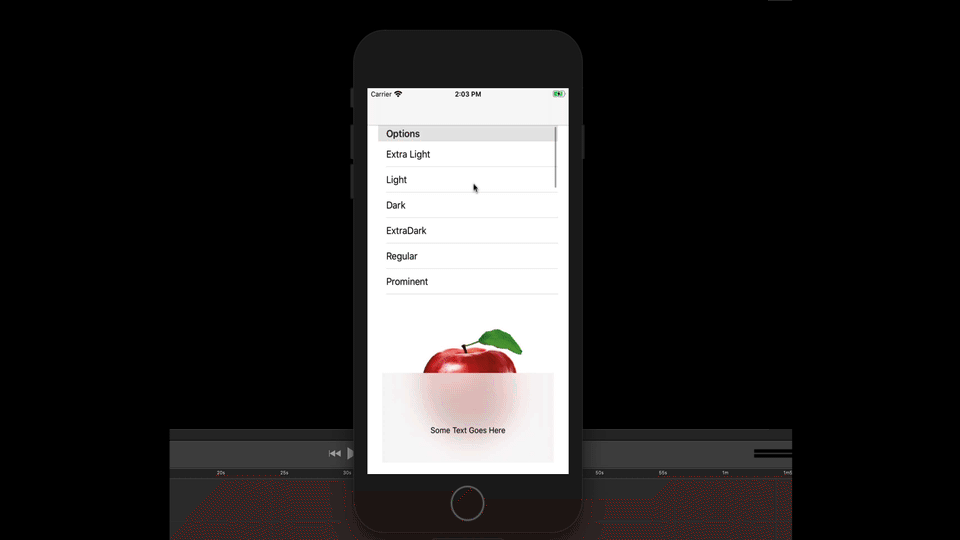
Lastly, let's add a iOSMobileTable to our user interface so it displays some of the available Blur options. Place it in the upper third of the main view and use the Inspector Panel to change its name to "OptionsTable".
With the "OptionsTable" still selected, add the Opening and RowActionSelected Event Handlers to it. Write the following fragment of code into the Open Code Editor, in order to add the Rows with the options:
me.AddSection("Options")
me.AddRow(0, "Extra Light")
me.AddRow(0, "Light")
me.AddRow(0, "Dark")
me.AddRow(0, "ExtraDark")
me.AddRow(0, "Regular")
me.AddRow(0, "Prominent")
me.AddRow(0, "UltraThinMaterial")
me.AddRow(0, "ThisMaterial")
me.AddRow(0, "Material")
me.AddRow(0, "ThickMaterial")
me.AddRow(0, "ChromeMaterial")
me.AddRow(0, "UltraThinMaterialLight")
me.AddRow(0, "ThinMaterialLight")
me.AddRow(0, "MaterialLight")
me.AddRow(0, "ThickMaterialLight")
me.AddRow(0, "ChromeMaterialLight")
me.AddRow(0, "UltraThinMaterialDark")
me.AddRow(0, "ThinMaterialDark")
me.AddRow(0, "MaterialDark")
me.AddRow(0, "ThickMaterialDark")
me.AddRow(0, "ChromeMaterialDark")
Then, write the following code in the RowActionSelected Code Editor. This is the one that will be fired every time the user taps on any of the available options, so we can use the selected row number to apply the desired blut mode to our "BlurRectangle" view:
select case row

case 0
  BlurRectangle.SetEffect(MobileRectangle.BlurStyles.ExtraLight)
case 1
  BlurRectangle.SetEffect(MobileRectangle.BlurStyles.Light)
case 2
  BlurRectangle.SetEffect(MobileRectangle.BlurStyles.Dark)
case 3
  BlurRectangle.SetEffect(MobileRectangle.BlurStyles.ExtraDark)
case 4
  BlurRectangle.SetEffect(MobileRectangle.BlurStyles.Regular)
case 5
  BlurRectangle.SetEffect(MobileRectangle.BlurStyles.Prominent)
case 6
  BlurRectangle.SetEffect(MobileRectangle.BlurStyles.UltraThinMaterial)
case 7
  BlurRectangle.SetEffect(MobileRectangle.BlurStyles.ThinMaterial)
case 8
  BlurRectangle.SetEffect(MobileRectangle.BlurStyles.Material)
case 9
  BlurRectangle.SetEffect(MobileRectangle.BlurStyles.ThickMaterial)
case 10
  BlurRectangle.SetEffect(MobileRectangle.BlurStyles.ChromeMaterial)
case 11
  BlurRectangle.SetEffect(MobileRectangle.BlurStyles.UltraThinMaterialLight)
case 12
  BlurRectangle.SetEffect(MobileRectangle.BlurStyles.ThinMaterialLight)
case 13
  BlurRectangle.SetEffect(MobileRectangle.BlurStyles.MaterialLight)
case 14
  BlurRectangle.SetEffect(MobileRectangle.BlurStyles.ThickMaterialLight)
end
The last step is making sure that the superclass in this hierarchy has its background set to fully transparent, because otherwise the blur effect wouldn't work. For this, select the 'BaseRectangle' in the Project Browser and add the Opening Event Handler to it. Then, we only need to write the following line of code in the resulting Code Editor:
me.FillColor = Color.Clear
Testing the app
That's all! We are ready to Run our example iOS app and play with some of the options listed in the table. As you tap, the "BlurRectangle" will apply the selected blur style affecting the contents of the views behing it (the "AppleImage" in this case).