Web custom controls
To best way to create custom web controls is to use the Web Control SDK. But for some some things you may find it sufficient to subclass built-in controls to modify their behavior.
Audio Player
HTML5 has a built-in tag to play audio. You can use this with a Web HTML Viewer to create a control that can play audio from a web URL.
Here are the steps: 1. Create a new class and set its Super to WebHTMLViewer and change its name to WebAudioPlayer.
Add a String Constant to WebAudioPlayer, call it kAudioTag. It contains this HTML code to play audio:
<audio controls="controls">
  <source src="%MP3URL%" type="audio/mp3" />
  Your browser does not support the audio tag.
</audio>
The rest of the code will be to substitute the URLs in this HTML.
Add a private property, mMP3URL As String.
Add a computed property, MP3URL As String. In the Set block for this property, add this code to substitute the provided URL into the HTML:
mMP3URL = value

Var tag As String = kAudioTag
tag = tag.Replace("%MP3URL%", value)
Self.LoadPage(tag)
Add the Opening event handler with this code to initialize things:
Self.URL = ""
Me.Width = 300
Me.Height = 60
That's it for the WebAudioPlayer control. Now you are ready to use it on a page.
Drag this control from the Navigator onto WebPage1. Add the Shown event and put this code to assign a URL of an audio file:
Me.MP3URL = "http://www.archive.org/download//Stockfinster.-DeadLinesutemos025/01_Push_Push.mp3"
Run the project. You'll see the audio player appear where the WebAudioPlayer control is. Click the play button to play the song.
Combo Box
This shows you how you can combine two separate controls to create a new control. A Combo Box is a control that consists of a Text Field to type a value and a Popup Menu to choose from existing values.
To implement this, you can use a Web Container. Here are the steps:
Add a Web Container to the project.
Add a Web Popup Menu to the container. Set its width to 120 and its name to ComboPopup.
Add a Web Text Field and place it directly on top of the Web Popup Menu. Align it on the left and set its width to 100. This allows the Popup Menu arrow to still appear. Set its name to ComboField.
Add the SelectionChanged event to ComboPopup and use this code to make sure it gets focus and to set the selected value to be the text of ComboField:
ComboField.SetFocus
ComboField.Text = Me.Text
Now we want to add methods to the container to make it easy to add and remove values from the Popup Menu.
Add a AddRow method and have it call ComboPopup.AddRow:
Public Sub AddRow(value As String)
  ComboPopup.AddRow(value)
End Sub
Add a DeleteAllRows method and have it call ComboPopup.DeleteAllRows:
Public Sub DeleteAllRows()
  ComboPopup.DeleteAllRows
End Sub
Now you are ready to use the control on a web page. Drag WebComboBox from the Navigator onto WebPage1 and add its Opening event with this code to add some rows:
Me.AddRow("Maine")
Me.AddRow("New Hampshire")
Me.AddRow("Vermont")
Run the project and you'll be able to type in the field or select something from the menu and have it fill in the field.
For a complete implementation of this control which adds autocomplete capability, refer to the example project here:
Examples/Web/Controls/WebComboBox
Inspector Behavior dialog
When creating custom controls, you may want to make some of its properties changeable at design time in the Inspector. Using the AudioPlayer example above, it would be better if you could set the MP3URL property in the Inspector for the control on the layout rather than having to put code in the Opening event.
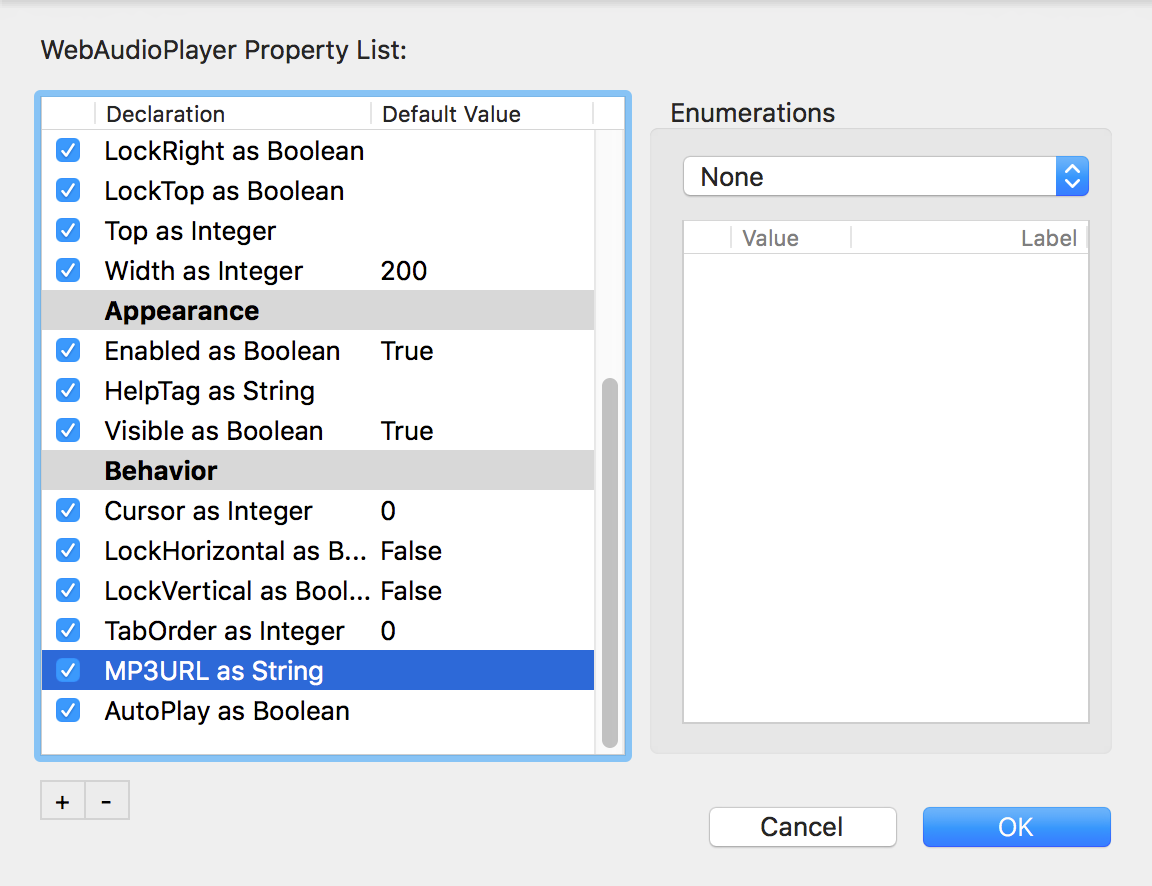
You use the Changing Properties With the Inspector feature to change what is displayed in the Inspector. To use it, open the contextual menu for AudioPlayer in the Navigator and select Inspector Behavior. This opens the Inspector Behavior dialog. In this dialog, you can control all the properties that appear in the Inspector, including any new ones that you add. If you scroll down, you will see the MP3URL parameter. Check the box next to its name and click OK to have the property displayed in the Inspector for the control when it is on a layout. Now you can specify the MP3URL in the Inspector and remove code that manually sets it.
Here are the steps in general: 1. Create your custom control.
Select the proper Inspector Behavior entries to expose in the IDE.
Drag and drop the custom control onto your layout.
Scroll the inspector to the appropriate section (usually Behaviors) to see your exposed properties.
Other features of the Inspector Behavior dialog
The Inspector Behavior dialog allows you to control all aspects of what appears in the Inspector. You can:
Add or remove group headings: Use the “+” or “-” buttons below the list or use the contextual menu.
Change the order of the properties, including moving them to different groups: Drag properties around as needed.
Set or modify default values: Double-click in the Default Value column for the property to set or modify the default value.
Change whether a property is shown or hidden: Check the property to display it; uncheck it to hide it.
Add enumerations: Use the Enumerations control on the right to add values that the user can select from a list.
See also
Web Control SDK, Changing Properties With the Inspector topics