Using source control with Xojo projects
A good developer always has backups of their source code. But backups are not enough. You also want to use a Source Control System. This is also sometimes called a Version Control System. A source control system is able to track changes to individual files, keeping a history of the changes and allowing you to go back and look at prior versions of the file.
In order to use a source control system with your projects, you first want to make sure you are using the Text Project (Xojo Project) format. The Text project format saves each project item as a separate text file on disk. Having separate files allows the source control system to track changes to individual project items. Text files allows you to use “difference” tools (aka diff tools) to compare differences between versions of a file. By having the changes tracked for each file, you can "commit" groups of changes to the source control system to easily tracked what was changed, by whom and when.
The Xojo text file project format works with any source control system, including Subversion, Git (including GitHub), Mercurial, CVS, Vault, Team Foundation Server or anything else.
Git
Git is currently the most popular source control system. Git is a distributed source control system which does not rely as heavily on a central repository for your source code, although you can certainly use it that way.
You can control Git using the command-line tool. But there are plenty of easy-to-use graphical tools that work with Subversion, such as SourceTree and Tower.
Git hosting
You can use Git completely on your local workstation, but there are also hosting companies that offer centralized Git services such as GitHub, BitBucket, GitLab, Beanstalk and Assembla.
Start an open-source project on GitHub
There are many Xojo-related open-source projects available on GitHub. Here is how you can make your own libraries and projects available on GitHub.
Create a GitHub account
If you don 't already have a GitHub account, you 'll need to create one. GitHub is the most popular place for hosting open-source projects and it is entirely free. As its name suggests, GitHub uses the Git source control system for storing the project source and managing updates. It also has a built-in wiki for documentation and an issue tracker.
The way GitHub works is that you 'll add your project, which is then available for anyone to download and use. In addition, others can submit changes to your project in the form of “pull requests”. These are perhaps enhancements or bug fixes that you can review and choose to merge into the project if you want.
Create repository
Now that you have a GitHub account, you 'll want to go to your GitHub home page and click the “New Repository” button. A repository is essentially where your project is stored. You 'll want a separate repository for each project.
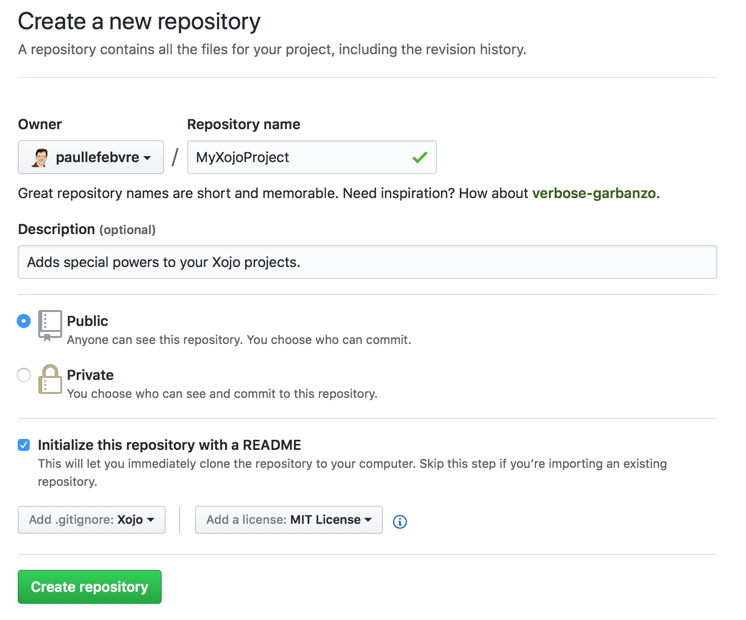
Be sure to come up with a catchy “repository name” and always include a description. You 'll want to leave “Public” selected as it's not really open-source if it's not public – and you actually have to pay to host private repositories on GitHub.
It is always good to check “Initialize this repository with a README”, which adds an empty README file. This is where you 'll briefly describe the project and how to use it (using Markdown).
You should also select “Xojo” for the gitignore setting. This identifies the project as using the Xojo programming language, which helps with searches and also marks the “uistate” file (which just has general information about the Xojo IDE window locations and sizes) so that it is not included in the repository.
Lastly, you 'll need to choose a license. For most projects, the MIT License is a good choice. It essentially allows anyone to use your code however they want.
Click the Create Repository button to create the repository.
Clone the repository to your computer
Now that the repository is created on GitHub, you 'll want to “clone” it to your computer. This copies the repository files to a folder on your computer so you can modify its files. At this point, the only files in the repository will be LICENSE and the empty README.md, but it is still necessary to do the clone so that you can create the folder where you will then add your Xojo code.
In order to clone, you 'll want to use a Git client application. There are many to choose from, but two free ones are the official GitHub Desktop and Atlassian SourceTree. GitHub Desktop simpler and SourceTree is more advanced.
Download GitHub Desktop: https://desktop.github.com
Start GitHub Desktop and click “Sign into GitHub.com”.
On the Configure Git page, enter the name and email you want to use to identify your commits.
Click Finish on the next page to show the main screen:
On this screen you have the option of creating new repositories or cloning a repository. Since we already created a repository online in the previous section, you want to select “Clone a Repository”. In the list, choose the repository you created above, choose your local folder location (Choose…) and click Clone.
You now have a folder on your disk where you can add your Xojo project.
Note: If you are using another client, you will choose its “clone a repository from URL” feature and then provide the URL shown in the “Clone or Download” button on the repository page.
Add your Xojo project code
Start Xojo and open the project you want for the repository you cloned. Click “Save As”, make sure the Format is “Xojo Project” and choose the folder you created when you did the checkout. You 'll want to use the “Text Project” format as that is what works best with Git because it allows people to view source online and makes it possible to precisely track changes.
Note: Although the Xojo Project format is not available with the free edition or Xojo Lite edition, any Xojo edition (even the free and Xojo Lite editions) can open the Xojo Project format.
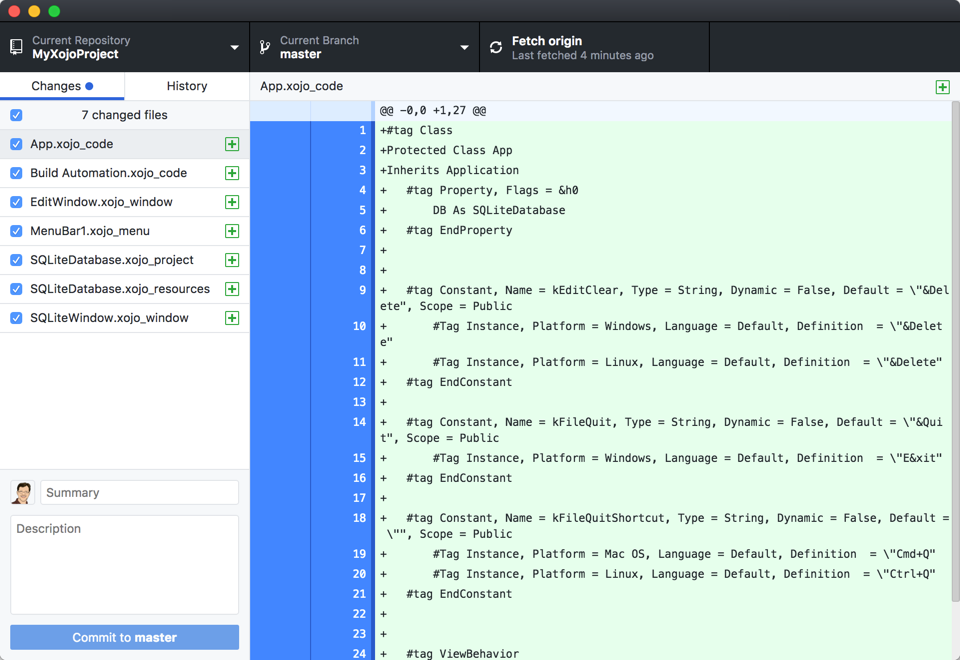
Go back to GitHub Desktop and you 'll now see all the Xojo files appearing in the list as “changed files”. (For a quick test try: Example Projects/Database/SQLite/SQLiteExample.)
You now need to “Commit” these changes. By default they are all checked so you can enter a brief summary (for the first commit, often “Initial Commit.” is used) and then click the “Commit to master” button.
This marked the files as committed in your local repository, which is needed before you can push the changes up to the online repository. Generally speaking you want to commit things after you have made changes that you want to track. You don 't need to immediately push the changes up to the server (online repository) each time, however.
But for this initial commit you do want to push it out to the server, so click the button in the toolbar that says “Push origin”.
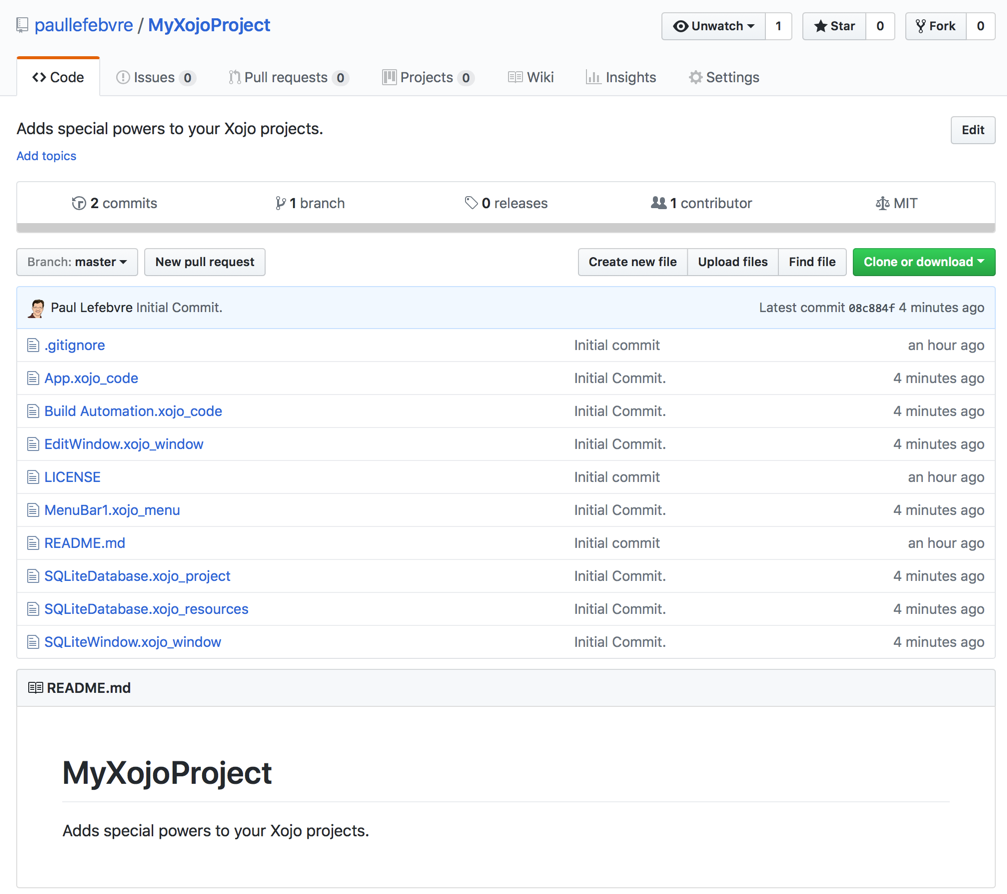
If you go back to the GitHub repository online and refresh the page you 'll now see the files have been committed.
Sharing your project
Your project is now publicly available on GitHub for you to share with the world. All you need to do now is give people the URL! Definitely at least share the URL with Xojo so we can add it to the Open Source Projects page in the Xojo Dev Center.
However, one other thing you should do on the project is click the “Add topics” link under the project description near the top of the page and add some tags. At the very least, add a tag for “Xojo”, but also add tags for whatever other technologies are relevant to your project. This will make it much easier for people to find your project when they search.
Changing and updating your project
You 'll likely be continuing to change your project to fix bugs and add features. Each change you make shows up in GitHub Desktop where you can commit it and then push it to the server.
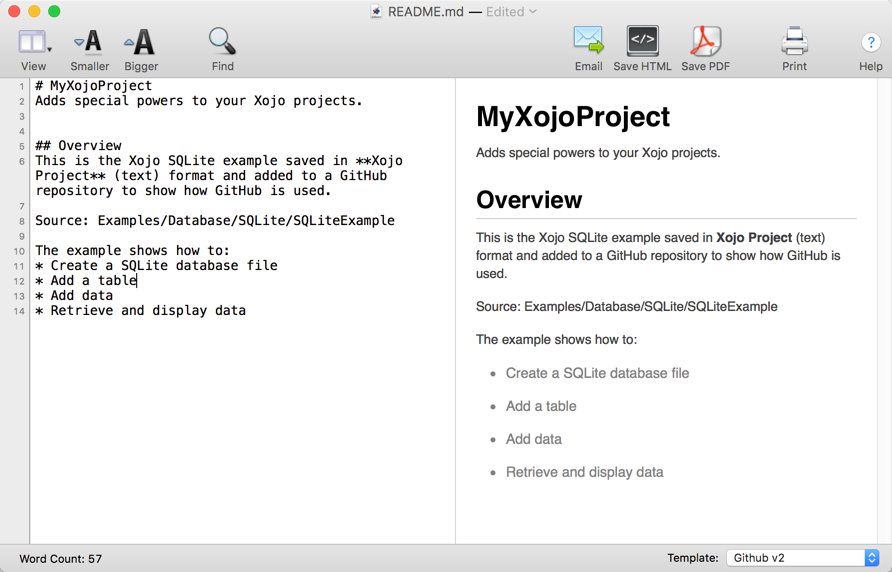
As an example, you should also make sure you update the README.md file to actually have a bit more description of your project and how people can use it. On your computer, open README.md in a text editor (or even better, a Markdown editor if you have one, such as Markdown Pro). You can learn more about Markdown here: GitHub Markdown Guide
Save the file and the go to GitHub Desktop to see that it shows as changed. With the file selected in GitHub desktop you can see that it shows you what has changed with the new content identified. This also works with source code and is why you want to use the Xojo Project text file format — you 'll be able to see exactly what code you 've changed.
You can now Commit this change (always add Summary text so you know the reason for the change!) and then Push it to the server (Push origin).
Using or cloning other repositories
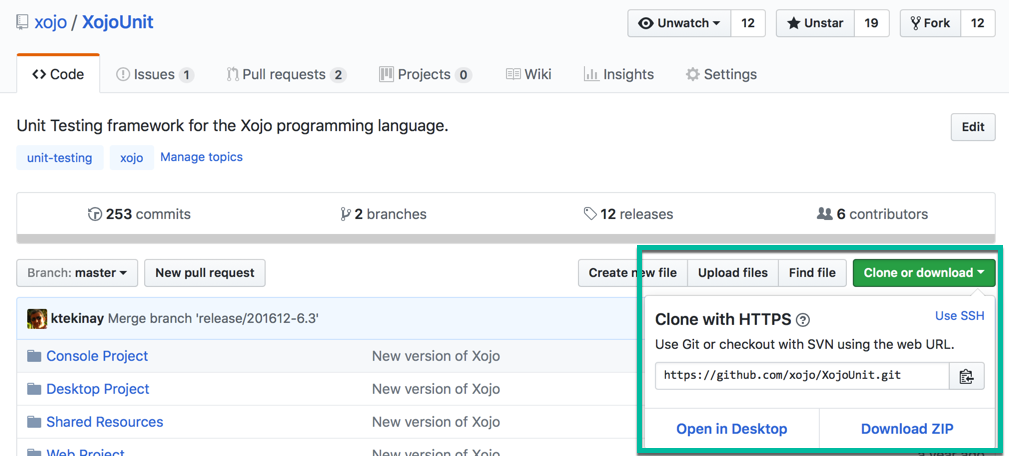
Now that you 've published your project, anyone can use it. And don 't forget that you can also use other people's repositories. In both cases you 'll want to click the “Clone or Download” button on the repository page.
For simple usage where you just want to grab the current version of the repository you can then click the Download ZIP button. Once downloaded, unzip the file and then open the project in Xojo where you can use it or copy/paste it into your own projects (review the license agreement before you use projects, of course).
You 'll want to clone a project when you want to manage it using GitHub Desktop (or your GitHub client of choice). This allows you to fetch and pull updates from the online repository and also allows you to make your own changes and push them up to the server where the repository owner will get them as pull requests. The owner can then review your changes and decided whether they want to incorporate (pull) them into the project.
Learn more
This section just scratches the surface of what GitHub does and also only touches lightly on the concept of source control in general. If you 'd like to use Git for source control, but don 't want to make your projects public you might also want to check out Atlassian BitBucket or GitLab, both of which offer free Git hosting for both private and public repositories.
Git videos
There are several videos on how to use Git with Xojo:
Subversion
Subversion (SVN) is another commonly used version control system that predates Git. SVN uses a central “repository” or database that contains your source code and all its versions. The process for working with Subversion is as follows:
Create a repository on the Subversion server
Check Out the repository to a local computer. This is where you edit your files.
When you want to make your changes permanent, you Commit them to the Subversion server. This also allows others on your team to see the changes.
If you have multiple developers working on a team, you use the Update command to get changes added to the server by others on your team.
You can control Subversion using the command-line tool, called svn. But there are plenty of easy-to-use graphical tools that work with Subversion, such as SmartSVN, RapidSVN, Versions and Cornerstone.
Subversion hosting
You can run a Subversion server on your development machine, but having Subversion on an external server is a great way to have an easy off-site backup of your source code.
You can choose to install Subversion on your own servers and some web hosting companies provide Subversion hosting as an optional feature. There are also companies that offer Subversion hosting, such as Cloudforge, Beanstalk and Assembla.
Additional information
Here are some terms that are commonly used with Subversion:
Checkout: Download files from the Subversion repository to a local working copy.
Commit: Sends a set of changes in the local working copy over to the Subversion repository.
Ignore: For excluding files in your Subversion folder from being managed by Subversion.
Revert: For retrieving older versions of a file from the repository, discarding any local changes.
Merge: Used to combine files that have been separately modified by two or more people.
To learn everything there is to know about Subversion, read the free, official Subversion book: Version Control with Subversion.
Subversion videos
Online and network file systems
Do not edit your Xojo project files directly from networked file systems (SMB, etc.) or online file systems (DropBox, Google Files, Box, etc.). The multi-user access and automated syncing can cause project corruption if things happen at inappropriate times.
For sharing projects between computers, Xojo recommends using a Using Source Control with Xojo Projects as described above.
See also
Project Types topic